About This Tooth Fairy Amigurumi Pattern
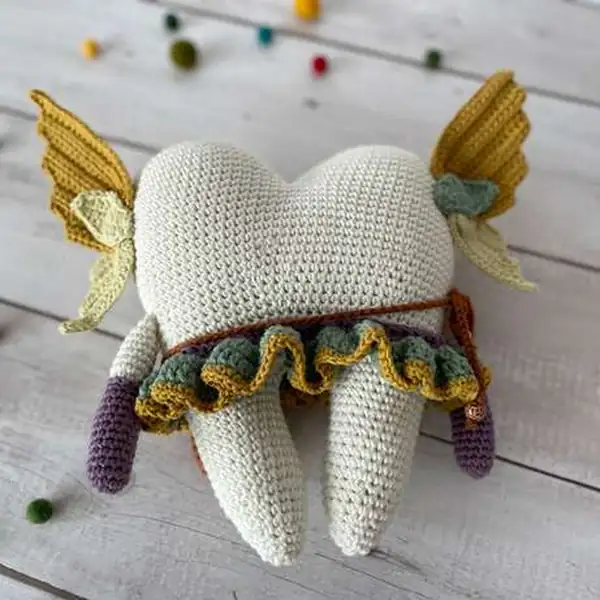
This is a hand-crocheted dream you can tuck into a nursery shelf and watch come to life as a friendly Tooth Fairy Amigurumi. Designed for the dedicated crafter, this pattern blends Aran weight white cotton for the tooth body with complementary DK accents to yield a doll that stands about 10 inches tall when stuffed and posed. Every detail—from the round tooth-shaped torso and puffed cheeks to the delicate wings, crossbody pouch, and tiny leaves—reads playful yet refined, so it looks equally at home on a bedside table or in a photo keepsake.
You’ll work with a magic ring to form a secure core, master invisible decreases for clean seams, and use just enough stuffing to keep its shape without becoming overfilled. With a thoughtful color plan (white tooth, nougat pouch, lilac gloves and waistband, mustard wings and skirt hem, plus tiny red or artichoke leaves) and precise colorwork, this project rewards patience and careful finishing. The finished piece is sturdy for little hands to cuddle, can be dressed with optional shoes or lashes, and becomes a heartfelt gift that can be treasured for years.
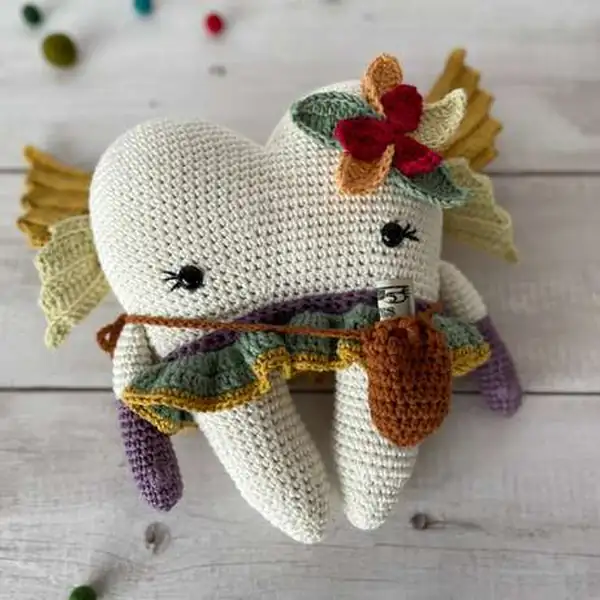
From the moment you prepare your yarns and hook, this Tooth Fairy project invites you into a world where textures tell a story. The tooth body is worked in Aran weight white cotton to keep the shape sturdy and smooth, while the crossbody bag, wings, and skirt are built with a palette of DK cotton in Nougat, Lilac, Mustard, and Artichoke for depth and movement. You’ll encounter a typical amigurumi construction flow: single crochet rounds around a fixed core, careful increases and decreases, and the secret magic of layering color to create contrast without breaking the silhouette. The pattern uses a mix of stitches—MR to start, BLO for seamless torsos, and subtle surface embroidery for the nose and eyelashes—so the final figure holds its pose without looking stiff. Safety eyes finish the face at 12 mm, giving a friendly, awake expression that children respond to.
Construction-wise, the Tooth Fairy is shaped in sections that stitch together neatly: head and torso as a soft core, arms and legs sculpted with careful color transitions, and a separate crossbody pouch that attaches with a small ring or tie. The wings are worked in DK weight and stitched to the back with a sparse seam to keep flexibility. The skirt and leaves are stitched with Artichoke and Mustard, then finished with a tiny hem and optional 4-DCBo bobbles for whimsy. I include inner details for the nose using a touch of black embroidery thread, plus lashes in black DK or thread to add character. The result is a durable, portable companion that stands or sits with ease.
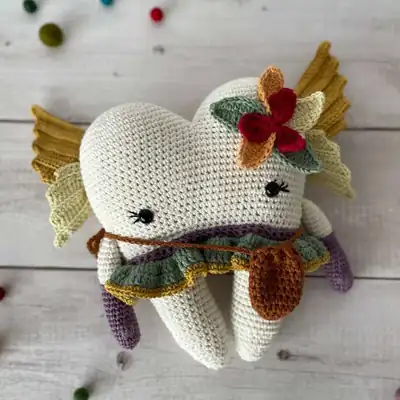
Because this is an advanced pattern, the finishing steps reward meticulous yarn management—carry colors neatly, tuck ends as you go, and switch to a smaller hook for crisp colorwork where the eye lands. Once complete, give the piece a gentle blocking if needed and store with a small sachet to keep the cotton soft. The Tooth Fairy looks delightful perched on a shelf, tucked into a child’s bedtime routine, or used as a gift to celebrate a lost tooth with a tiny smile that says you care.

The Tooth Fairy Amigurumi pattern is designed for advanced crocheters who love precision and texture, offering a balanced challenge that yields a polished, toy-grade result. The tooth body relies on a sturdy MR start and tight single crochet rounds, while the limbs use color blocks to keep the arms and legs airy yet defined. You’ll alternate DK weights—Nougat for the crossbody pouch, Lilac for gloves, and Mustard for wings—along with the white Aran for the core, so you develop an eye for how light and shade travel across a three-dimensional piece. The wings incorporate a lightweight stitch rhythm that keeps them buoyant, and the skirt absorbs color with a gentle hem that avoids stiffness. Expect to pause for color changes and finishes, but enjoy the sense of accomplishment as you stitch the tiny leaves and applique accents that bring the character to life.
Careful assembly is part of the artistry—sewing or crocheting the limbs to mirror-image sides, attaching the crossbody bag securely with a small strap or ring, and applying facial features with embroidery for longevity. The design includes few, well-placed color breaks so the toy reads crisp even after hours of handling, and the optional wooden buttons provide a tactile, gift-ready touch for the bag tie. I also remind you to test your gauge before you begin and to check the final height against the target of roughly 10 inches tall. With patience and a few careful finishes, your Tooth Fairy becomes a dependable keepsake that keeps its charm after countless bedtime stories.