About This Forest Friends Amigurumi Pattern
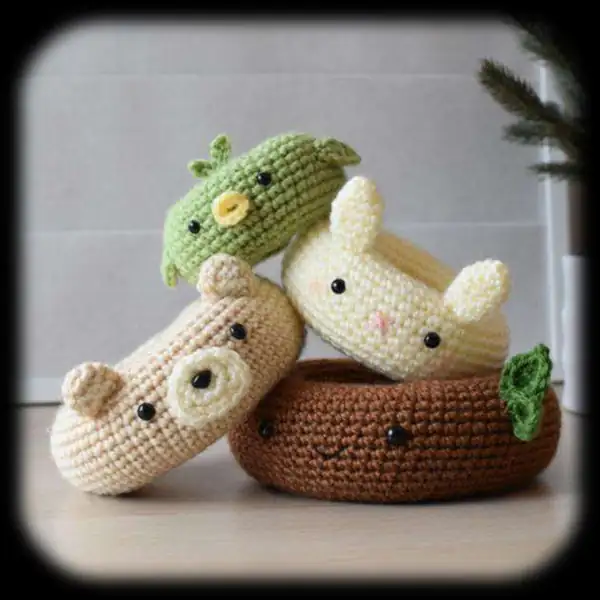
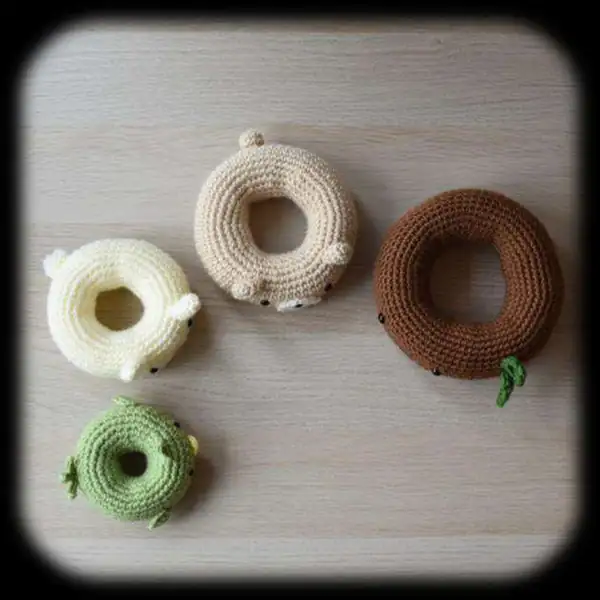
Forest Friends Amigurumi Pattern is a complete little forest troupe designed for crocheters who love character, texture, and a tidy finish. Working with worsted weight yarn (#4) and a 4.25 mm (G) hook yields plush stitches that hold their shape, while remaining soft to the touch. Across Birdie, Bunny, Bear, and Tree, the finished sizes vary—from Birdie at about 10 cm (4 in) tall to Tree at roughly 18 cm (7 in) high—so the collection presents a pleasing range of scales for display or play. The construction relies on classic amigurumi techniques like MR, SC, INC, DEC, BLO, and FLO, with careful color changes that keep the characters cohesive yet distinct. The pattern calls for a careful balance of stuffing and shaping so limbs retain pose and heads stay perched without tipping.
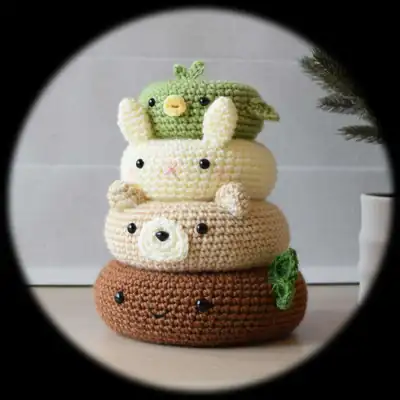
You’ll see precise material guidelines: Color A beige for the main fur, Color B brown for accents, Color C green for leaves, Color D white for highlights, and Color E pink for tiny cheeks. A total of approximately 350–500 g of main colors covers all pieces, making it easy to raid a yarn stash or to shop one coordinated set of skeins. Safety eyes sized to fit each piece (typically 7.5–10.5 mm) bring a spark of personality, while polyester stuffing creates a plush, ready-to-hug finish. The finished trio and tree form a friendly woodland tableau that’s stable enough for little hands yet charming for grown-up shelves. Every seam is designed to disappear from the front, so the characters read as soft, friendly silhouettes rather than flat toys—perfect for gifting, display, or a bedtime storytelling crew.
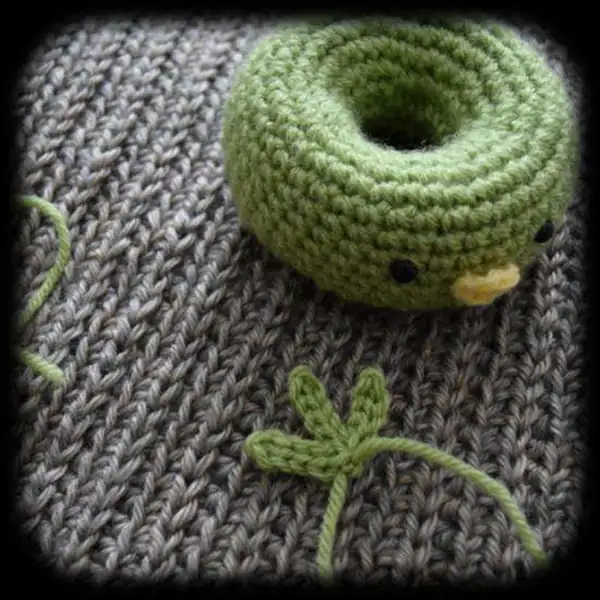
Step into a woodsy mood with a pattern that balances charm and technique, letting you build a forest family piece by piece. The Forest Friends are four separate parts that weave together into a cohesive scene, yet each stands confidently on its own when you want to mix and match. I designed the sequence to flow from the magic ring into a series of rounds that shape heads, bodies, and leafy accents with gentle curvature. The color plan—Beige, Brown, Green, White, and Pink—creates a harmonious woodland look while allowing room for personal touches. You’ll notice how the pink cheeks soften each character’s expression, while the white highlights make the eyes twinkle with life.
Construction emphasizes a soft but sturdy silhouette: tight stuffing, invisible joins, and careful color transitions so the finish reads as a single, cohesive family. The pieces are crocheted in the round, then joined with a nearly invisible seam so Birdie’s wings and Tree’s canopy don’t disrupt the smooth surface. I include guidance on when to switch from BLO to FLO for texture balance, how to place safety eyes, and how to anchor ends securely to prevent shifting with play. The result is a set that’s resilient, cuddly, and ready for countless stories by the fireside or on a nursery shelf.
Finally, the finishing touches make the forest feel alive: tiny embroidery for smiles, subtle shading to define beaks and paws, and a light touch of stuffing to keep every contour soft. Display them together for a forest tableau, or gift individual pieces to celebrate a new arrival, a birthday, or a milestone. The pattern’s clarity and repeatable shapes make it a joy from start to finish, so you can enjoy the process as much as the finished forest family. When you’re done, you’ll understand why these amigurumi feel like old friends who invite you back to their woodland home again and again.
For crocheters who love a practical path, this guide offers pacing and scaling tips that help you tailor the Forest Friends to your own style. I discuss gauge considerations, how to maintain consistent tension, and the impact of a slightly looser or tighter stitch on each piece’s final size. If you’re aiming for a different overall look, you can experiment with minor tweaks in color proportion or strand thickness, while keeping the proportions close to the original so the characters remain recognizable. The pattern also provides clear guidance on color changes and end-to-end finishing, ensuring your transitions look clean and professional.
Assembly order matters for a tidy result. Finish Birdie’s tiny features first, then attach ears on Bunny, paws on Bear, and finally the leafy canopy on Tree. By adhering to the recommended stuffing levels for each piece, you’ll preserve their individual shapes—Birdie’s perched posture, Bunny’s upright stance, Bear’s sturdy torso, and Tree’s branchy crown—without sacrificing softness. The finishing sequence is designed to minimize bulk at the joints while maximizing the overall compact feel that makes amigurumi so delightful to hold. With these tips, you’ll replicate the same cohesive forest look in your own home, whether you start fresh or adapt colors to your stash.