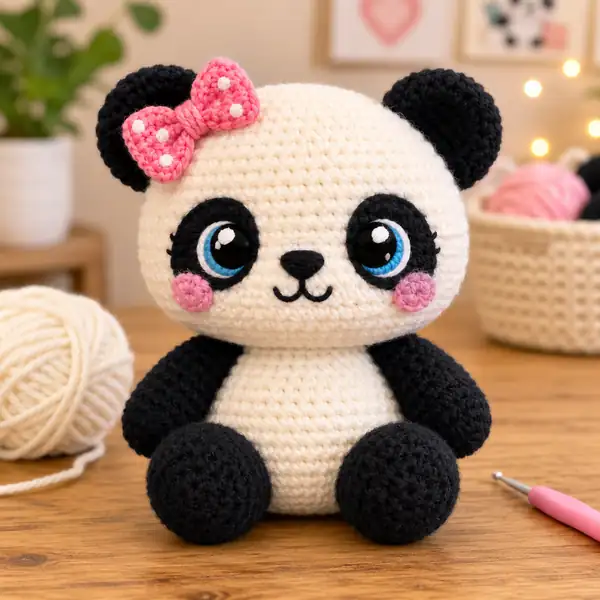
Panda Amigurumi
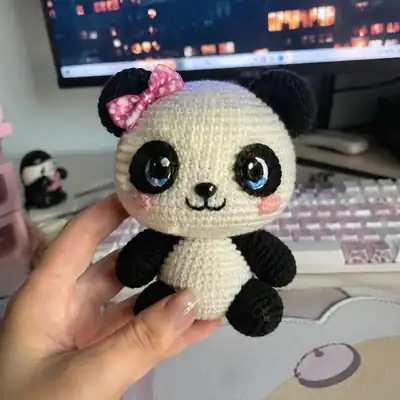
What makes it special
Made with Love
Pattern to crochet a panda amigurumi toy with detailed head/body, paws, ears, tail, facial features, and decorative bow.
Time to crochet
Total time depends on experience, yarn thickness, hook size, and whether you choose to embroider facial details after assembly.
Advanced Level
Intermediate to advanced amigurumi technique requiring color changes, shaping, and careful seam assembly. Knowledge of working in rounds, increasing/decreasing, and color changes is assumed.
About This Panda Amigurumi
A crocheted panda plush toy created in classic amigurumi style with a white head and body, black limbs and eye patches, pink cheeks, a bow, and a detailed underside/belly with color changes. Includes assembly steps for paws, ears, tail, eyes, nose, blush, bow, and final stitching.
Step-by-step amigurumi pattern for a panda. It provides material lists, abbreviations, and detailed round-by-round instructions for the head, body, limbs, facial features, and final assembly.
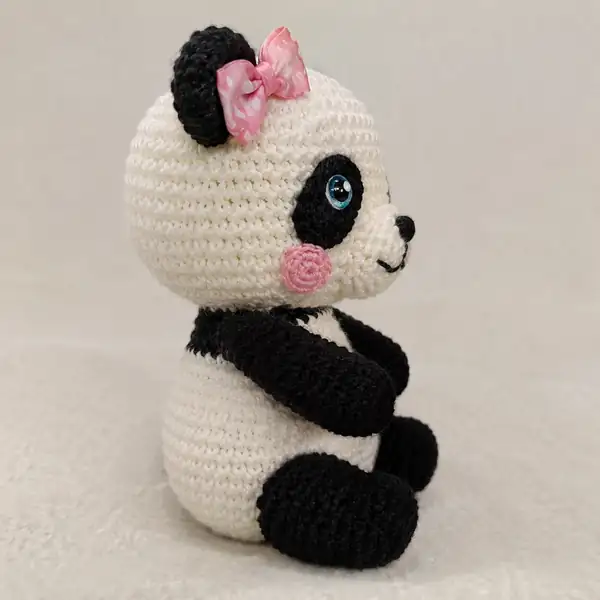
Includes color-change guidance, stuffed parts, and attachment points to create a cohesive plush panda.
Why You'll Love This Panda Amigurumi
If you enjoy cute, expressive amigurumi with distinct facial features and careful finishing (embroidery, eyes, blush), this panda pattern offers clear round-by-round instructions and visual cues for assembly.
Switch Things Up
You can switch colors between rounds as indicated (white/ivory, black, pink, blue/green), and substitute similar yarns as needed to achieve the same effect.
Common Mistakes & How to Fix Them
Abbreviations
-
01MR – magic ring:
-
02CH – chain:
-
03SS – slip stitch:
-
04St – stitch:
-
05SC – single crochet:
-
06HDC – half double crochet:
-
07INC – increase (2 stitches in same St):
-
08INC HDC – increase of half double crochet (2 HDC in same St):
-
09DEC – decrease (2 SC together through the front loops):
-
10(SC, INC)*6 – repeat the sequence in brackets six times, total stitches shown in brackets:
Panda Amigurumi
pattern: amigurumi panda; skill level: advanced; technique: crochet in rounds, color changes, shaping, and embroidery.
- Skill level
- Advanced
- Time to make
- Varies by crafter; typically 8–20+ hours depending on speed and density
Materials Needed
Tap an item to tick it off your stash — the list resets when you leave the page.
-
01plush yarn (white/ivory, black, pink for blush)
-
02cotton/semi-cotton yarn for eyes, smile, eyebrows, bow
-
01crochet hooks 3.5–4 mm for body
-
022–2.5 mm hook for eyes/bow
-
03tapestry needle
-
04stitch markers
-
05scissors
-
06fiber filling
-
07pins
-
08safety eyes optional
The Pattern, Round by Round
Tap a row when you finish its round — the red thread keeps your place.
Chain 9; - work in spiral (without a turning CH and SS) as in all amigurumi toys (oval-shape detail);
(start in the 2nd chain from the hook) 7 SC, 3 SC into the last chain from the hook, on the other side: 6 SC, INC (18);
INC, 6 SC, 3 INC, 6 SC, 2 INC (24);
(SC, INC)*? 3, 6 SC, (SC, INC)*2 (30);
2 SC, INC, 6 SC, (2 SC, INC)*3, 6 SC, (2 SC, INC)*2 (36);
3 SC, INC, 6 SC, (3 SC, INC)*3, 6 SC, (3 SC, INC)*2 (42);
4 SC, INC, 6 SC, (4 SC, INC)*3, 6 SC, (4 SC, INC)*2 (48);
2 rounds 48 SC;
2 rounds 48 SC;
5 SC, INC, 6 SC, (5 SC, INC)*3, 6 SC, (5 SC, INC)*2 (54);
2 rounds 54 SC;
2 rounds 54 SC;
11 SC, 6 INC, 37 SC (60);
3 rounds 60 SC;
3 rounds 60 SC;
3 rounds 60 SC;
11 SC, 6 DEC, 37 SC (54);
5 SC, DEC, 6 SC, (5 SC, DEC)*3, 6 SC, (5 SC, DEC)*2 (48);
4 SC, DEC, 6 SC, (4 SC, DEC)*3, 6 SC, (4 SC, DEC)*2 (42);
3 SC, DEC, 6 SC, (3 SC, DEC)*3, 6 SC, (3 SC, DEC)*2 (36);
2 SC, DEC, 6 SC, (2 SC, DEC)*3, 6 SC, (2 SC, DEC)*2 (30);
SC, DEC, 6 SC, (SC, DEC)*3, 6 SC, (SC, DEC)*2 (24);
6 SC with the paw, 6 SC, 6 SC with the paw, 6 SC (24);
(7 SC, INC)*3 (27);
27 SC;
(8 SC, INC)*3 (30);
30 SC;
(9 SC, INC)*3 (33);
33 SC;
(10 SC, INC)*3 (36);
8 SC, (SC, INC)*6, 16 SC (42);
2 rounds 42 SC;
2 rounds 42 SC;
2 SC, 7 SC with the paw, 14 SC, 7 SC with the paw, 12 SC (42);
(5 SC, DEC)*6 (36);
(4 SC, DEC)*6 (30);
(3 SC, DEC)*6 (24);
(2 SC, DEC)*6 (18);
(SC, DEC)*6 (12);
6 DEC;
6 SC in MR;
6 INC (12);
12 SC;
- work a CH, fold in half and crochet the sides together with 6 SC;
- fix the thread and leave a long ending for sewing.
Tail: 1. 6 SC in MR;
2. 6 INC (12);
3. 12 SC;
4. 6 DEC (6);
- fix the thread and leave a long ending for sewing.
Nose: 0. Chain 6;
- work in spiral (without a turning CH and SS);
1. (start in the 2nd chain from the hook) INC, SC, 3 SC in one St, SC, 4 SC into the last chain from the hook, on the other side: 3 SC, INC (14);
- fix the thread and leave a long ending for sewing.
Blushes 1: 6 SC in MR;
- fix the thread and leave a long ending for sewing.
Eye patches 0: 0. Chain 6;
1. (start in the 2nd chain from the hook) 3 SC, HDC, 5 HDC into the last chain from the hook, on the other side: HDC, 2 SC, INC (14);
2. INC, 2 SC, HDC, 5 INC HDC, HDC, 2 SC, 2 INC (22);
- fix the thread; - it is better to cut the thread, and then sew the detail with a black thin cotton thread.
Eyes 1: 1. 6 SC in MR;
2. 6 INC (12);
3. (SC, INC)*4, change color to white, back loops only: SC, 3 INC (20);
4. back loops only: INC, SC, SS (4);
Bow 0: Chain 28+2 turning CH (30);
1. - 4. 4 rows 28 HDC;
- sew it on the head.
Assembly Instructions
- 1) Crochet all body parts separately (head, body, upper paws, bottom paws, ears, tail, nose, blushes, eye patches, eyes, and bow).
- 2) Stuff as indicated; do not overstuff paws until final assembly.
- 3) Attach paws to head and body at designated rounds, ensuring symmetry (mark placement with stitch markers).
- 4) Attach ears between rounds 5 and 10 on head; embroider the glare after attaching and shaping the head.
- 5) Attach eye patches to head, sew in facial features (eyes, eyebrows, and nose) with thread changes for color accuracy.
- 6) Attach tail along the back near the belt line (as shown in photos), ensuring it curves outward for balance.
- 7) Finish by embroidering smile and blush with appropriate colors; tighten and weave in ends securely.
Important Notes
- A toy height around 25–28 cm is achievable with recommended yarns and density.
- Yarn thickness ratio to use: body yarn should be about twice as thick as yarn for eyes; use eye hook sizes 1.5 mm smaller than body hook.
- Density and tension will affect finished size; tension may vary per crafter.
- All color changes should be done cleanly to avoid gaps.
Pattern includes a full set of rounds for the panda, including head, body, limbs, facial features, and final assembly; ensure all color changes and embroidery are completed after assembling components.
Frequently Asked Questions
Any plush yarn for the body paired with a fine semi-cotton yarn for eyes and facial features can work, keeping the suggested thickness ratio roughly 2:1.
Sew parts with a whip stitch, reinforce with a few extra stitches where needed, then weave in ends carefully to prevent fluff from loosening.