About This Oceana Bikini Top Pattern
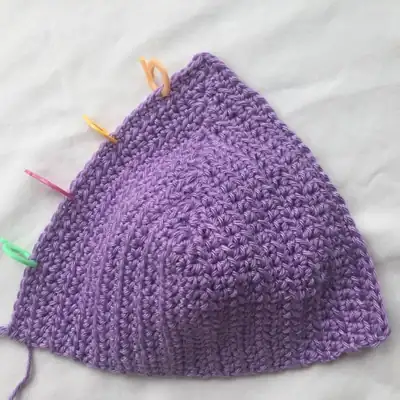
From the first chain to the final weave, Oceana is designed to celebrate the texture and drape of cotton DK. This wearable triangle inspired top uses a compact, sturdy stitch rhythm that yields a smooth cup and a crisp edge, while keeping the piece light enough for all day wear at the beach or poolside. The plan calls for Wendy Supreme Cotton DK or a substitute cotton yarn, about one skein for the main color used in each cup and in the edging, with optional accent colors to tailor to your personal palette.
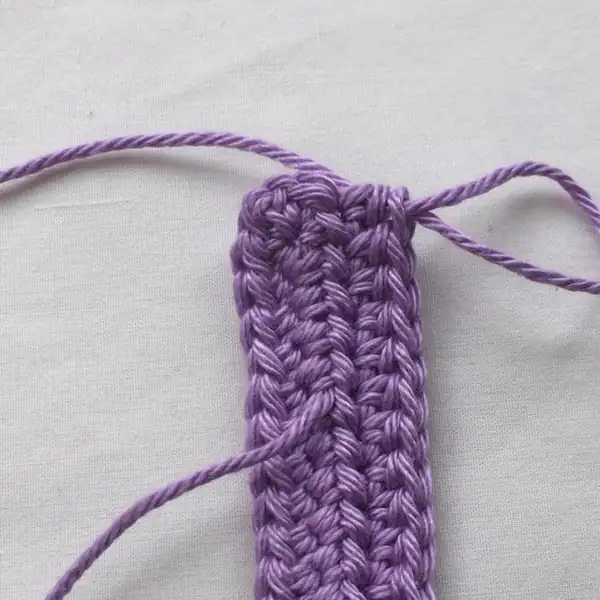
The finished sizes vary by cup but stay true to a simple, scalable proportion so you can cup size up or down without changing the stitch count dramatically. The technique favors comfortable construction over flash, with a classic amigurumi approach to shaping that embraces a magic ring start, a few rounds of SC and HDc, and closed with a dependable slip stitch seam or invisible join. The result is a bikini top that feels sturdy, breathable, and ready to pair with high waist bottoms or a sunwashed sarong.
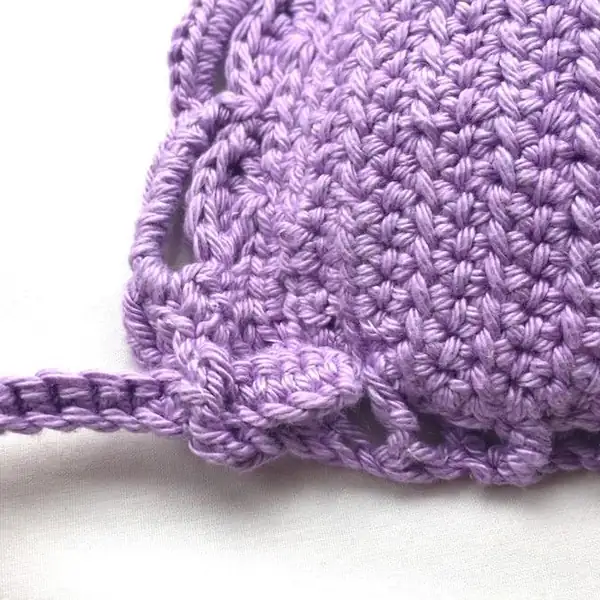
Designed for intermediate crocheters, this Oceana top blends practical construction with a coast inspired silhouette. The cups are shaped to sit cleanly along the bust, while the edging finishes with a soft, wave like line that sits flat under sunblock and sunscreen. The pattern reads like a short wardrobe chapter, where the yarn behaves as its own lining and the stitches set the frame for comfort, coverage, and confidence by the water. You will enjoy the calm rhythm of rounds, MR starts, and a subtle balance between the fabric's feedback and your own range of motion when you swim or lounge. The description guides you through transforming simple stitches into satisfying contours that hold without digging in, even as you move from towel to paddle board to photo pose.
Material notes keep the project approachable: Wendy Supreme Cotton DK or a substitute cotton yarn will deliver a forgiving drape, about one skein for the main cup color and edging, with optional accent colors to punctuate the design. The technique centers on a classic amigurumi mindset for shaping, beginning with a magic ring, then a carefully measured sequence of SC and HDc to build the cup walls, and finishing with a precise invisible decrease that reshapes the curve without creating bulk. Expect to work through a handful of rounds that culminate in a smooth, wearable edge, joined with either a tidy SL ST seam or a seamless back join for a clean look. The pattern assumes a standard DK gauge, but provides guidance for minor adjustments so your top feels snug across different busts and fabric tensions.
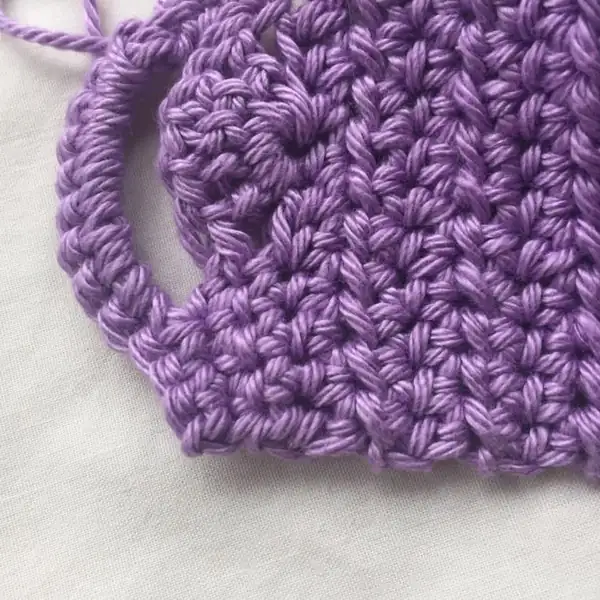
Careful finishing means you can press and block gently to set the edges, then weave in ends with care so the trim stays tidy over weeks of wear. The design invites you to experiment with accent colors or a subtle lining if you plan to wear the top over a swimsuit, and you can balance strap length to suit narrow or broad shoulders. Overall Oceana embraces a simple, repeatable rhythm that honors the body and the sea while remaining comfortably within beginner to intermediate reach. This is a piece you will reach for often, because it pairs well with many bottoms and travels beautifully from pool side to sunset walk.
Oceana is not only about the cups, it is about how you customize color and scale to suit your chest and style. I love starting with a single main color and edging that frames the shape like a shoreline, then adding a second color along the strap or the cup rim to give a playful highlight. The DK weight cotton keeps the fabric light, while the magic ring and BLO stitches create a gentle stretch that feels comfortable against skin even in bright sun. You can adjust the cup height within the same stitch count by swapping a few rounds, and you can switch from a classic triangle to a slightly longer cup by extending the initial MR rounds.
Careful attention to finishing means no visible yarn tails protrude beyond the edging, and you can optionally insert a narrow swimwear lining for extra brightness and modesty. If you swap to another cotton DK, test gauge early because a tighter or looser fabric affects fit and a knit like FPtr and BPtr twist can alter texture. The design also adapts to accent palettes that echo a sunset coast or a coral reef, so you can tell a story with color as you wear it. Overall Oceana remains adaptable, so you can rework the same pattern for multiple tops across seasons.