About This Kangaroo Amigurumi Pattern
From start to finish, this Kangaroo Amigurumi Pattern guides you through a complete sculpting journey that results in a tall, cuddly friend with an expressive face. The dimensions are anchored by a firm core created with a magic ring and a secure series of rounds, followed by gradually increasing sections that shape the torso, head, and long limbs in bulky yarn. Each piece is crocheted in a deliberate order so you can stuff and assemble without losing the neat silhouette, then joined with invisible seams that keep the lines clean.
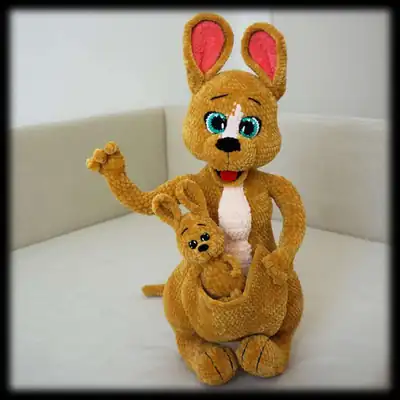
The design accommodates poseable limbs with optional wire insertion, and the pouch area is shaped to cradle a tiny joey if you wish to add another decorative layer. Color decisions are mapped to the pattern: a rich brown body (80330) frames a soft belly (80353); small details use black (80311) for the nose, red (80318) for the tongue, coral (80332) for ear insides, and white (62) for eye highlights. The finished piece stands approximately 55 cm tall and is a striking statement in any craft room or children's corner.
The moment I started this Kangaroo Amigurumi with a magic ring, I knew it would test an advanced crocheter's patience and precision. Its long torso, bold hind legs, and flexible tail are built in careful rounds that reward steady counting and marking. Using bulky #5 yarn and two precise hook sizes—3.0 mm and 3.5 mm—lets you shape a sturdy 55 cm tall figure. Color changes are deliberate: a warm brown body, pale belly and muzzle, and tiny black accents come together through BLO and FLO techniques. I also love that the pattern invites optional wiring for posable limbs, so your kangaroo can pose with joey tucked in the pouch, and the polyester stuffing helps create a soft, cuddly feel.
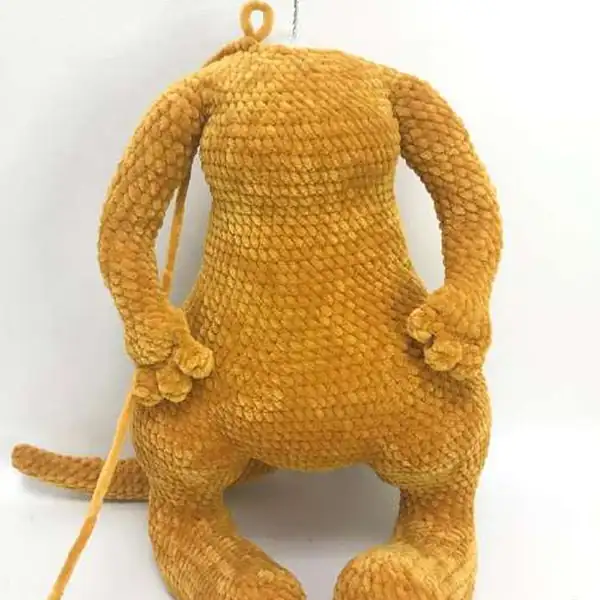
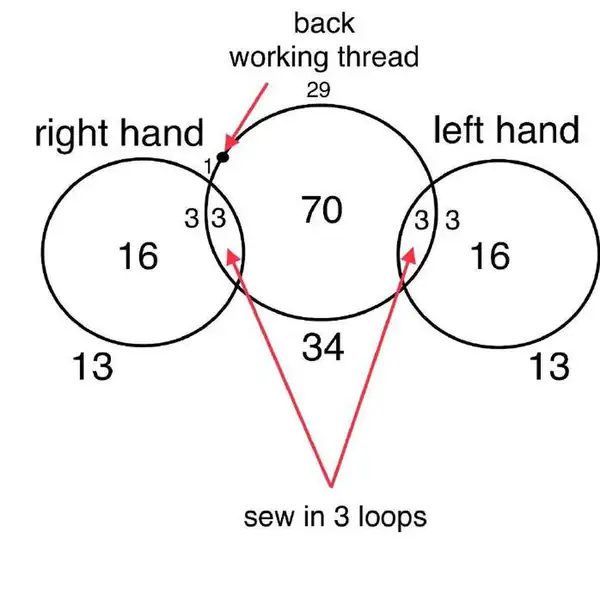
The construction stays seamless by working in continuous rounds for the body, limbs, and tail, with polyester stuffing added gradually to keep the shape firm. Details like the lighter belly and muzzle are worked with color 80353 and 80311 to create soft contrast that reads in person and on camera. Invisible decreases keep the shaping smooth, while small stitches along the face hold eyes and nose in perfect alignment. The ears get inner color 80332 and outer shading, and the tongue in 80318 adds a playful pop. In assembly, pins guide the joints, the yarn needle hides every seam, and you can thread a 1 mm wire to make the limbs poseable—about 200 cm total length will do.
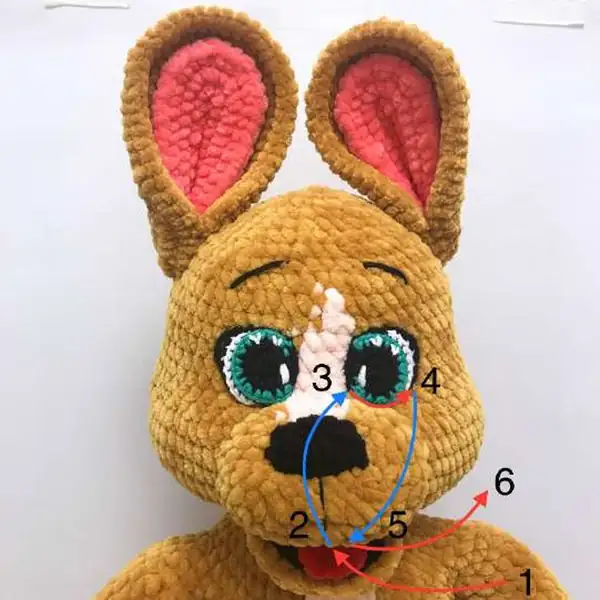
Expect a dedicated stretch of time—roughly 12 to 15 hours—so you can savor each round and the gradual reveal of the kangaroo’s character. I recommend marking each round so your increases and decreases stay aligned with the leg lines and tail curve. Texture stays consistent because the pattern emphasizes bold outer rounds and trickier invisible decreases in the head and neck. When you’re ready to finish, place the eyes and the nose using black Camtex thread, then add a tiny white highlight with color 62 for life-like sparkle. This pattern is free and designed to teach you new skills while yielding a durable, cuddle-worthy finished toy.
For makers who love a challenge, this pattern rewards patience with precise sculpting that feels almost magical in the finished piece. The kangaroo’s long limbs and tail require careful stuffing and placement of wires if you choose to make them posable, and I guide you through the transition from the muzzle to the head with subtle color changes and micro-decreases that keep the jawline clean. The pouch is shaped with a soft curve and a tiny joey can be added by crocheting a smaller circle or a mini body stuffed to shape. Expect to spend substantial time on each limb and the tail to keep their proportions true and the overall balance stable. Finishing touches—tightening the eyes, sculpting the mouth, and ensuring a gentle arch in the back—are what elevate this from a toy to a treasured keepsake.
Careful attention to tension and stitch placement ensures the outer fabric remains plush rather than stiff. Position markers help you track increases and decreases, preventing drift as you move from rounds to shaping. If you choose to insert a light wire, you’ll want to thread it through the limbs before final assembly to maintain a natural bend. I also recommend testing the stuffing density in a small swatch inside the leg before filling the whole limb. By the end you’ll have a majestic kangaroo whose proportions align with the finished size of approximately 55 cm tall, with a sturdy but cuddly feel. Color choices can reflect a family of kangaroos, from warm browns to richer tan hues.