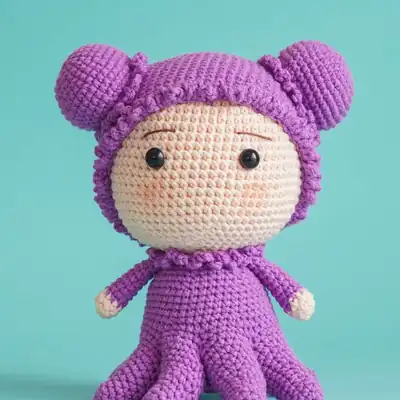
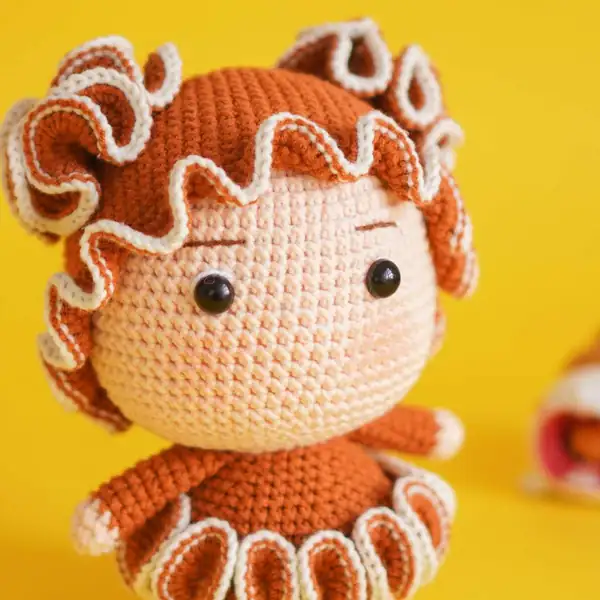
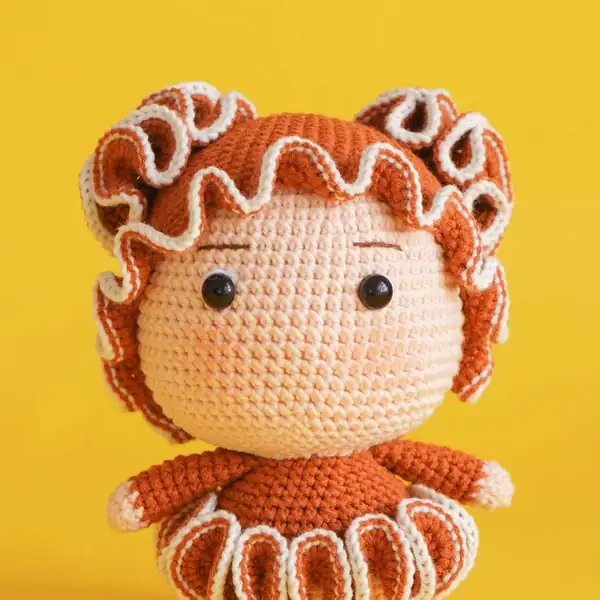
Step into a sunlit craft corner with Caro-The Coral Girl Amigurumi Pattern, a small seaside friend who packs a big personality into a compact 12-15 cm stature. This is an advanced crochet project that will reward your patience with clean shaping, precise colorwork, and a lullaby-soft finished toy that stands beautifully on a shelf or tucked into a plush coral reef diorama. Using DK or worsted yarn, a 2.5 mm hook, and careful stitch control, you’ll form a tapered head, a plump torso, tiny fins, and a curled tail that reads like a living underwater sculpture. Every round, every stitch is a chance to practice invisible decreases, BLO and FLO texture, and the magic ring start that anchors the toy’s head with a solid core. The pattern is written in clear, compact steps, with color changes handled in a way that keeps the fabric dense and the seams invisible. I love how the little Coral Girl carries a sense of movement—her arms are poised, her tail flicks, and the coral-inspired palette can be swapped to suit your room’s mood, from candy-pastels to sunset oranges. This is crochet mindfulness disguised as a charming character.
— Part 1 :
Round 2: sc 42 (3 rows), change to yarn B (42)
Round 3: sc 42 (3 rows), change to yarn B (42)
Round 4: sc 42 (3 rows), change to yarn B (42)
Round 7: sc 42 (3 rows) (42)
Round 8: sc 42 (3 rows) (42)
Round 9: sc 42 (3 rows) (42)
— Part 2 :
Round 4: sc 9 (9 rows) (9)
Round 5: sc 9 (9 rows) (9)
Round 6: sc 9 (9 rows) (9)
Round 7: sc 9 (9 rows) (9)
Round 8: sc 9 (9 rows) (9)
Round 9: sc 9 (9 rows) (9)
Round 10: sc 9 (9 rows) (9)
Round 11: sc 9 (9 rows) (9)
Round 12: sc 9 (9 rows) (9)
Round 13: sc 66 (12 rows), insert 10mm safety eyes between the 17th &;
Round 14: sc 66 (12 rows), insert 10mm safety eyes between the 17th &;
Round 15: sc 66 (12 rows), insert 10mm safety eyes between the 17th &;
Round 16: sc 66 (12 rows), insert 10mm safety eyes between the 17th &;
Round 17: sc 66 (12 rows), insert 10mm safety eyes between the 17th &;
Round 18: sc 66 (12 rows), insert 10mm safety eyes between the 17th &;
Round 19: sc 66 (12 rows), insert 10mm safety eyes between the 17th &;
Round 20: sc 66 (12 rows), insert 10mm safety eyes between the 17th &;
Round 21: sc 66 (12 rows), insert 10mm safety eyes between the 17th &;
Round 22: sc 66 (12 rows), insert 10mm safety eyes between the 17th &;
Round 23: sc 66 (12 rows), insert 10mm safety eyes between the 17th &;
Round 24: sc 66 (12 rows), insert 10mm safety eyes between the 17th &;
— Part 3 :
Round 1: crochet rnd 1-10 of the Head (60) 11;
Round 2: crochet rnd 1-10 of the Head (60) 11;
Round 3: crochet rnd 1-10 of the Head (60) 11;
Round 4: crochet rnd 1-10 of the Head (60) 11;
Round 5: crochet rnd 1-10 of the Head (60) 11;
Round 6: crochet rnd 1-10 of the Head (60) 11;
Round 7: crochet rnd 1-10 of the Head (60) 11;
Round 8: crochet rnd 1-10 of the Head (60) 11;
Round 9: crochet rnd 1-10 of the Head (60) 11;
Round 10: crochet rnd 1-10 of the Head (60) 11;
Round 12: sc 66 (14 rows) (66)
Round 13: sc 66 (14 rows) (66)
Round 14: sc 66 (14 rows) (66)
Round 15: sc 66 (14 rows) (66)
Round 16: sc 66 (14 rows) (66)
Round 17: sc 66 (14 rows) (66)
Round 18: sc 66 (14 rows) (66)
Round 19: sc 66 (14 rows) (66)
Round 20: sc 66 (14 rows) (66)
Round 21: sc 66 (14 rows) (66)
Round 22: sc 66 (14 rows) (66)
Round 23: sc 66 (14 rows) (66)
Round 24: sc 66 (14 rows) (66)
Round 25: sc 66 (14 rows) (66)
— Part 4 :
Round 5: dec 1, sc 4, inc 1, sc 5 (2 rows) (12)
Round 6: dec 1, sc 4, inc 1, sc 5 (2 rows) (12)
Round 8: dec 1, sc 6, inc 1, sc 6 (2 rows) (15)
Round 9: dec 1, sc 6, inc 1, sc 6 (2 rows) (15)
Round 11: dec 1, sc 7, inc 1, sc 8 (2 rows) (18)
Round 12: dec 1, sc 7, inc 1, sc 8 (2 rows) (18)
— Part 5 :
Round 1: sc 48 (2 rows) (48)
Round 2: sc 48 (2 rows) (48)
Round 4: sc 42 (4 rows), start to stuff 8 legs (42) 8;
Round 5: sc 42 (4 rows), start to stuff 8 legs (42) 8;
Round 6: sc 42 (4 rows), start to stuff 8 legs (42) 8;
Round 7: sc 42 (4 rows), start to stuff 8 legs (42) 8;
— Part 6 :
Round 4: sc 9 (9 rows) (9)
Round 5: sc 9 (9 rows) (9)
Round 6: sc 9 (9 rows) (9)
Round 7: sc 9 (9 rows) (9)
Round 8: sc 9 (9 rows) (9)
Round 9: sc 9 (9 rows) (9)
Round 10: sc 9 (9 rows) (9)
Round 11: sc 9 (9 rows) (9)
Round 12: sc 9 (9 rows) (9)
Round 13: sc 66 (12 rows), insert 10mm safety eyes between the 17th &;
Round 14: sc 66 (12 rows), insert 10mm safety eyes between the 17th &;
Round 15: sc 66 (12 rows), insert 10mm safety eyes between the 17th &;
Round 16: sc 66 (12 rows), insert 10mm safety eyes between the 17th &;
Round 17: sc 66 (12 rows), insert 10mm safety eyes between the 17th &;
Round 18: sc 66 (12 rows), insert 10mm safety eyes between the 17th &;
Round 19: sc 66 (12 rows), insert 10mm safety eyes between the 17th &;
Round 20: sc 66 (12 rows), insert 10mm safety eyes between the 17th &;
Round 21: sc 66 (12 rows), insert 10mm safety eyes between the 17th &;
Round 22: sc 66 (12 rows), insert 10mm safety eyes between the 17th &;
Round 23: sc 66 (12 rows), insert 10mm safety eyes between the 17th &;
Round 24: sc 66 (12 rows), insert 10mm safety eyes between the 17th &;
— Part 7 :
Round 1: crochet rnd 1-10 of the Head (60) 11;
Round 2: crochet rnd 1-10 of the Head (60) 11;
Round 3: crochet rnd 1-10 of the Head (60) 11;
Round 4: crochet rnd 1-10 of the Head (60) 11;
Round 5: crochet rnd 1-10 of the Head (60) 11;
Round 6: crochet rnd 1-10 of the Head (60) 11;
Round 7: crochet rnd 1-10 of the Head (60) 11;
Round 8: crochet rnd 1-10 of the Head (60) 11;
Round 9: crochet rnd 1-10 of the Head (60) 11;
Round 10: crochet rnd 1-10 of the Head (60) 11;
Round 12: sc 66 (15 rows) (66)
Round 13: sc 66 (15 rows) (66)
Round 14: sc 66 (15 rows) (66)
Round 15: sc 66 (15 rows) (66)
Round 16: sc 66 (15 rows) (66)
Round 17: sc 66 (15 rows) (66)
Round 18: sc 66 (15 rows) (66)
Round 19: sc 66 (15 rows) (66)
Round 20: sc 66 (15 rows) (66)
Round 21: sc 66 (15 rows) (66)
Round 22: sc 66 (15 rows) (66)
Round 23: sc 66 (15 rows) (66)
Round 24: sc 66 (15 rows) (66)
Round 25: sc 66 (15 rows) (66)
Round 26: sc 66 (15 rows) (66)
— Part 8 :
Round 8: sc 40 (3 rows) (40)
Round 9: sc 40 (3 rows) (40)
Round 10: sc 40 (3 rows) (40)
Round 17: sc 42 (2 rows) (42)
Round 18: sc 42 (2 rows) (42)
— Part 9 :
Round 3: sc 9 (10 rows) (9)
Round 4: sc 9 (10 rows) (9)
Round 5: sc 9 (10 rows) (9)
Round 6: sc 9 (10 rows) (9)
Round 7: sc 9 (10 rows) (9)
Round 8: sc 9 (10 rows) (9)
Round 9: sc 9 (10 rows) (9)
Round 10: sc 9 (10 rows) (9)
Round 11: sc 9 (10 rows) (9)
Round 12: sc 9 (10 rows) (9)
Round 13: sc 66 (12 rows), insert 10mm safety eyes between the 17th &;
Round 14: sc 66 (12 rows), insert 10mm safety eyes between the 17th &;
Round 15: sc 66 (12 rows), insert 10mm safety eyes between the 17th &;
Round 16: sc 66 (12 rows), insert 10mm safety eyes between the 17th &;
Round 17: sc 66 (12 rows), insert 10mm safety eyes between the 17th &;
Round 18: sc 66 (12 rows), insert 10mm safety eyes between the 17th &;
Round 19: sc 66 (12 rows), insert 10mm safety eyes between the 17th &;
Round 20: sc 66 (12 rows), insert 10mm safety eyes between the 17th &;
Round 21: sc 66 (12 rows), insert 10mm safety eyes between the 17th &;
Round 22: sc 66 (12 rows), insert 10mm safety eyes between the 17th &;
Round 23: sc 66 (12 rows), insert 10mm safety eyes between the 17th &;
Round 24: sc 66 (12 rows), insert 10mm safety eyes between the 17th &;
— Part 10 :
Round 1: crochet rnd 1-10 of the Head (60)
Round 2: crochet rnd 1-10 of the Head (60)
Round 3: crochet rnd 1-10 of the Head (60)
Round 4: crochet rnd 1-10 of the Head (60)
Round 5: crochet rnd 1-10 of the Head (60)
Round 6: crochet rnd 1-10 of the Head (60)
Round 7: crochet rnd 1-10 of the Head (60)
Round 8: crochet rnd 1-10 of the Head (60)
Round 9: crochet rnd 1-10 of the Head (60)
Round 10: crochet rnd 1-10 of the Head (60)
Round 17: Repeat rnd 13-16 (4 rows) (66)
Round 18: Repeat rnd 13-16 (4 rows) (66)
Round 19: Repeat rnd 13-16 (4 rows) (66)
Round 20: Repeat rnd 13-16 (4 rows) (66)
Round 21: Repeat rnd 13-14;
Round 22: Repeat rnd 13-14;
Caro-The Coral Girl Amigurumi Pattern is a small but mighty project that invites you to explore advanced crochet techniques within a playful narrative. The finished figure lends itself to shelf display, nursery decor, or a charming gift for sea lovers, with careful shaping, texture, and color choices that evoke an underwater scene. Care for Caro is simple: hand wash in mild soap, reshape gently, and lay flat to dry to preserve her delicate coral fins. If you share your version online, tag your photos with the pattern name so other crocheters can discover her. May your hook stay swift and your color palette stay bright as you bring this coral friend to life.