About This Bubba the Elephant Amigurumi Pattern
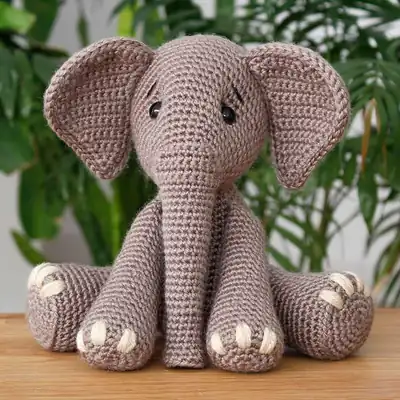
Bubba the Elephant Amigurumi Pattern uses worsted weight yarn and a compact, teddy-like construction. The main color is Dark Beige or Grey, worked in tight stitches to create a plush fabric that holds its shape. You’ll need about 100-150g of main color and a smaller amount of Beige or White for nails and little embroidery details.
A 3.25 mm hook (D) keeps the fabric dense enough for little fingers to hold. The finished height is approximately 20 cm tall, standing with a sturdy base. Safely, Ø12mm safety eyes can be used, or you can embroider eyes for a completely kid-safe version.
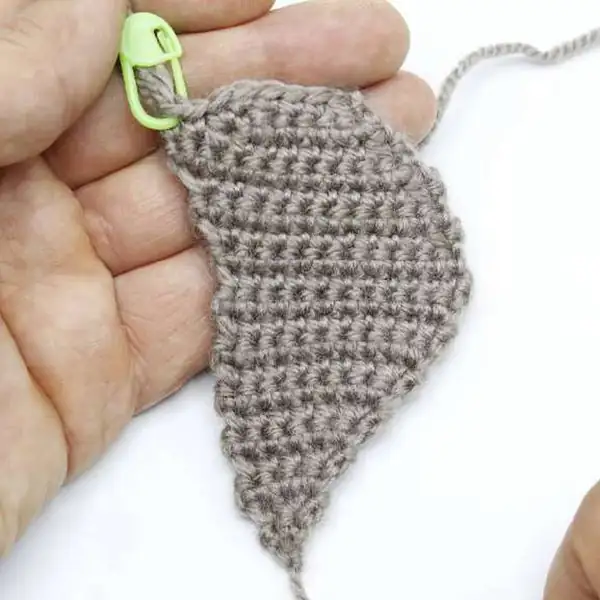
The assembly order is designed to create a balanced silhouette: head, trunk, ears, body, limbs, and tail are joined with invisible decreases and snug seams. Polyester stuffing gives Bubba his plump, huggable shape, while magic ring beginnings help the round forms stay neat. You’ll also use stitches like SC, INC, DEC, BLO, FLO, CH, SL ST to craft Bubba's soft curves and end with precise embroidery lines for nails and accent features.
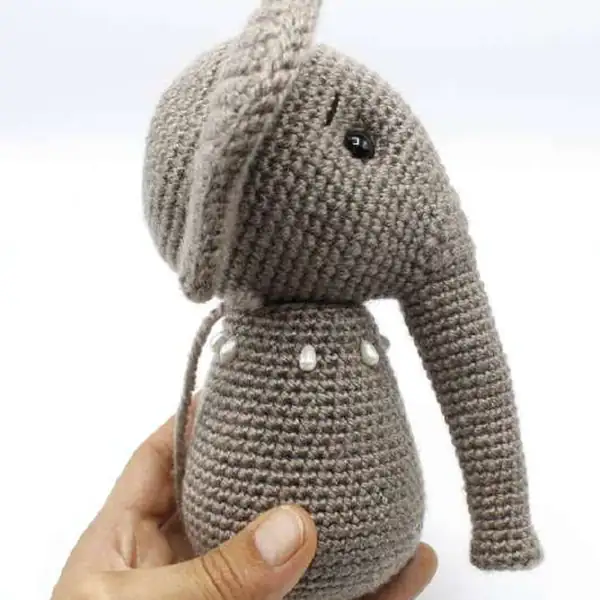
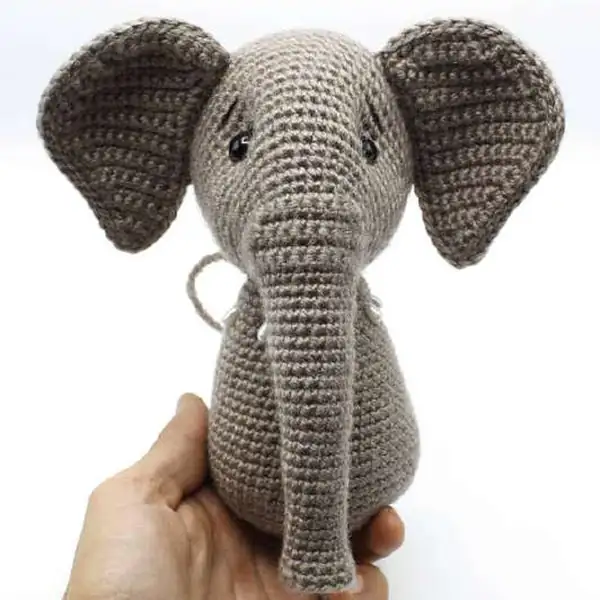
From a magic ring begin Bubba's head, then build the body and limbs in joined sections, keeping tension consistent so the curves remain soft yet firm. You’ll work in rounds for the head and body using a Dark Beige/Grey main color, switching to Beige or White for tiny accents. The pattern uses MR, SC, INC, DEC, CH, SL ST, and is designed for a dense fabric that holds its shape. You’ll crochet in BLO for some shaping and FLO for small color changes, and you’ll close with an invisible decrease so the crown sits neatly. After finishing the head, you’ll crochet the trunk and attach large ears that frame the face, then sew on the limbs and a small tail to complete the silhouette. The finished piece stands about 20 cm tall and has a playful pose with a slight forward tilt that reads as curious and friendly.
When you assemble, I recommend pinning parts first and testing fit before sewing, then stuffing evenly to avoid lumps. Use a yarn needle to anchor the joints, and place safety eyes at Ø12mm if you’re following the recommended look, or embroider eyes for a softer, child-safe option. The nails and tiny facial details are typically done with a contrasting accent color, so the beige or white features pop against the main shade. Bubba’s ears are worked separately and integrated with a seam that’s barely visible on the outside, thanks to careful color blocking and careful seam alignment. The crochet technique combines tight single crochet fabric with subtle increases, so Bubba remains cuddly without being floppy. Finally, add any final embroidery to highlight fingernails and a gentle smile.
Maintenance is simple: hand wash in lukewarm water and lay flat to dry, keeping his proportions intact. Because it’s an Advanced pattern, you’ll finish with neatly woven ends and a durable seam line that stands up to little hands playing with him. Bubba is a durable friend made to last, and the technique you learned here translates well to other amigurumi projects in the same family. If you ever want to adapt, this design lends itself to gentle color swaps and subtle feature alterations, allowing your Bubba to become a unique creature in your own crochet collection.
One of Bubba’s strengths is how the pieces come together to form a balanced, endearing silhouette. The construction relies on a precise combination of MR, SC, INC, DEC, and careful color blocking to create the elephant’s head, trunk, and ears without extra bulk in the joints. I designed the ears to sit slightly forward, giving Bubba that perky, listening look, while the trunk curves in a gentle arc that invites touch. The limbs are proportioned to keep him upright when placed on a shelf, but soft enough to be hugged when the moment calls for comfort. Color changes are kept minimal, so the espresso-dark main color remains dominant while the accent color adds just enough personality to nails and tiny facial lines. The final piece measures roughly 20 cm tall, a satisfyingly tangible size for display or play.
In terms of care and flexibility, the pattern keeps room for personal touches. You can embroider eyes or place Ø12mm safety eyes depending on the recipient and safety considerations. Stuffing is key; not too firm, not too loose, to maintain Bubba’s rounded shapes. If you plan to turn this into a baby-friendly toy, I recommend stitching eyes with thread and avoiding small beads, then securing all parts firmly. For display-only versions, you can experiment with slightly larger eyes or longer ears to give Bubba more character. This pattern is a learning journey; you’ll get great experience with MR starts and invisible decreases, and you’ll finish with a neat, professional seam that shows off your craftsmanship.