Crochetologist
Free Crochet Pattern
Beautiful Detailed Adorable

Un mar de puntos Amigurumi Pattern

Two amigurumi dolls wearing pastel dresses, front view
4.3Rating
12-15 HoursTime
AdvancedSkill
Highlights

What makes it special

Made with Love

An adorable friend to cherish, handcrafted with love to bring comfort and joy for years to come.

Multi-Day Project

A rewarding 12+ hour journey—perfect for dedicated crafters who love detailed work.

Advanced Level

Difficulty level: Intermediate. The project weaves basic amigurumi work with multiple garment steps, careful color changes, and precise finishing. Builders will gauge increases, attach separate pieces cleanly, and manage a careful stuffing plan to preserve poseability and a soft silhouette. The pattern remains accessible to determined beginners who are comfortable with simple shaping and sewing, but the complexity of two wardrobes and delicate details subtly elevates the challenge.

Two dolls, twin-like yet distinct, sit at the edge of a quiet craft desk, inviting you to begin. This is a pattern for the patient maker who loves to layer color, texture, and form into a living toy that can wear two different outfits. The moment you crochet the first foundation chain, you’ll settle into a calm rhythm—step by step, round by round, your little characters begin to breathe in a soft, crocheted breath. This is more than just crochet; it is a gentle ritual you perform for someone you care about, a gift of time stitched into fabric and yarn, transforming imagination into a keepsake.

Perfect for gifting, display, or simply to brighten a shelf, the Lady in Waiting set turns craft into storytelling. Each dress, hairpiece, and accessory becomes a language of color and texture that suggests a tiny life without words. If you crave a project that blends skill with sentiment, this pattern is an invitation to slow down and savor the quiet artistry of making.

About This Un mar de puntos Amigurumi Pattern

The construction begins with shaping the head and torso, followed by arms, legs, and ears. Each element is worked in rounds, with careful increases to maintain proportion. The torso and head are built in the round from a starting magic ring, then joined with small seams that stay hidden inside the garment lines. The wardrobe is built in separate blocks—base, skirt, overskirt—and then threaded through the body using alignment marks. Color changes are planned to create distinct dress looks that can be swapped, and the pieces are attached via sewing and gentle seam joins to preserve mobility. The hair and headbands are created separately and attached after the main assembly to keep finishes clean and hair secure.

You’ll experience the satisfying rhythm of basic stitches and shaping, punctuated by careful attachment and alignment to keep the final piece balanced. Durability is a core aim: limbs are stuffed firmly without rigidity, and features are anchored securely so the dolls can be posed and handled without losing form. Precision in joining parts and careful finishing contribute to a polished result that can be shared with friends or kept as a cherished keepsake.

Close-up of dress detail and hair accessory on the left doll

Crafting these figures involves shaping the head, torso, arms, legs, and ears before dressing them and adding hair. Each element is worked in rounds, with measured increases to maintain proportion and balance. The dress forms are built in modular blocks—base, skirt, and overskirt—so you can explore color schemes within the same overall shape. The lace and flower accents are created with small, precise stitches to avoid overpowering the silhouette, and you’ll anchor flowers and bows with discreet stitches so they stay secure through play. The hair is styled to frame the face, and the face remains simple to emphasize the dress and accessories.

Finishing steps bring the pieces together: pinning pieces for correct alignment, sewing seams that disappear into the garment lines, and positioning features to avoid limp or flat areas. When the two figures stand side by side, you’ll feel a quiet sense of accomplishment that comes from following a plan and watching it become a pair of charming amigurumi friends ready for cozy corners or gift-giving moments. The process emphasizes careful planning, tidy finishing, and durable construction so these dolls can become a durable part of a shelf or a child’s imaginative play.

Stitches & Skills You'll Use

The project rests on classic crochet foundations: starting with a foundation chain and a magic ring, then working single crochet in rounds to build the body and head. Increases are used to shape, while decreases taper toward the face. Texture is added by using back loops only (BLO) in selected sections and front loops only (FLO) in others to create subtle contour without introducing rigid textures. Color changes are sequenced to create crisp separations on the dresses, using slip stitches to secure ends. The hair is formed with tight stitches to maintain a solid silhouette, and a small crochet motif creates neck lace that anchors with a few slip stitches to the base fabric. A crab stitch is used for decorative borders to finish edges with a backward crochet motion.

Joining and assembly require patience: the arms attach between rounds to maintain flexibility, and the skirt aligns with the torso using marked stitch positions to preserve symmetry. Flower and bow elements scale in proportion to the overall body, guiding the eye to focal points across both outfits. The lace neckline repeats a gentle motif to reward precision. Stuffing is done in stages—head first, then torso—so the silhouette remains neat and poseable for safe play. Colorwork remains restrained to avoid visual overload, ensuring both outfits stay legible and balanced against the skin tones. The body uses a DK-weight cotton or equivalent for a soft but sturdy structure, while the garments demand more structure to hold shape. Careful tension control helps the two outfits maintain drape and cohesion as they are worn or displayed.

Why You'll Love This Un mar de puntos Amigurumi Pattern

Two figures with coordinated wardrobes invite personal expression through color and texture, turning a pattern into a small studio of choices. The two dress schemes encourage experimentation and color storytelling, making each finished piece feel like a wearable scene from a tiny narrative.

The design rewards careful shaping and sewing in a way that supports beginners growing into more complex steps, while still challenging seasoned crocheters with lace details and precise garment construction. The balance of planning, palette, and patchwork fosters a sense of quiet magic when everything lines up and the outfits harmonize with the skin tones.

What makes this project especially satisfying is the freedom to customize within a structured framework. Modifying colors, adjusting accessory placements, and adding small embellishments provide opportunities to express personality without altering the core proportions. Patience yields a keepsake that can be gifted or treasured at home, a reminder that steady, mindful work can create something meaningful and lasting.

When complete, the dolls stand with poise, their dresses drape correctly, and the assembled figures radiate handmade warmth. This pattern serves as a reliable canvas for a crochet journey, a reminder that steady practice yields enduring beauty in a tangible, huggable form.

Taken together, the balance of technique, style, and personal expression makes this pattern a welcome choice for expanding amigurumi skills while producing a cherished heirloom for someone special.

Colour & Yarn Inspiration

Skin-tone base with two contrasting dresses offers a classic palette; a blue and white pairing creates a cool vibe, or peach with mint offers a springtime feel. For drama, swap to deep purples and emerald greens with a black lace accent. Subtle sheen from cotton yarn can yield a vintage glow, while a matte finish gives a softer appearance. If using a multicolor overskirt, choose a third color that complements the main palette, ensuring the balance remains tasteful and cohesive. Yarn choices beyond cotton will alter drape and pose; a linen blend creates a stiffer finish while a soft baby-alpaca blend yields a plush, cuddly feel. Each substitution brings a distinct character to the dolls.

Side view of the two finished dolls in their outfits

Switch Things Up

See how flexible the pattern can be by swapping color families and experimenting with weight. A simple palette swap can redefine the mood, moving from soft pastels to bold jewel tones for a dramatic effect, while preserving the same proportions.

Explore alternate garment silhouettes by adjusting the skirt width or overskirt length. The base pattern remains forgiving, so consider tiny crocheted flowers, miniature belts, or beads to add sparkle. The key is maintaining balanced proportions so the pieces still fit the same arms and head structure.

Technique variations teach new facets of crochet design: using a larger hook with a bulkier yarn yields a chunkier, heavier feel; a finer yarn with the same stitch count yields a lighter, more delicate look in the dress while preserving garment integrity. Each variant helps develop tension control, garment balance, and finishing technique.

Customization can extend to facial features through embroidery or subtle surface detailing. Tiny eyelashes, a blush touch, or a small mouth can vary expression without compromising stability. The pattern invites playful experimentation within a solid framework, producing repeatable outcomes that feel unique each time.

Ways to Use & Gift It

Two matching dolls with interchangeable outfits make a thoughtful gift for a friend who loves handcrafts or a child who enjoys storytelling toys. The dress options invite the recipient to mix and match, creating new mini-scenes with every play session.

Consider presenting the set as a birthday surprise or a keepsake for a baby shower, where soft cotton fabric and gentle faces offer a comforting presence in a nursery. The two outfits can be swapped seasonally, providing ongoing delight as colors shift with holidays and personal tastes. The careful finishing and handcrafted quality also make this a special present for teachers or loved ones who appreciate the patience and artistry involved.

Common Mistakes & How to Fix Them

Not checking stitch counts at color changes can lead to misaligned rounds; always place a stitch marker at the start of each round and recount after color transitions. Overstuffing can distort facial features and shoulder shape; stuff gradually in stages to maintain proportion and pose. Neglecting to weave in ends securely can cause unraveling with play; tie off firmly and weave several times through adjacent stitches. Inconsistent tension creates lumps in the skirt and body; maintain even tension and adjust gradually when changing weight or fiber. Skipping steps in the lace neckline is easy to miss; follow the sequence carefully and test a small swatch if unsure.

Maker's Notes

Begin with a gauge swatch that mirrors the fabric thickness of the final piece. Crochet a 4x4 inch square in the chosen weight and stitch, then measure the resulting gauge. If the swatch width is smaller than expected, pick a larger hook or a tighter tension; if it is larger, switch to a smaller hook or looser tension. Compare the circumference and height of the mock-up with the target dimensions to ensure proportion. When testing color changes, work a short sample sequence to confirm the color breaks are crisp and do not bleed. Maintain consistent tension to preserve the dress silhouette and overall body shape during assembly. Keep your starting tail intact for the starting ring as needed and secure it after tightening the first rounds.

I tried a substitution: Substituting yarns and weights changes the piece’s look and feel. A switch from 100% cotton to a cotton blend or a yarn with more drape will alter the drape and stitch definition, so adjust tension and possibly the hook size to preserve the intended shape. Using a yarn with a slight sheen can lend a more polished finish on the dresses, while a matte yarn will create a softer appearance. When substituting lace or floral accents made from small stitches, ensure the substitute still holds its structure and remains secure through play. Finishing may require extra needlework or extra slips to anchor delicate elements, but the core construction steps remain the same: starting ring, rounds, increases, decreases, and attachment points stay in place.

Un mar de puntos Amigurumi Pattern

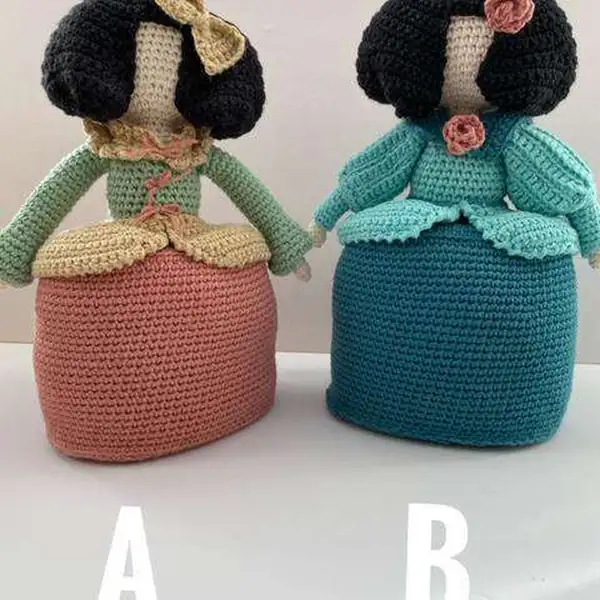
Make these elegant Lady in Waiting amigurumi dolls with our free crochet pattern—complete rounds, materials, and finishing tips. Start crocheting today!

Advanced 12-15 Hours
Pattern at a glance
Skill level
Advanced
Time to make
12-15 Hours
Hook size
2.5 mm (B/1)
Yarn weight
DK / #3
Finished size
Approx. 20 cm tall
Gauge
Not critical; use tight, even tension for smooth fabric and minimal stuffing show-through.
Yarn used
Main colors total approx. 400-600 m; additional colors vary by dress scheme

Materials Needed

Main Fabric
  • 01
    Schachenmayr quality Organic Cotton, 50 g hanks, 155 meters per skein
  • 02
    Color flesh – used for skin tone
  • 03
    Color for the hair – used in hairstyle details
  • 04
    Two body colors – for the base dresses
  • 05
    Third color – for overskirt accents (optional)
Tools Required
  • 01
    Crochet hook size 2.5 mm
  • 02
    Darning needle
  • 03
    Safety eyes (optional for facial features)
  • 04
    Scissors
  • 05
    Pins for assembly
  • 06
    Stitch markers
  • 07
    Polyester stuffing
  • 08
    Cardboard for dress base support (optional)

— ARMS :

Round 1: 4 sc in a magic ring;
Round 2: (1 inc) x 4 …….. (8sc)
Round 3: to 21: 8sc Cut the thread and close. Leave aside until later;

— BODY :

Round 1: to 12: 28sc Cut the thread and weave in the loose ends.

— BODY :

Round 13: 28 slip stitches. On the next row join the arms to the body. Make single crochets in the back loop BLO of the slip stitch on the previous row.
Round 14: 2sc, 1 dec, 3sc, Take one of the arms and make 6sc around the top. Leave the loose strand at the bottom. 3sc, 1 dec, 4sc, 1 dec, 3sc, Take the other arm and work 6sc. Leave the strand at the bottom to use later. 3sc, 1 dec, 2sc. (36 sts)
Round 15: (4sc, 1 dec) x 6 (30 sts)
Round 16: (3sc, 1 dec) x 6 (24 sts)
Round 17: 1sc, 1 dec, 1sc, 2 dec, 1sc, 1 dec, 2sc, 1 dec, 1sc, 2 dec, 1sc, 1 dec, 1sc, (16 sts)
Round 18: 1sc, 1 dec, 2sc.., 1 dec, 2sc, 1 dec, 2sc, 1 dec, 1sc (12 sts)
Round 19: to 21: 12sc.

— HEAD :

Round 1: 1 inc in every stitch (24 sts)
Round 2: ( 3sc, 1 inc) x 6 (30 st)
Round 3: ( 1 inc, 4sc) x 6 (36 sts)
Round 4: 2sc, 1 inc, (5sc, 1 inc) x 5, 3sc……. (42 sts)
Round 5: (6sc, 1 inc) x 6 ……..(48 sts)
Round 6: to 14: 48sc;

— HEAD :

Round 15: (6sc, 1 dec) x 6 (42 sts)
Round 16: 2sc, 1 dec, (5sc and 1 dec) x 5, 3sc……… (36 sts)
Round 17: (4sc, 1 dec) x 6………… (30 sts)
Round 18: (3sc, 1 dec) x 6 …….(24 sts)
Round 19: (2sc and 1 dec) x 6 ……..(18 sts)
Round 20: (1sc and 1 dec) x 6 ……….(12 sts)
Round 21: 6 dec (6 sts)

— SKIRT :

Round 1: 30sc;
Round 2: 30sc;
Round 3: 5sc, 6 inc, 9sc, 6 inc, 4sc (42 sts)
Round 4: 5sc, 1 inc, 2sc, 1 inc, 4sc, 1 inc, 2sc, 1 inc, 9sc, 1 inc, 2sc, 1 inc, 4sc, 1 inc, 2sc, 1 inc, 4sc. (50 sts)
Round 5: 5sc, 1 inc, 4sc, 1 inc, 4sc, 1 inc, 4sc, 1 inc, 9sc, 1 inc, 4sc, 1 inc, 4sc, 1 inc, 4sc, 1 inc, 4sc, (58 sts)
Round 6: 7sc, 1 inc, 4sc, 1 inc, 4sc, 1 inc, 4sc, 1 inc, 13sc, 1 inc, 4sc, 1 inc, 4sc, 1 inc, 4sc, 1 inc, 6sc (66 sts)
Round 7: 11sc, 1 inc, 3sc, 1 inc, 2sc, 1 inc, 3sc, 1 inc, 21sc, 1 inc, 3sc, 1 inc, 2sc, 1 inc, 3sc, 1 inc, 10sc (74 sts)
Round 8: 14sc, 1 inc, 3sc, 1 inc, 7sc, 1 inc, 3sc, 1 inc, 13sc, 1 inc, 3sc, 1 inc, 7sc, 1 inc, 3sc, 1 inc, 13sc (82 sts)
Round 9: 82sc blo;
Round 10: to 35: 82 sts. Cut the yarn and weave in the loose ends.

— Overskirt :

Round 1: 31sc.
Round 2: 31sc;
Round 3: 5sc, 6 inc, 9sc, 6 inc, 5sc (43 sts)
Round 4: 5sc, 1 inc, 2sc, 1 inc, 4sc, 1 inc, 2sc, 1 inc, 9sc, 1 inc, 2sc, 1 inc, 4sc, 1 inc, 2sc, 1 inc, 5sc (51 sts)
Round 5: 5sc, 1 inc, 4sc, 1 inc, 4sc, 1 inc, 4sc, 1 inc, 9sc, 1 inc, 4sc, 1 inc, 4sc, 1 inc, 4sc, 1 inc, 5sc (59 sts)
Round 6: 7sc, 1 inc, 4sc, 1 inc, 4sc, 1 inc, 4sc, 1 inc, 13sc, 1 inc, 4sc, 1 inc, 4sc, 1 inc, 4sc, 1 inc, 7sc. (67 sts)
Round 7: 11sc, 1 inc, 12sc, 1 inc, 18sc, 1 inc, 12sc, 1 inc, 11sc, 11sc (71 sts)
Round 8: 14sc, 1 inc, 10sc, 1 inc, 20sc, 1 inc, 10sc, 1 inc, 14sc (75sts)
Round 9: to 11 : skip the 1st stitch then make a single crochet in every stitch of the row until the last and finish with a sl.st Cut the yarn and weave in the loose thread. Now start at one end and work a row of crab stitch. If you are making the Lady in waiting in two colours, work a row of sl.sts on the row of starting chains.

— Dress Base :

Round 1: 6 inc (12 sts)
Round 2: (1sc, 1 inc) x 6 (18 sts)
Round 3: (2sc, 1 inc) x 6 (24 sts)
Round 4: (3sc, 1 inc) x 6 (30 sts)
Round 5: 5sc, 6 inc. 9sc, 6 inc. 4sc (42 sts)
Round 6: 5sc, 1 inc., 2sc, 1 inc, 4sc, 1 inc, 2sc, 1 inc, 9sc, 1 inc., 2sc, 1 inc, 4sc, 1 inc, 2sc, 1 inc, 4sc (50 sts)
Round 7: 5sc, 1 inc, 4sc, 1 inc. 4sc, 1 inc, 4 pb, 1 aum. 9sc, 1 inc, 4sc, 1 inc. 4sc, 1 inc, 4sc, 1 inc, 4sc (58 sts)
Round 8: 7sc, inc, 4sc, 1 inc, 4sc, 1 inc, 4sc, 1 inc, 13sc, 1 inc, 4sc, 1 inc, 4sc, 1 inc, 4sc, 1 inc, 6sc. (66 sts)
Round 9: 11sc, 1 inc, 3sc, 1 inc, 2sc, 1 inc, 3sc, 1 inc, 21sc, 1 inc, 3sc, 1 inc, 2sc, 1 inc, 3sc, 1 inc, 10sc (74 sts)
Round 10: 14sc, 1 inc, 3sc, 1 inc, 7sc, 1 inc, 3sc, 1 inc, 13sc, 1 inc, 3sc, 1 inc, 7sc, 1 inc, 3sc, 1 inc, 13sc (82 sts)
Round 11: 10sc, 4hdc, 1 inc.(hdc) 3hdc, 1 inc (hdc), 7hdc, 1 inc (hdc), 3hdc, 1 inc (sc), 20sc, 1 inc ( sc), 3hdc, 1 inc (hdc) 7hdc, 1 inc (hdc) 3hdc, 1 inc (hdc), 4hdc, 10sc. (90sts)
Round 12: 90sc. Cut the yarn and weave in the loose ends Lightly iron the base of the dress. Adjust the size of the cardboard to the base. The crochet base must be wider than that of the cardboard, so you can then sew it to the skirt easily. Pour some white glue into the cardboard and stick to the base. Let dry.

— HAIR :

Round 1: 6 inc, 1ch and turn (12 sts)
Round 2: (1sc, 1 inc) x 6 (18 sts)
Round 3: (2sc, 1 inc) x 6 (24 sts)
Round 4: (3sc, 1 inc) x 6 (30 sts)
Round 5: (4sc, 1 inc) x 6 (36 sts)
Round 6: (5sc, 1 inc) x 6 (42 sts)
Round 7: (6sc, 1 inc) x 6 (48 sts)
Round 8: 10sc ( 1 inc, 1sc) x 6, 11sc, ( 1 inc, 1sc) x 6, 3sc (60sts)
Round 9: 54sc The 6 unworked stitches will form the fringe.
Round 10: 1sc, 1 inc, 50sc, 1 inc, 1sc (56sts)
Round 11: 56sc;
Round 12: 1sc, 1 inc, 52sc, 1 inc, 1sc (58 sts)
Round 13: 58sc;
Round 14: 1sc, 1 inc, 48sc, 1 sl.st. ( 7 stitches remaining.) turn;
Round 15: Skip the 1st sl.st and make 42sc, - 1sl.st. (8 stitches remaining) turn;
Round 16: skip the 1st sl.st and make 48sc, - now work the sl.st that was skipped on the previous row - 1 inc, 1sc.
Round 17: 60sc and work the sl.st skipped on the previous row.
Round 18: 1sc, 1 inc, 48sc, 1sl.st. Turn. 9 stitches remaining;
Round 19: skip the 1st sl.st and work 40sc, 1sl.st. 10 stitches remaining.
Round 20: skip the 1st sl.st, 48sc, - now work the sl.st that was skipped on the previous row - 1 inc, 1sc.
Round 21: 62sc now work the sl.st that was skipped on the previous row;
Round 22: 1sc, 1inc, 58sc, 1 inc, 1sc.
Round 23: 64sc;
Round 24: 3 double decs, (2sc, 1 dec) x 11, 2sc, 3 double decs. 41 sts;
Round 25: 1 double decs, (1sc, 1 dec) x 11, 2sc, 1 double decs. Cut the yarn and weave in loose ends.

— Sleeve :

Round 1: 10sc;
Round 2: 10 inc (20 sts)
Round 3: 20sc;
Round 4: 20sc;
Round 5: (3sc, 1 dec) x 4 (16 sts)
Round 6: 16sc;
Round 7: (2sc, 1 dec) x 4 (12sts)
Round 8: to 20: 12sc Cut the yarn and weave in the starting thread. The thread at the end will be used to attach the sleeve to the body;

— LACE FOR THE NECKLINE :

Round 1: 35 sl.st.
Round 2: 35sc;
Round 3: (1sc, 1dc, 1sc in the same stitch, 1sl.st in the next stitch) repeat until the end of the row. Now with slip stitches position yourself at the height of the initial chain and make: *3ch, skip 1ch. and sl.st into the next stitch.*. Repeat from *a* until all the chain is covered. Weave in one of the loose ends, the other one will be use to sew it onto the body. BOW 10 ch. – The last 3 count as 1dc. Work 5 rows each with 7dc. Cut the yarn and weave in the ends. Wind a strand of yarn wind two or three times around the middle of the loop, to shape it. Us the same strand to sew it onto the hair.

— Collar :

Round 1: 12sc, 3sc in th same stitch, 12sc, 3sc in the same stitch, 12sc. 42 sts;
Round 2: 42sc.
Round 3: 13sc, 3sc in the same stitch, 14sc, 3sc in the same stitch, 13sc. 46 sts.
Round 4: 46sc. Close and weave in the loose ends. Keep the starting thread to sew onto the body.

Assembly Instructions

  1. Stuff each piece firmly before closing.
  2. Pin all parts in place and check the proportions against the photos.
  3. Sew parts on securely with matching yarn.
  4. Weave in all ends and shape the finished piece.

Important Notes

  • Pin all parts before assembly to ensure correct placement and symmetry across both figures.
  • Stuff the head and limbs gradually to avoid bulges; keep a light to moderate pressure and adjust as necessary while shaping.
  • Weave in your ends securely and hide tails within seam lines to prevent snagging in play or display.
  • Keep a dedicated space for organizing colors and pieces during the build to avoid mix-ups and misalignment.
  • Store finished pieces in a safe display area away from direct sunlight to preserve color and fiber integrity.

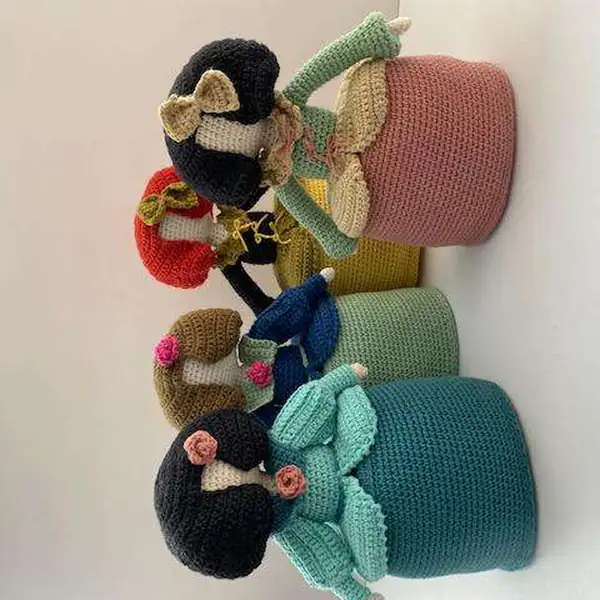
This pair of amigurumi ladies embodies timeless whimsy and careful craftsmanship. The two dress variations invite personalization and make a charming gift for a friend or crochet buddy. With thoughtful finishing, they become treasured keepsakes that spark stories every time they sit on a shelf. The pair offers joy to a child’s imagination or a loved one as a handmade keepsake, a gentle reminder that slowing down yields tangible warmth and memory.

Good to know

You ask, we answer

The dolls measure approximately 20 cm tall when made with the recommended Schachenmayr Organic Cotton and 2.5 mm hook.

Yes, you can, but final size and drape will change. Use a hook size that maintains a tight stitch to hold stuffing well.

This pattern is advanced, with multiple garment steps and detailed finishing. Basic amigurumi skills are helpful, plus patience for color changes and sewing.

Most crocheters dedicate 12-15 hours across several sessions, depending on experience and how meticulously you finish each step.

Hairpiece and lace neckline samples in progress
Join 100k+ crocheters

Get new free patterns, stitch tips and exclusive content in your inbox.