Download this free crochet pattern for the Super-Prickle amigurumi — full round-by-round instructions, materials, and assembly tips for a tactile 35 cm plush toy. Start today!
— Thumb :
Round 1: 6 SC in MR;
Round 2: 6 SC; - work a CH, fold in half and crochet the sides together with 3 SC; - fix and cut the thread.
Round 3: 6 SC; - work a CH, fold in half and crochet the sides together with 3 SC; - fix and cut the thread.
Round 4: 6 SC; - work a CH, fold in half and crochet the sides together with 3 SC; - fix and cut the thread.
Round 5: 6 SC; - work a CH, fold in half and crochet the sides together with 3 SC; - fix and cut the thread.
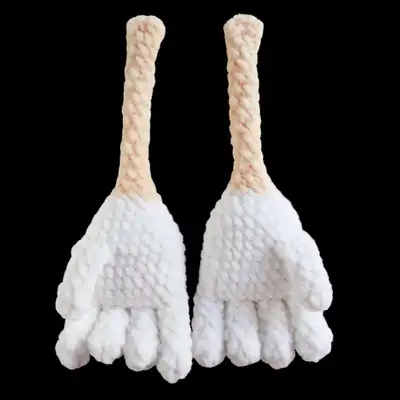
— All other fingers (except the thumb) :
Round 1: 6 SC in MR;
Round 2: 6 SC; - fix and cut the thread in 3 details; - when crocheting the last 4th detail, do NOT cut the thread and begin to join all 4 fingers; 1;
Round 3: 6 SC; - fix and cut the thread in 3 details; - when crocheting the last 4th detail, do NOT cut the thread and begin to join all 4 fingers; 1;
Round 4: 6 SC; - fix and cut the thread in 3 details; - when crocheting the last 4th detail, do NOT cut the thread and begin to join all 4 fingers; 1;
Round 5: 6 SC; - fix and cut the thread in 3 details; - when crocheting the last 4th detail, do NOT cut the thread and begin to join all 4 fingers; 1;
Round 6: 6 SC; - fix and cut the thread in 3 details; - when crocheting the last 4th detail, do NOT cut the thread and begin to join all 4 fingers; 1;
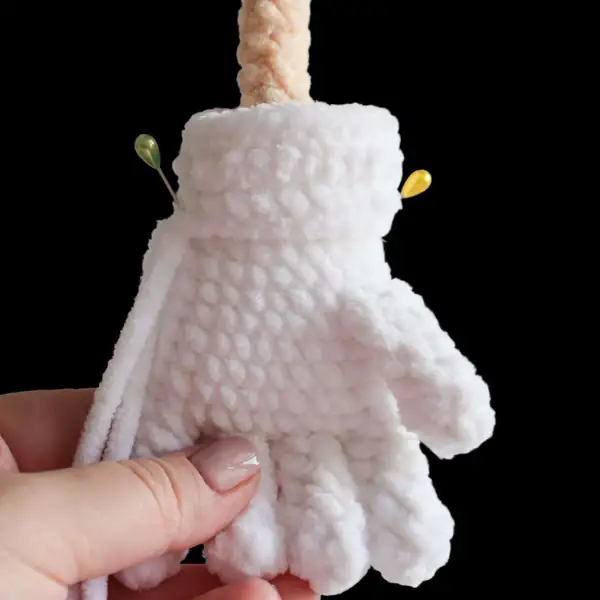
Round 7: 3 SC on the 1st finger, 3 SC on the 2nd finger, 3 SC on the 3d finger, 6 SC on the 4th finger, 3 SC on the 3d finger, 3 SC on the 2nd finger, 3 SC on the 1st finger (24);
Round 8: 24 SC; - in Rd 13 we attach the thumb; - to make sure that the finger is exactly in its place, fold the detail in half along all the fingers and shift the stitch marker to the next SC from the fold line;
Round 9: 24 SC; - in Rd 13 we attach the thumb; - to make sure that the finger is exactly in its place, fold the detail in half along all the fingers and shift the stitch marker to the next SC from the fold line;
Round 10: 24 SC; - in Rd 13 we attach the thumb; - to make sure that the finger is exactly in its place, fold the detail in half along all the fingers and shift the stitch marker to the next SC from the fold line;
Round 11: 24 SC; - in Rd 13 we attach the thumb; - to make sure that the finger is exactly in its place, fold the detail in half along all the fingers and shift the stitch marker to the next SC from the fold line;
Round 12: 24 SC; - in Rd 13 we attach the thumb; - to make sure that the finger is exactly in its place, fold the detail in half along all the fingers and shift the stitch marker to the next SC from the fold line;
Round 13: left arm: SC, 3 SC with the thumb, 20 SC (24);
Round 14: (10 SC, DEC)* 2 (22);
Round 15: (9 SC, DEC)* 2 (20);
Round 16: (3 SC, DEC)*4 (16);
Round 17: (2 SC, DEC)*4 (12);
Round 18: (4 SC, DEC)*2 (10);
Round 19: (3 SC, DEC)*2 (8);
Round 20: (2 SC, DEC)*2 (6);
Round 21: 6 SC; - (if needed) work several additional SCs so that the 1st finger was in one line with the fold line, when folded;
Round 22: 6 SC; - (if needed) work several additional SCs so that the 1st finger was in one line with the fold line, when folded;
Round 23: 6 SC; - (if needed) work several additional SCs so that the 1st finger was in one line with the fold line, when folded;
Round 24: 6 SC; - (if needed) work several additional SCs so that the 1st finger was in one line with the fold line, when folded;
Round 25: 6 SC; - (if needed) work several additional SCs so that the 1st finger was in one line with the fold line, when folded;
Round 26: 6 SC; - (if needed) work several additional SCs so that the 1st finger was in one line with the fold line, when folded;
Round 27: 6 SC; - (if needed) work several additional SCs so that the 1st finger was in one line with the fold line, when folded;
Round 28: 6 SC; - (if needed) work several additional SCs so that the 1st finger was in one line with the fold line, when folded;
Round 29: 6 SC; - (if needed) work several additional SCs so that the 1st finger was in one line with the fold line, when folded;
Round 30: 6 SC; - (if needed) work several additional SCs so that the 1st finger was in one line with the fold line, when folded;
Round 31: 6 SC; - (if needed) work several additional SCs so that the 1st finger was in one line with the fold line, when folded;
Round 32: 6 SC; - (if needed) work several additional SCs so that the 1st finger was in one line with the fold line, when folded;
— The edge of the glove :
Foundation: Chain 22;
Round 1: start in the 2nd chain from the hook: 21 SC;
Round 2: BLO: 21 SC;
Round 3: FLO: 21 SC; - fix the thread and leave a long end to sew;
— Part 4 :
Foundation: Chain 10; - work in spiral (without a turning CH and SS) as in all amigurumi toys (oval-shape detail);
Round 1: start in the 2nd chain from the hook: 8 SC, 3 into the last chain from the hook, on the other side: 7 SC, INC (20);
Round 2: INC, 7 SC, 3 INC, 7 SC, 2 INC (26);
Round 3: SC, INC, 7 SC, (SC, INC)*3, 7 SC, (SC, INC)*2 (32);
Round 4: (2 SC, INC)*2, 4 SC, (2 SC, INC)*3, 4 SC, (2 SC, INC)*3 (40);
Round 5: (3 SC, INC)*2, 4 SC, (3 SC, INC)*3, 4 SC, (3 SC, INC)*3 (48);
Round 6: BLO: 48 SC; - shift stitch marker to the middle of the heel (if needed);
Round 7: 20 SC, 4 DEC, 20 SC (44);
Round 8: 18 SC, 4 DEC, 18 SC (40);
Round 9: 16 SC, 4 DEC, 16 SC (36);
Round 10: 14 SC, 4 DEC, 14 SC (32);
Round 11: 12 SC, 4 DEC, 12 SC (28);
Round 12: 10 SC, 4 DEC, 10 SC (24);
Round 13: 8 SC, 4 DEC, 8 SC (20);
Round 14: 6 SC, 4 DEC, 6 SC (16);
Round 15: (6 SC, DEC)*2 (14);
Round 16: (5 SC, DEC)*2 (12);
Round 17: (4 SC, DEC)*2 (10);
Round 18: (3 SC, DEC)*2 (8);
Round 19: 8 SC (8)
Round 20: 8 SC (8)
Round 21: 8 SC (8)
Round 22: 8 SC (8)
Round 23: 8 SC (8)
Round 24: 8 SC (8)
Round 25: 8 SC (8)
Round 26: 8 SC (8)
Round 27: 8 SC (8)
Round 28: 8 SC (8)
Round 29: 8 SC (8)
Round 30: 8 SC (8)
Round 31: 8 SC (8)
Round 32: on the left leg: 8 SC, on the chain: 4 SC, on the right leg: 8 SC, on the chain: 4 SC (24);
Round 33: (3 SC, INC)*6 (30);
Round 34: 30 SC;
Round 35: (4 SC, INC)*6 (36);
Round 36: 36 SC;
Round 37: (5 SC, INC)*6 (42);
Round 38: 42 SC (42)
Round 39: 42 SC (42)
Round 40: 42 SC (42)
Round 41: 42 SC (42)
Round 42: 42 SC (42)
Round 43: 42 SC (42)
Round 44: (5 SC, DEC)*6 (36);
Round 45: 36 SC (36)
Round 46: 36 SC (36)
Round 47: (4 SC, DEC)*6 (30);
Round 48: 5 SC, 3 SC with the arm, 12 SC, 3 SC with the arm, 7 SC (30);
Round 49: 30 SC;
Round 50: (3 SC, DEC)*6 (24);
Round 51: (2 SC, DEC)*6 (18);
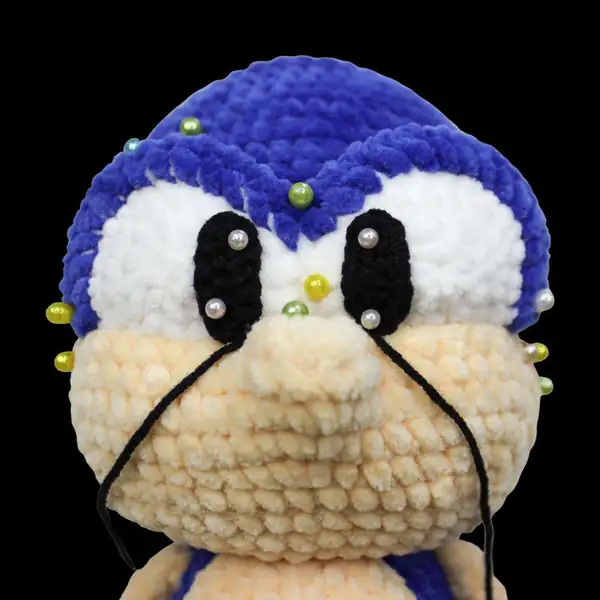
Round 52: (SC, INC)*9 (27); (the first Rd of the head)
Round 53: (2 SC, INC)*9 (36);
Round 54: (3 SC, INC)*9 (45);
Round 55: (4 SC, INC)*9 (54);
Round 56: (8 SC, INC)*6 (60);
Round 57: 60 SC (60)
Round 58: 60 SC (60)
Round 59: 60 SC (60)
Round 60: 60 SC (60)
Round 61: 60 SC (60)
Round 62: 60 SC (60)
Round 63: 60 SC (60)
Round 64: 60 SC (60)
Round 65: 60 SC (60)
Round 66: 60 SC (60)
Round 67: 60 SC (60)
Round 68: 60 SC (60)
Round 69: (8 SC, DEC)*6 (54);
Round 70: (7 SC, DEC)*6 (48);
Round 71: (6 SC, DEC)*6 (42);
Round 72: (5 SC, DEC)*6 (36);
Round 73: (4 SC, DEC)*6 (30);
Round 74: (3 SC, DEC)*6 (24);
Round 75: (2 SC, DEC)*6 (18);
Round 76: (SC, DEC)*6 (12);
Round 77: 6 DEC (6);
— Sneaker fastener :
Foundation: Chain 19;
Round 1: start in the 2nd chain from the hook: 18 SC;
Round 2: 18 SC; - fix the thread and leave a long end to sew; - sew on the sneakers on the sides; - tie the ends of the threads into a knot and hide them inside the foot.
— Upper edge of the sock :
Foundation: Chain 27;
Round 1: start in the 2nd chain from the hook: 26 SC;
Round 2: BLO: 26 SC;
Round 3: 26 SC;
Round 4: BLO: 26 SC;
Round 5: 26 SC; - fix the thread and leave a long end to sew; - wrap the detail around the leg so that the front loose loops of rows 1 and 3 are on the front side, and the start chain is on top; - carefully sew the edges of the detail without removing it from the leg; - the seam is performed in an upward direction;
— Part 7 :
Round 1: 6 SC in MR;
Round 2: 6 INC (12);
Round 3: (3 INC, 3 SC)*2 (18);
Round 4: (SC, INC)*3, 3 SC, (SC, INC)*3, 3 SC (24);
Round 5: (2 SC, INC)*3, 3 SC, (2 SC, INC)*3, 3 SC (30);
Round 6: (3 SC, INC)*3, 3 SC, (3 SC, INC)*3, 3 SC (36);
— Part 8 :
Foundation: Chain 16;
Round 1: start in the 2nd chain from the hook: 14 SC, 3 SC into the last chain from the hook, on the other side: 13 SC, INC (32);
Round 2: INC, 13 SC, 3 INC, 6 SC, 3 SC in the same St, 6 SC, 2 INC (40);
Round 3: SC, INC, 13 SC, (SC, INC)*3, 7 SC, 3 SC in the same St, 7 SC, (SC, INC)*2 (48);
Round 4: 2 SC, INC, 13 SC, (2 SC, INC)*3, 8 SC, 3 SC in the same St, 8 SC, (2 SC, INC)*2;
Round 5: 56 SC; - finish with a straight line; - fold the part in half inside out;
Round 6: 56 SC; - finish with a straight line; - fold the part in half inside out;
— Eye whites :
Round 1: 6 SC in MR;
Round 2: 6 INC (12);
Round 3: (3 INC, 3 SC)*2 (18);
Round 4: (SC, INC)*3, 3 SC, (SC, INC)*3, 3 SC (24);
— the eyelid according to the pattern :
Round 1: FLO: 28 SC, a turning CH, turn; 14 SC 14 SC;
Round 2: 28 SC, a turning CH, turn; - in Rd 3 we form a crease; - work SCs in Rd 3 together with back loops of the last Rd of the eye white;
Round 3: 28 SC + back loops of the last Rd of the eye white; - fix and cut the thread.
— Pupils :
Foundation: Chain 6;
Round 1: start in the 2nd chain from the hook: 4 SC, 3 SC into the last chain from the hook, on the other side: 3 SC, INC (12);
— Part 12 :
Round 1: 6 SC in MR;
Round 2: (SC, INC)*3 (9);
Round 3: 9 SC;
Round 4: (SC, DEC)*3 (6);
— Inner part :
Foundation: Chain 2;
Round 1: start in the 2nd chain from the hook: INC (2);
Round 2: INC, SC (3);
Round 3: INC, 2 SC (4);
Round 4: INC, 3 SC (5);
Round 5: INC, 4 SC (6);
Round 6: INC, 5 SC (7);
— Outer part + assembly :
Foundation: Chain 2;
Round 1: start in the 2nd chain from the hook: INC (2);
Round 2: INC, SC (3);
Round 3: INC, 2 SC (4);
Round 4: INC, 3 SC (5);
Round 5: INC, 4 SC (6);
Round 6: INC, 5 SC (7);
— Central upper prickle :
Round 1: 6 SC in MR;
Round 2: (SC, INC)*3 (9);
Round 3: (2 SC, INC)*3 (12);
Round 4: (3 SC, INC)*3 (15);
Round 5: (4 SC, INC)*3 (18);
Round 6: (5 SC, INC)*3 (21);
Round 7: (6 SC, INC)*3 (24);
Round 8: (7 SC, INC)*3 (27);
Round 9: (8 SC, INC)*3 (30);
Round 10: 30 SC; - work a CH, fold in half and crochet the sides together with 15 SC;
Round 11: 30 SC; - work a CH, fold in half and crochet the sides together with 15 SC;
Round 12: 30 SC; - work a CH, fold in half and crochet the sides together with 15 SC;
Round 13: 30 SC; - work a CH, fold in half and crochet the sides together with 15 SC;
Round 14: 30 SC; - work a CH, fold in half and crochet the sides together with 15 SC;
Round 15: 30 SC; - work a CH, fold in half and crochet the sides together with 15 SC;
Round 16: 30 SC; - work a CH, fold in half and crochet the sides together with 15 SC;
Round 17: 30 SC; - work a CH, fold in half and crochet the sides together with 15 SC;
Round 18: 30 SC; - work a CH, fold in half and crochet the sides together with 15 SC;
Round 19: 30 SC; - work a CH, fold in half and crochet the sides together with 15 SC;
Round 20: 30 SC; - work a CH, fold in half and crochet the sides together with 15 SC;
— Central middle and lower prickles :
Round 1: 6 SC in MR;
Round 2: (SC, INC)*3 (9);
Round 3: (2 SC, INC)*3 (12);
Round 4: (3 SC, INC)*3 (15);
Round 5: (4 SC, INC)*3 (18);
Round 6: (5 SC, INC)*3 (21);
Round 7: (6 SC, INC)*3 (24);
Round 8: (7 SC, INC)*3 (27);
Round 9: (8 SC, INC)*3 (30);
Round 10: 30 SC; - work a CH, fold in half and crochet the sides together with 15 SC;
Round 11: 30 SC; - work a CH, fold in half and crochet the sides together with 15 SC;
Round 12: 30 SC; - work a CH, fold in half and crochet the sides together with 15 SC;
Round 13: 30 SC; - work a CH, fold in half and crochet the sides together with 15 SC;
Round 14: 30 SC; - work a CH, fold in half and crochet the sides together with 15 SC;
Round 15: 30 SC; - work a CH, fold in half and crochet the sides together with 15 SC;
Round 16: 30 SC; - work a CH, fold in half and crochet the sides together with 15 SC;
Round 17: 30 SC; - work a CH, fold in half and crochet the sides together with 15 SC;
— Side prickles :
Round 1: 6 SC in MR;
Round 2: 2 SC, 2 INC, 2 SC (8);
Round 3: 2 SC, 4 INC, 2 SC (12);
Round 4: 12 SC;
Round 5: 4 SC, 4 INC, 4 SC (16);
Round 6: 16 SC;
Round 7: 6 SC, 4 INC, 6 SC (20);
Round 8: 20 SC;
Round 9: 8 SC, 4 INC, 8 SC (24);
Round 10: 24 SC;
Round 11: 11 SC, 2 INC, 11 SC (26);
Round 12: 12 SC, 2 INC, 12 SC (28);
Round 13: 28 SC; - if needed, work 1-2 additional SC so that when the detail is folded in half, it has a clear beveled acute angle; - work a CH, fold in half and crochet the sides together with 14 SC; - fix and cut the thread; - hide the thread inside the detail (if you crochet with a semi-cotton yarn, then we leave a long thread for sewing).
Round 14: 28 SC; - if needed, work 1-2 additional SC so that when the detail is folded in half, it has a clear beveled acute angle; - work a CH, fold in half and crochet the sides together with 14 SC; - fix and cut the thread; - hide the thread inside the detail (if you crochet with a semi-cotton yarn, then we leave a long thread for sewing).
Round 15: 28 SC; - if needed, work 1-2 additional SC so that when the detail is folded in half, it has a clear beveled acute angle; - work a CH, fold in half and crochet the sides together with 14 SC; - fix and cut the thread; - hide the thread inside the detail (if you crochet with a semi-cotton yarn, then we leave a long thread for sewing).
Round 16: 28 SC; - if needed, work 1-2 additional SC so that when the detail is folded in half, it has a clear beveled acute angle; - work a CH, fold in half and crochet the sides together with 14 SC; - fix and cut the thread; - hide the thread inside the detail (if you crochet with a semi-cotton yarn, then we leave a long thread for sewing).
Round 17: 28 SC; - if needed, work 1-2 additional SC so that when the detail is folded in half, it has a clear beveled acute angle; - work a CH, fold in half and crochet the sides together with 14 SC; - fix and cut the thread; - hide the thread inside the detail (if you crochet with a semi-cotton yarn, then we leave a long thread for sewing).
Round 18: 28 SC; - if needed, work 1-2 additional SC so that when the detail is folded in half, it has a clear beveled acute angle; - work a CH, fold in half and crochet the sides together with 14 SC; - fix and cut the thread; - hide the thread inside the detail (if you crochet with a semi-cotton yarn, then we leave a long thread for sewing).
Round 19: 28 SC; - if needed, work 1-2 additional SC so that when the detail is folded in half, it has a clear beveled acute angle; - work a CH, fold in half and crochet the sides together with 14 SC; - fix and cut the thread; - hide the thread inside the detail (if you crochet with a semi-cotton yarn, then we leave a long thread for sewing).
Round 20: 28 SC; - if needed, work 1-2 additional SC so that when the detail is folded in half, it has a clear beveled acute angle; - work a CH, fold in half and crochet the sides together with 14 SC; - fix and cut the thread; - hide the thread inside the detail (if you crochet with a semi-cotton yarn, then we leave a long thread for sewing).
— Side prickles :
Round 1: 6 SC in MR;
Round 2: 2 SC, 2 INC, 2 SC (8);
Round 3: 3 SC, 2 INC, 3 SC (10);
Round 4: 4 SC, 2 INC, 4 SC (12);
Round 5: 5 SC, 2 INC, 5 SC (14);
Round 6: 6 SC, 2 INC, 6 SC (16);
Round 7: 7 SC, 2 INC, 7 SC (18);
Round 8: 18 SC; - if needed, work 1-2 additional SC so that when the detail is folded in half, it has a clear beveled acute angle; - work a CH, fold in half and crochet the sides together with 9 SC; - fix and cut the thread; - hide the thread inside the detail (if you crochet with a semi-cotton yarn, then we leave a long thread for sewing).
Round 9: 18 SC; - if needed, work 1-2 additional SC so that when the detail is folded in half, it has a clear beveled acute angle; - work a CH, fold in half and crochet the sides together with 9 SC; - fix and cut the thread; - hide the thread inside the detail (if you crochet with a semi-cotton yarn, then we leave a long thread for sewing).
Round 10: 18 SC; - if needed, work 1-2 additional SC so that when the detail is folded in half, it has a clear beveled acute angle; - work a CH, fold in half and crochet the sides together with 9 SC; - fix and cut the thread; - hide the thread inside the detail (if you crochet with a semi-cotton yarn, then we leave a long thread for sewing).
Round 11: 18 SC; - if needed, work 1-2 additional SC so that when the detail is folded in half, it has a clear beveled acute angle; - work a CH, fold in half and crochet the sides together with 9 SC; - fix and cut the thread; - hide the thread inside the detail (if you crochet with a semi-cotton yarn, then we leave a long thread for sewing).
Round 12: 18 SC; - if needed, work 1-2 additional SC so that when the detail is folded in half, it has a clear beveled acute angle; - work a CH, fold in half and crochet the sides together with 9 SC; - fix and cut the thread; - hide the thread inside the detail (if you crochet with a semi-cotton yarn, then we leave a long thread for sewing).
— Small lower prickle :
Round 1: 6 SC in MR;
Round 2: 3 SC, INC, 2 SC (7);
Round 3: 3 SC, INC, 3 SC (8);
Round 4: 8 SC;
Round 5: 3 SC, 2 INC, 3 SC (10);
Round 6: 4 SC, 2 INC, 4 SC (12);
Round 7: 5 SC, 2 INC, 5 SC (14);
Thank you for choosing Super-Prickle — a tactile, characterful amigurumi designed to bring a handmade smile to your shelf and your hands.
This pattern balances sculpted features with soft plush textures and includes clear guidance for placement, tightening and finishing so your toy looks professional and full of personality.
I hope the making process gives you bright moments and a delightful finished piece to gift or display.