Crochetologist
Free Crochet Pattern
Beautiful Detailed Adorable

Snake Slythie Amigurumi Pattern

Green Slythie snake amigurumi close-up eye detail
4.0Rating
8-10 HoursTime
IntermediateSkill
Highlights

What makes it special

Made with Love

An adorable friend to cherish, handcrafted with love to bring comfort and joy for years to come.

All-Day Adventure

An immersive, multi-session build that rewards patience with a playful reptile friend you’ll be proud to display and gift.

Intermediate Level

This amigurumi suits crafters who enjoy working in the round, mastering color changes with jacquard technique, and adding lightweight wire for poseable limbs while maintaining a soft, squeezable finish.

Imagine a small, serpentine companion that is as clever as it is cuddly, ready to perch on a shelf or accompany a favorite reader to story time. This Snake Slythie amigurumi brings a hint of Gryffindor-like courage and Slytherin whimsy into one pocket-sized creature. It’s the kind of project you can pick up between chores, and the moment you finish the scarf and crest, you’ll feel a true sense of accomplishment. The design emphasizes contrast stripes, micro detailing, and the playful idea of a tiny magical locket, which makes the finish feel extra collectible. If you love characters with personality, you’ll adore how this little snake comes to life through color, texture, and a subtle wink of character.

Whether you’re crocheting for a friend who adores Harry Potter lore or for a sibling who loves unusual stuffed animals, this pattern is a delightful choice. It blends technique with storytelling, inviting you to craft a tiny hero that children will want to cuddle and grownups will want to display. The moment you tie on the finishing touches—eyes, tongue, and the miniature crest—you’ll see the transformation from yarn to a personality with zing and charm.

About This Snake Slythie Amigurumi Pattern

This adorable amigurumi snake brings a sly wink of wizarding mischief into your crochet bag. You’ll enjoy the rhythmic ease of rounds around a soft core, the tactile joy of striped detailing, and the delightful final pose when you dress him in a tiny scarf and crest. It’s a charming gift for fans of strategic color-work and characterful plush toys alike, perfect for intermediate crocheters who relish a small but satisfying project.

With clear, step-by-step shaping and a touch of whimsy, this snake becomes a keepsake that can be treasured for years. You’ll smile every time you pick him up and sew on the last gleaming stitch.

Snake Slythie begins with a muzzle and a two-part head that are joined to create a friendly face, followed by the long body built in jacquard style using three colors for a striped effect. The project requires careful color changes, a lightweight wire for head stability, and a tiny locket and crest to accessorize the creature. It culminates with a scarf and a crest, giving the snake a playful, Hogwarts-inspired look. The pattern guides you through intricate seamwork and careful stuffing to keep the form rounded yet flexible, ensuring a soft but expressive finish. You’ll experience a satisfying rhythm as you crochet, change colors, and stitch the features into place, step by step.

Snake Slythie with striped body and scarf

Crafting this amigurumi teaches you practical technique: from invisible color changes to precise eye placement and careful embroidery for facial details. The design intentionally balances intricate texture with approachable shaping so that intermediate crocheters feel challenged but not overwhelmed. The included accessories—locket, house crest, and scarf—offer opportunities to personalize and extend the story of your Slythie, making it a perfect keepsake or a unique gift for a friend who loves magical creatures. As you progress, you’ll discover how small adjustments in tension and stuffing shape the final silhouette, reminding you that patience yields a charming, durable, and cuddly toy.

Stitches & Skills You'll Use

The core stitches are basic crochet rounds, but the real magic comes from the jacquard color-changing technique that threads yarn A and yarn B through a single row to create a two-tone effect without cutting. You’ll also employ an invisible color change: when the last stitch of the green section is completed, you twist and pull in the gray thread to finish the stitch, making the join nearly seamless. The muzzle and head involve careful two-piece assembly, with the pieces stitched from inside to outside to form a cohesive facial structure. You’ll embroider delicate features with black mouline, finalize the look with a tiny tongue in red, and incorporate a subtle mouth line to give the snake a friendly expression. Finally, you’ll weave in the tail ends and attach the locket and crest as a whimsical nod to the house motif.

Safety considerations are present: the wire inside the neck demands cautious insertion and secure wrapping with electrical tape for stability, while the eyes are fixed with a traditional safety method to prevent accidental removal. The finishing phase includes stuffing to a light, springy density so that the snake feels plush but resilient. I’ve found that maintaining even tension during color changes is key to avoiding lumps along the body’s stripe pattern.

As you work, you’ll notice the momentum builds around rounds that require back-loop-only stitching in some sections and front-loop focus in others, a technique that preserves a clean stripe edge and a consistent silhouette. The torso’s gradual increase and taper are a joy to shape, giving the snake a natural, sinuous look when posed with the head upright or curled for display. The scarf and crest sections provide extra opportunities to personalize texture, stitch density, and color balance, allowing you to tailor Slythie to your own sense of style.

Why You'll Love This Snake Slythie Amigurumi Pattern

I fell in love with Snake Slythie because it merges a traditional amigurumi form with a playful, game-inspired flair. I adore watching the jacquard color-work come alive as the green and gray threads slide across the rounds, creating a subtle yet striking striped effect. The moment you sew on the tiny crest and tongue, the character’s personality blooms, and it becomes clear why this design holds up as a favorite in my collection.

I appreciate how the head’s expression can be tuned with the positioning of eyes and embroidery lines, letting you give your Slythie a mischievous grin or a gentle, loyal gaze. This pattern feels like a small theatre of crochet—every round a new scene, every finish a standing ovation.

Colour & Yarn Inspiration

The color palette is open to exploration. A neon-green and charcoal combination creates a futuristic reptile that pops under bright lighting, while a seafoam-green with sand-slate stripe yields a calmer, ocean-adjacent creature. If you prefer a classic look, deep greens with a black nose and white accents on the eyes can give Slythie a more traditional amigurumi feel. For a seasonal twist, try a red-and-green stripe for a festive vibe, or a purple-and-lavender scheme for a whimsical, fairy-tolk-inspired friend. Substituting yarn weights changes the scale as well—thicker yarn yields a chunkier friend with a more robust presence, whereas thinner yarn keeps the model delicate and collectable. When you switch colors, keep the stripe sequence consistent to preserve the character’s recognizability.

Consider using a variegated yarn for the main body to create natural variation, then pick a solid color for the crest and scarf to maintain a focal point. If you use metallic yarn for the locket or crest detail, maintain a low-contrast background to keep the design readable. Remember that lighting plays a role; in a gallery setting, soft warm light can deepen the greens and grays, while cool daylight may sharpen the stripes for a crisp, modern look. The key is to maintain balance so the character remains friendly and legible from a distance.

Overall poseable snake with head tilted

Switch Things Up

I love how versatile this pattern becomes when you experiment with color palettes and yarn textures. You can swap the three core colors for a brighter carnival snake or for a more subdued, forest-tone Slythie. I recently explored a metallic-thread version for the locket and crest, which added a touch of shimmer without overpowering the yarn’s softness. If you want a more plush finish, try a slightly bulkier yarn while keeping the same hook size to maintain proportion, but expect a chunkier roundness to the body’s midsection. I also like to create a tiny, removable scarf so the creature can keep cozy without changing its own fabric integrity; it’s a small detail, but it elevates the display quality.

Should you want more poseability, I’ve experimented with adding a light wire through the neck and tail regions, wrapped firmly in tape and secured with a couple of extra slip stitches—this preserves flexibility while preventing any sharp bends. For texture play, a subtle surface slip-stitch over the back stripe can add a tactile ripple that catches the light differently as you rotate the snake. And if you’re gifting, consider pairing your Slythie with a miniature Hogwarts banner or a tiny fabric scroll that ties into the crest motif. The possibilities here are surprisingly broad for a small amigurumi piece.

Another idea is to personalize the eyes with tiny safety beads or felt cutouts to match a friend’s favorite color. If you want an even softer feel, substitute a plushier inners for the stuffing or adjust the stuffing density to produce a more pillowy effect. You can also tailor the length by adjusting the number of rows in the body, while still preserving the jacquard stripe. Finally, don’t hesitate to try alternative finishing details—glossy beads for a magical locket or a stitched “S” emblem on the front—these little touches can transform your Slythie into a one-of-a-kind heirloom.

Ways to Use & Gift It

Give Snake Slythie as a personalized companion for a friend who loves fantasy stories or for a child beginning a journey into collecting handmade creatures. It’s a thoughtful welcome-to-a-new-room gift or a small achievement reward after finishing a big crochet project. The locket and crest provide built-in display options, making the piece a charming desk buddy or shelf guardian. For a graduation or birthday surprise, pair Slythie with a handwritten note about the house crest—an easy, heartwarming way to celebrate imagination and craft. The scale is perfect for gifting because the finished toy is compact, cute, and highly collectible, with a story that can evolve with every accessory you add or color swap you imagine.

In a home decor context, Slythie can be displayed with other mythical animals or as part of a cozy reading nook, migrating between shelves and bedsides to brighten the daily routine. You can also use the scarf as an interchangeable prop, enabling you to re-theme the figure for different holidays or seasons. The snake’s locket offers a fun magnet for a mini treasure collection—fill it with tiny beads or charms to reflect the receiver’s interests. As a keepsake, Slythie travels well, stays lightweight, and has that instantly endearing charm that makes crocheted creatures feel like old friends you want to hug again and again.

Common Mistakes & How to Fix Them

Losing your stitch count — place a marker at the start of each round. Working too loosely, which lets the stuffing show through the fabric. Forgetting to stuff firmly before closing a piece. Sewing parts on before pinning and checking the proportions.

Maker's Notes

When I made this project, I used sport weight yarn in three colors and a 1.75 mm hook. It took about 9 hours across 3 sessions, with the jacquard sections being the most time-consuming. Beginners stumble at color changes and the neck insertion, so I suggest marking starting stitches and keeping a steady hand during assembly.

The wire adds support but must be wrapped and taped securely to avoid poking through the fabric. Eye placement matters; use a pin at the start of each round to keep them aligned. Stuffing should be firm but not overly tight to maintain the stripes’ crisp look.

I tried a substitution: I tested substituting a DK weight yarn with a 2.0 mm hook; the snake grew to about 9 cm tall and 38 cm long, losing some of the tight stripe definition. The jacquard effect remained visible but softened because of the looser fabric. Reverting to sport weight with the original hook preserved the intended proportions and texture. I also tried a softer stuffing; it slightly reduces stiffness while maintaining the plush feel. The locket maintained its shape when using metallic threads, though the finishing seam required a fine needle for accuracy. Overall, the substitution demonstrates pattern resilience with minor scale changes.

Snake Slythie Amigurumi Pattern

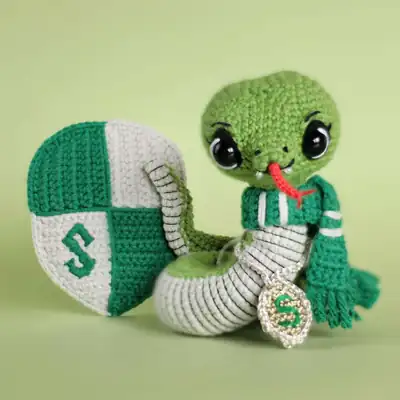
Make the Snake Slythie amigurumi with our free crochet pattern—step-by-step rounds, materials and tips. Perfect for fans of magical creatures and intermediate crocheters.

Intermediate 8-10 Hours
Pattern at a glance
Skill level
Intermediate
Time to make
8-10 Hours
Hook size
1.75 mm (A) and 1.5 mm for small details
Yarn weight
Sport / #2
Finished size
Approximately 11 cm tall in sitting position; 32 cm long when expanded
Gauge
1.0 in (2.5 cm) square = 8 SC x 8 ROWS (approx.)
Yarn used
Total main-color yarn: ~150-180 m; three 160 m skeins used across colors A, B, C

Materials Needed

Main Fabric
  • 01
    YarnArt Jeans Sport weight (12 wpi) - A: Green (color 69) 160 m/50 g
  • 02
    YarnArt Jeans Sport weight - B: Pink/Lavender (color 49) 160 m/50 g
  • 03
    YarnArt Jeans Sport weight - C: Green (color 52) 160 m/50 g
Tools Required
  • 01
    Hook 1.75 mm (A) for snake
  • 02
    Hook 1.5 mm (for tongue and locket)
  • 03
    10 mm safety eyes
  • 04
    Black, white and red mouline threads
  • 05
    Black thread for facial detailing
  • 06
    Black felt
  • 07
    White beads (2 pcs for teeth)
  • 08
    Needle for sewing and embroidery
  • 09
    Yarn needle (thick blunt-ended)
  • 10
    Scissors
  • 11
    Pins/markers
  • 12
    Polyester stuffing
  • 13
    Aluminum wire, 2 mm diameter (approx 25 cm) for the head/neck
  • 14
    Electrical tape
  • 15
    Super Glue Moment for securing small details

— Snake :

Round 1: 5 loops, turning, 4sc (starting from the 2nd loop from the hook), 4sc (from the back of the chain) (8l)
Round 2: only through back loops [sc, inc]х4 (12l)
Round 3: 12sc, sl st in the 1st sc (12l)

— follows below :

Round 2: [sc, inc]х6 (18l)
Round 3: [2sc, inc]х6 (24l)
Round 5: crochet around [5sc, inc]х6 (42l)
Round 6: [6sc, inc]х6 (48l)
Round 7: 48 sc (48l)
Round 8: 48 sc (48l)
Round 10: crochet 24sc on the head, crochet 6sc on the muzzle, crochet 18sc on the head (48l).
Round 11: 48 sc (48l)
Round 12: 48 sc (48l)
Round 13: 48 sc (48l)
Round 14: 9sc, [sc, dec]x6, [dec, sc]x6, 3sc (36l)

— Muzzle :

Round 1: 9 loops, turning, 8 sl st (starting from the 2nd loop from the hook) (8l)

— Closing :

Round 15: 9sc, [dec]x12, 3sc (24l)

— Head :

Round 41: . Insert the wire ring to the head opening. Crochet and fix the wire on six points to the head – every 4th sc, crocheting the next round.

— Eyes :

Round 16: 24sc (24l)
Round 17: 9sc, [sc, dec]x2, [dec, sc]x2, 3sc (20l)

— Body :

Round 46: . Then the green thread is thrown forward, and the grey working thread goes backwards. To change the color back: when crocheting the last grey sc, insert the hook into the loop, pull out the thread, crochet this sc to the end with the green thread. It is more convenient to crochet with the jacquard only the front of the body, and the back should only be crocheted from yarn A. At the end of the row, when crocheting the last green sc, insert the hook into the loop, pull out the thread, crochet this sc to the end with a grey thread grabbing it in the place where it remained. A «loose stitch» is formed on the wrong side. You need to move it forward along with the green thread, so when crocheting jacquard it will be inside and the wrong side will become as neat as the front one.

— Tongue :

Round 18: only through back loops 10sc (Yarn А); 8sc (Yarn B); 2sc (Yarn A) (20l)
Round 19: 10sc (Yarn А); 8sc (Yarn B); 2sc (Yarn A) (20l)
Round 20: 10sc (Yarn А); 8sc (Yarn B); 2sc (Yarn A) (20l)
Round 21: 10sc (Yarn А); 8sc (Yarn B); 2sc (Yarn A) (20l)
Round 22: 10sc (Yarn А); 8sc (Yarn B); 2sc (Yarn A) (20l)
Round 23: 10sc (Yarn А); 8sc (Yarn B); 2sc (Yarn A) (20l)
Round 24: 7sc, inc, 2sc (Yarn А); 7sc, inc (Yarn B); 2sc (Yarn A) (22l)
Round 25: 11sc (Yarn А); 9sc (Yarn B); 2sc (Yarn A) (22l)
Round 26: 11sc (Yarn А); 9sc (Yarn B); 2sc (Yarn A) (22l)
Round 27: 11sc (Yarn А); 9sc (Yarn B); 2sc (Yarn A) (22l)
Round 28: 8sc, inc, 2sc (Yarn А); 8sc, inc (Yarn B); 2sc (Yarn A) (24l)
Round 29: 12sc (Yarn А); 10sc (Yarn B); 2sc (Yarn A) (24l)
Round 30: 12sc (Yarn А); 10sc (Yarn B); 2sc (Yarn A) (24l)
Round 31: 12sc (Yarn А); 10sc (Yarn B); 2sc (Yarn A) (24l)
Round 32: 12sc (Yarn А); 10sc (Yarn B); 2sc (Yarn A) (24l)
Round 33: 12sc (Yarn А); 10sc (Yarn B); 2sc (Yarn A) (24l)
Round 34: 12sc (Yarn А); 10sc (Yarn B); 2sc (Yarn A) (24l)
Round 35: 12sc (Yarn А); 10sc (Yarn B); 2sc (Yarn A) (24l)
Round 36: 12sc (Yarn А); 10sc (Yarn B); 2sc (Yarn A) (24l)
Round 37: 12sc (Yarn А); 9sc, inc (Yarn B); dec (Yarn A) (24l)
Round 38: 12sc (Yarn А); 11sc (Yarn B); sc (Yarn A) (24l)
Round 39: 12sc (Yarn А); 11sc (Yarn B); sc (Yarn A) (24l)
Round 40: 12sc (Yarn А); 11sc (Yarn B); sc (Yarn A) (24l)
Round 41: 12sc (Yarn А); 11sc (Yarn B); sc (Yarn A) (24l)
Round 42: 12sc (Yarn А); 11sc (Yarn B); sc (Yarn A) (24l)
Round 43: 12sc (Yarn А); 11sc (Yarn B); sc (Yarn A) (24l)
Round 44: 12sc (Yarn А); 12sc (Yarn B) (24l)
Round 45: 12sc (Yarn А); 12sc (Yarn B) (24l)
Round 46: 12sc (Yarn А); 12sc (Yarn B) (24l)
Round 47: 12sc (Yarn А); 12sc (Yarn B) (24l)
Round 48: 12sc (Yarn А); 12sc (Yarn B) (24l)
Round 49: 12sc (Yarn А); 12sc (Yarn B) (24l)
Round 50: 12sc (Yarn А); 12sc (Yarn B) (24l)
Round 51: 12sc (Yarn А); 12sc (Yarn B) (24l)
Round 52: 12sc (Yarn А); 12sc (Yarn B) (24l)
Round 53: 12sc (Yarn А); 12sc (Yarn B) (24l)
Round 54: 12sc (Yarn А); 12sc (Yarn B) (24l)
Round 55: 12sc (Yarn А); 12sc (Yarn B) (24l)
Round 56: 12sc (Yarn А); 12sc (Yarn B) (24l)
Round 57: 12sc (Yarn А); 12sc (Yarn B) (24l)
Round 58: 12sc (Yarn А); 12sc (Yarn B) (24l)
Round 59: 12sc (Yarn А); 12sc (Yarn B) (24l)
Round 60: 12sc (Yarn А); 12sc (Yarn B) (24l)
Round 61: 12sc (Yarn А); 12sc (Yarn B) (24l)
Round 62: 12sc (Yarn А); 12sc (Yarn B) (24l)
Round 63: 12sc (Yarn А); 12sc (Yarn B) (24l)
Round 64: 12sc (Yarn А); 12sc (Yarn B) (24l)
Round 65: 12sc (Yarn А); 12sc (Yarn B) (24l)
Round 66: 12sc (Yarn А); 12sc (Yarn B) (24l)
Round 67: 12sc (Yarn А); 12sc (Yarn B) (24l)
Round 68: 12sc (Yarn А); 12sc (Yarn B) (24l)
Round 69: 12sc (Yarn А); 12sc (Yarn B) (24l)
Round 70: 12sc (Yarn А); 12sc (Yarn B) (24l)
Round 71: 12sc (Yarn А); 12sc (Yarn B) (24l)
Round 72: 12sc (Yarn А); 12sc (Yarn B) (24l)
Round 73: 12sc (Yarn А); 12sc (Yarn B) (24l)
Round 74: 12sc (Yarn А); 12sc (Yarn B) (24l)
Round 75: 12sc (Yarn А); 12sc (Yarn B) (24l)
Round 76: dec, 10sc (Yarn А); dec, 10sc (Yarn B) (22l)
Round 77: 11sc (Yarn А); 11sc (Yarn B) (22l)
Round 78: 11sc (Yarn А); 11sc (Yarn B) (22l)
Round 79: dec, 9sc (Yarn А); dec, 9sc (Yarn B) (20l)
Round 80: 10sc (Yarn А); 10sc (Yarn B) (20l)
Round 81: 10sc (Yarn А); 10sc (Yarn B) (20l)
Round 82: dec, 8sc (Yarn А); dec, 8sc (Yarn B) (18l)
Round 83: 9sc (Yarn А); 9sc (Yarn B) (18l)
Round 84: 9sc (Yarn А); 9sc (Yarn B) (18l)
Round 85: dec, 7sc (Yarn А); dec, 7sc (Yarn B) (16l)
Round 86: 8sc (Yarn А); 8sc (Yarn B) (16l)
Round 87: 8sc (Yarn А); 8sc (Yarn B) (16l)
Round 88: dec, 6sc (Yarn А); dec, 6sc (Yarn B) (14l)
Round 89: 7sc (Yarn А); 7sc (Yarn B) (14l)
Round 90: 7sc (Yarn А); 7sc (Yarn B) (14l)
Round 91: dec, 5sc (Yarn А); dec, 5sc (Yarn B) (12l)
Round 92: 6sc (Yarn А); 6sc (Yarn B) (12l)
Round 93: 6sc (Yarn А); 6sc (Yarn B) (12l)
Round 94: dec, 4sc (Yarn А); dec, 4sc (Yarn B) (10l)
Round 95: 5sc (Yarn А); 5sc (Yarn B) (10l)
Round 96: 5sc (Yarn А); 5sc (Yarn B) (10l)
Round 97: dec, 3sc (Yarn А); dec, 3sc (Yarn B) (8l)
Round 98: 4sc (Yarn А); 4sc (Yarn B) (8l)
Round 99: 4sc (Yarn А); 4sc (Yarn B) (8l)
Round 100: dec, 2sc (Yarn А); dec, 2sc (Yarn B) (6l)

— Locket :

Round 1: 3 loops, turning, 2sc (2l)
Round 2: 1 loop, turning, [inc]x2 (4l)
Round 3: 1 loop, turning, inc, 2sc, inc (6l)
Round 4: 1 loop, turning, 6sc (6l)
Round 5: 1 loop, turning, 6sc (6l)
Round 6: 1 loop, turning, 6sc (6l)
Round 7: 1 loop, turning, dec, 2sc, dec (4l)
Round 8: 1 loop, turning, [dec]x2 (2l)
Round 9: 1 loop, turning, 2sc (2l)
Round 10: 8sc down, 2sc straight, 8sc up, 2sc straight, sl st in 1st sc (20l)

— House Crest :

Round 2: 1 loop, turning, 9sc (9l)
Round 3: 1 loop, turning, 8sc, inc (10l)
Round 4: 1 loop, turning, 10sc (10l)
Round 5: 1 loop, turning, 9sc, inc (11l)
Round 6: 1 loop, turning, 11sc (11l)
Round 7: 1 loop, turning, 10sc, inc (12l)
Round 8: 1 loop, turning, 12sc (12l) Change the thread to Yarn C. To get a beautiful line when changing color in the next round crochet the sc in this way - half of the sc with grey thread, and the other half with green (Yarn B + Yarn C), -87.
Round 9: 1 loop, turning, 12sc (12l) Change the thread to Yarn C. To get a beautiful line when changing color in the next round crochet the sc in this way - half of the sc with grey thread, and the other half with green (Yarn B + Yarn C), -87.
Round 10: 1 loop, turning, 12sc (Yarn B + Yarn С) (12l)
Round 15: 1 loop, turning, 10sc, dec (11l)
Round 16: 1 loop, turning, 11sc (11l)
Round 17: 1 loop, turning, 9sc, dec (10l)
Round 18: 1 loop, turning, 10sc (10l)
Round 19: 1 loop, turning, 8sc, dec (9l)
Round 20: 1 loop, turning, 9 sl st (9l)
Round 21: 10sc (Yarn C + Yarn B), 10 sc (Yarn B + Yarn C) (20l) Cut the Yarn B.
Round 22: 1 loop, turning, 10sc (Yarn C), 10sc (Yarn B)* (20l)
Round 23: 1 loop, turning, 10sc (Yarn B), 10sc (Yarn C) (20l)
Round 24: 1 loop, turning, 10sc (Yarn C), 10sc (Yarn B) (20l)
Round 25: 1 loop, turning, 10sc (Yarn B), 10sc (Yarn C) (20l)
Round 26: 1 loop, turning, 10sc (Yarn C), 10sc (Yarn B) (20l)
Round 27: 1 loop, turning, 10sc (Yarn B), 10sc (Yarn C) (20l)
Round 28: 1 loop, turning, dec, 8sc (Yarn C), 8sc, dec (Yarn B) (18l)
Round 29: 1 loop, turning, dec, 7sc (Yarn B), 7sc, dec (Yarn C) (16l)
Round 30: 1 loop, turning, dec, 6sc (Yarn C), 6sc, dec (Yarn B) (14l)
Round 31: 1 loop, turning, dec, 5sc (Yarn B), 5sc, dec (Yarn C) (12l)
Round 32: 1 loop, turning, dec, 4sc (Yarn C), 4sc, dec (Yarn B) (10l)
Round 33: 1 loop, turning, dec, 3sc (Yarn B), 3sc, dec (Yarn C) (8l)
Round 34: 1 loop, turning, dec, 2sc (Yarn C), 2sc, dec (Yarn B) (6l)
Round 35: 1 loop, turning, dec, sc (Yarn B), sc, dec (Yarn C) (4l)
Round 36: 1 loop, turning, dec (Yarn C), dec (Yarn B) (2l)
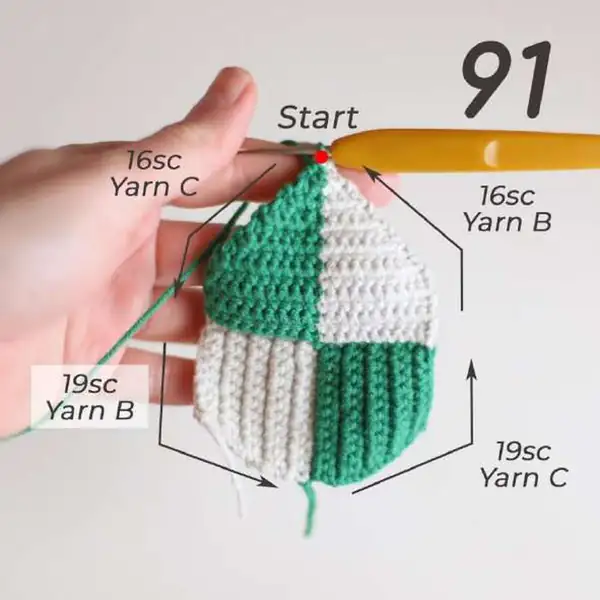
Round 37: 1 loop, turning, dec. Next crochet the detail around the perimeter in a counter- clockwise direction from the point "Start" using jacquard technique for changing color – 16sc (Yarn C), 19sc (Yarn B), 19sc (Yarn C), 16sc, sl st in the 1st dec (Yarn B) (71l)

— Locket (Bonus) :

Round 1: 5 loops, turning, 4sc (4l)
Round 2: 1 loop, turning, 4sc (4l) Cut 8 strands of Yarn C 6 cm (2.4 inches) long for the fringe. Fix the threads with a hook at both edges of the scarf and trim the fringe with scissors to the same length.

Assembly Instructions

  1. Stuff each piece firmly before closing.
  2. Pin all parts in place and check the proportions against the photos.
  3. Sew parts on securely with matching yarn.
  4. Weave in all ends and shape the finished piece.

Important Notes

  • Work in a continuous spiral unless a round says otherwise.
  • Stitch counts are given at the end of each round — check them as you go.
  • Stuff firmly and evenly for a smooth finish.
  • Use a stitch marker to track the beginning of each round.

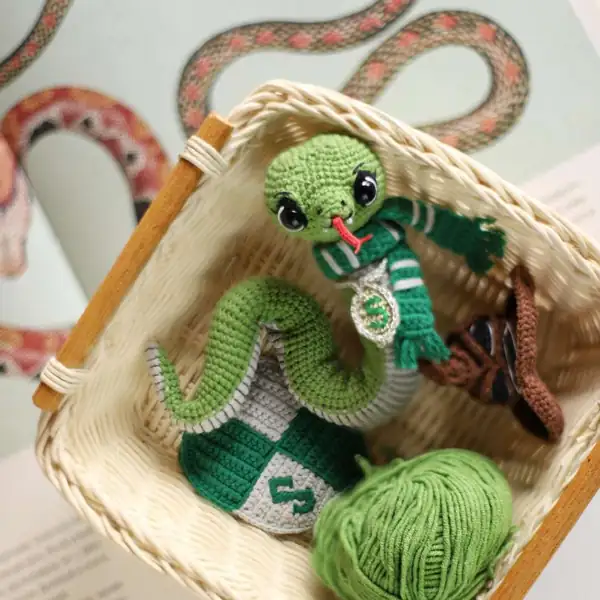
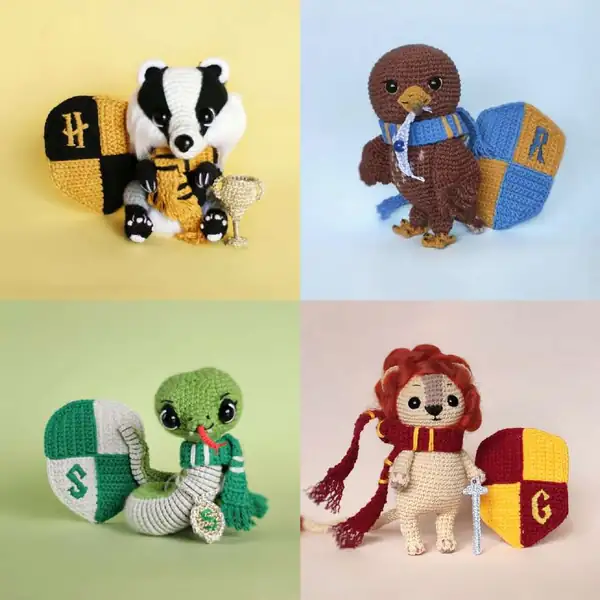
This tiny serpent is more than a toy; it’s a portal to creativity and storytelling. The Slythie pattern invites you to curate a little world around a magical friend, complete with a crest and locket that hint at adventures yet to come. Every stitch holds a memory of time spent crafting something handmade with care. May your hooks stay bright and your yarns stay soft as you bring this character to life.

Good to know

You ask, we answer

The finished amigurumi snake measures approximately 11 cm tall when sitting, about 32 cm long when laid flat in its expanded state, and roughly proportionate to the jacquard-striped body when posed. The overall footprint reflects the head-to-tail balance and the added width from the scarf and crest.

Yes, you can experiment with other weights, but expect size changes. Lighter yarns will yield a smaller snake with a finer stripe, while bulkier yarns will enlarge the overall silhouette and increase stuffing requirements. Adjust the hook size accordingly to preserve the proportions and texture.

This pattern is best suited for an intermediate crocheter who is comfortable with working in the round, performing color changes, and executing a few more delicate assembly steps like inserting the wire and shaping the head. A calm, methodical approach will help you master the jacquard color technique and produce a polished finish.

Most crocheters complete the project in 8-10 hours, distributed over several sessions. Time varies with your pace, how tightly you crochet, and how meticulously you position the eyes and accessories. Beginners may take longer as they practice color changes and careful seaming.

Locket and crest accessories for Slythie
Join 100k+ crocheters

Get new free patterns, stitch tips and exclusive content in your inbox.