Crochetologist
Free Crochet Pattern
Beautiful Detailed Adorable

Pusheen Cat with Ice Cream Amigurumi Pattern

Pusheen cat amigurumi with ice cream accessory in soft grey colors
4.6Rating
6-8 HoursTime
IntermediateSkill
Highlights

What makes it special

Made with Love

An adorable friend to cherish, handcrafted with love to bring comfort and joy for years to come.

Weekend Treat

Takes about 6 to 8 hours, making it ideal for a weekend crafting stretch or two relaxed evening sessions that end with a finished, friendly amigurumi.

Intermediate Level

This project suits crocheters who are comfortable working in the round, making increases and decreases, performing color changes, and sewing small parts with careful alignment to maintain balanced proportions.

Imagine a cuddly Pusheen perched on your bookshelf, nibbling an ice cream cone and radiating whimsy. This amigurumi pattern captures the cat’s iconic shape with a soft, squeezable body and tiny paws that grip the cone just right. It’s a design that feels charmingly modern while using classic crochet techniques you’ll come back to again and again. The moment you finish sewing on the ears and eyes, you’ll be rewarded by the gentle smile that forms in the silent choreography of stitches. It’s a perfect gift for cat fans, dessert lovers, or anyone who cherishes a thoughtful handmade toy.

Whether you’re a veteran amigurumi maker or returning after a crafty pause, you’ll appreciate the clean silhouette created by a one-piece head-and-body build, paired with a playful ice cream accessory that anchors the scene. The color palette invites personal choice—from soft pastels to punchy cartoon hues—so you can tailor the vibe to your room, desk, or gifting style. Gather your starting tail, slip the hook into the yarn, and let the process unfold as you crochet toward a soft, huggable friend that sparks smiles wherever it sits.

About This Pusheen Cat with Ice Cream Amigurumi Pattern

At its core, this project blends an adorable character with a comforting prop to create a tiny scene you can place on a desk or shelf. The pattern uses continuous rounds to keep fabric tight and uniform, with simple color changes to render the ice cream scoop and cherry topping in playful contrast. The head and body are shaped in one piece for structural integrity, while ears, arms, and tail are added later to preserve overall symmetry. The ice cream cone is a separate component that slots into the paws, transforming a basic amigurumi into a small, interactive tableau.

You’ll manage multiple yarn colors without sacrificing tension by working in consistent rounds, stuffing evenly and pausing to position small parts before sewing. Expect magic ring starts, steady increases in each round, invisible decreases for a neat finish, and color changes at color-change boundaries that remain subtle. The finish lands with aligned eyes and ears that evoke the classic Pusheen look, while the coned dessert sits naturally in the paws. The result is a soft, friendly toy that pairs well with a mug, a book, or a cozy corner on a desk shelf.

Close-up of Pusheen head and tiny ears in progress

The construction rewards careful assembly and a playful sense of color. A simple cone and a bright cherry transform an otherwise ordinary feline form into a charming character with a narrative moment. The project is approachable for a wide range of crafters, offering room to experiment with color placement and accessory positioning. With practical tips for securing parts and tidying yarn tails, you’ll finish with more than a toy—you’ll finish with confidence, experience, and a story to share about a handmade friend.

Ultimately, the pattern celebrates patient, deliberate crochet that yields big character in a compact size. It’s ideal for a family crochet session, a desk-side gift, or a whimsical addition to a yarn-loving friend’s collection. The sense of accomplishment comes not just from finishing, but from knowing you’ve created something with personality, charm, and a gentle sense of humor—Pusheen, with ice cream, in plush, crocheted form.

Stitches & Skills You'll Use

Key technique notes that anchor this design lie in disciplined round work and thoughtful placement of small parts. Begin with a magic ring or foundation chain and join to form a tight starting circle, then build outward with even increases to maintain a spherical torso. Maintain tension consistency by using the same hook and yarn weight for all rounds, and avoid adding extra loosening in the early rounds that can lead to a misshapen head. Color changes are kept clean by carrying the working yarn along the inside of the work when possible, and by securing the old color with a few tiny stitches before trimming and continuing with the new shade. When you shape the ears and paws, pause to pin them in place so you can verify alignment in relation to eyes and mouth before sewing, ensuring symmetry that reads as intentional character rather than improvised placement.

As the ice cream cone appears, the workflow shifts to a compact, sturdy motif. The cone is worked or assembled separately and then attached to the paws, with stuffing adjusted to keep the cone firm yet not bulging. Attention to proportion is key—keep the cone length balanced with the head, and verify that the scoop sits on top with a natural tilt toward the Pusheen’s grin. Finally, a gentle smoothing of the surface with careful finishing and weaving of tails hides ends and preserves a clean exterior that reads well from any angle.

Why You'll Love This Pusheen Cat with Ice Cream Amigurumi Pattern

This pattern invites you to slow down and enjoy the rhythm of stitching that builds a tiny, beloved scene. The one-piece head-and-body approach streamlines assembly, reducing seams and giving you a clean silhouette you can admire as you work. The ice cream prop adds a playful focal point that invites display possibilities, from a desk corner to a cozy shelf vignette. The design encourages color exploration—swap hues to reflect a mood, a season, or a favorite character, all while preserving the proportions that keep the Pusheen likeness intact.

What stays with you after you finish is a quiet sense of satisfaction: a soft, squeezable friend that holds its shape, a confident practice in color changes and round counting, and a tiny story you can tell with a glint of stitched eyes and a smiling mouth. The project offers a dependable routine for crochet lovers who crave steady progress and a tangible, huggable result. It’s the kind of making that suits weekend downtime and giftgiving alike, turning a spare afternoon into a heartfelt treasure.

Colour & Yarn Inspiration

When building color stories for this character, start from the baseline: a warm grey for the body, and a softer contrasting shade for the ice cream scoop. For a traditional look, keep the cone in a sandy or tan tone and choose a cherry-red accent for the topping. If you’d like the palette to read as modern and fresh, pair cool greys with mint, lavender, or pink for a springtime vibe. For a playful, high-contrast look, select saturated jewel tones—emerald, royal blue, and hot pink—kept within a cohesive range to preserve the cat-like silhouette. Don’t forget to carry color changes neatly and secure tails to the inside as you complete each element so seams stay tidy and unobtrusive.

Finished Pusheen with ice cream posing on a clean surface

Switch Things Up

Color is your first and most accessible tool for changing the mood of this Pusheen. Try a pastel palette for a soft, dreamy cat, or pair vivid primaries for a bold, cartoony look. A single shade swap on the ice cream cone can transform the dessert from chocolate to strawberry or pistachio without altering the structure of the piece. If you crave a larger version, choose a heavier weight yarn and proportionally scale up the hook size, then recalculate rounds to preserve the same proportions. A different stuffing density can produce a firmer toy or a squishier feel, depending on your preference for pose and durability.

Embroidery or lasered facial features can be adjusted for expression—cheeky, sweet, or shy—by repositioning the mouth and eyes after pinning and before sewing. For a sturdier toy, opt for firmer stuffing and slightly tighter body rounds to sustain a plump silhouette under play. Stage a tiny photo set with an ice-cream shop backdrop to showcase the finished Pusheen in social posts, or create a simple vignette on your desk with a clay-formed prop to anchor the scene. Before starting, test a small swatch in your chosen colorway to confirm tension and density, ensuring the main project will translate as intended.

Ways to Use & Gift It

Give this Pusheen with Ice Cream as a desk-side companion for colleagues, students, or family members who enjoy whimsy with a sense of craft. Pair it with a favorite mug or a small book as a complete gift set, or tuck the toy into a gift bag with a handwritten note that explains the scene you created. A little plush friend can brighten a workspace, a bedside table, or a classroom corner, inviting the recipient to pause and smile at the handmade effort involved. If you want a ready-made moment, photograph the Pusheen in a cozy setup and add a personal card that references the ice-cream cone scene to extend the sentiment beyond the hook.

Common Mistakes & How to Fix Them

Overtightening the stitches around the magic ring can create a stiff starting circle; loosen slightly to allow smooth rounds and even fabric. Skipping color-change transitions at the exact moment of switching yarn can create visible seams; pause to secure the old color and carefully start the new hue. Failing to mark the first stitch of each round may lead to misalignment of eyes and ears; place a stitch marker at the starting point and move it up as you progress. Stuffing too firmly can distort the round shape and compress facial features; add stuffing gradually, paying attention to the overall silhouette and symmetry.

Maker's Notes

Gauges shift with yarn type, but you can lock in a dependable size by crochet a quick swatch and comparing it to a target: measure the diameter of a worked round and ensure it stays within a millimeter or two of your standard gauge. For this project, a typical DK weight yields a mid-sized amigurumi when paired with the recommended hook. Mark the start of each round with a stitch marker to prevent miscounts, then stuff gradually to preserve roundness as you work toward the neck and head. A slightly looser ring at the magic circle helps maintain an open center while still forming a rounded silhouette, and you’ll want to clip ties neatly as you go to hide ends and avoid bulk through the seams.

I tried a substitution: The substitution described uses a lighter lace-weight pink for the ice cream scoop while maintaining the same DK body yarn and cone. The change yields a more delicate, airy scoop and a slightly smaller overall footprint, requiring a touch more stuffing to keep the silhouette balanced. Expect a minor shift in scale, so adjust one or two rounds to close the gap between the head and the ice cream. The key is to balance density with tension across the new material, ensuring the yarn still reads as Pusheen with Ice Cream even with the softer substitute.

Pusheen Cat with Ice Cream Amigurumi Pattern

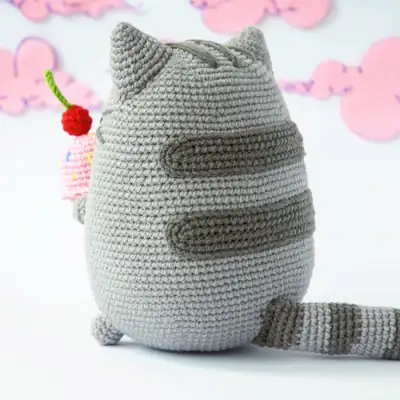
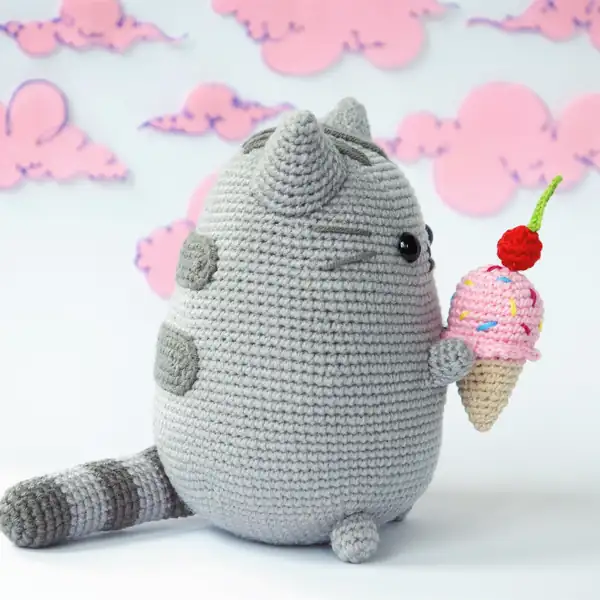
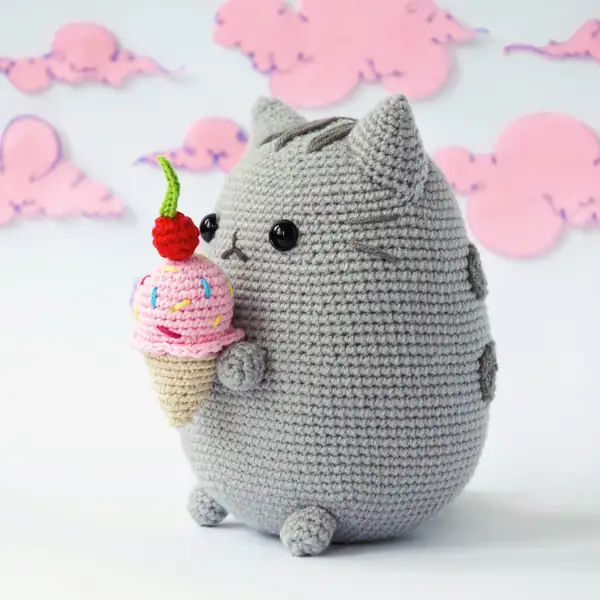
Make a delightful Pusheen with Ice Cream amigurumi using our free crochet pattern. Full rounds, materials, and assembly guidance included. Start crocheting now!

Intermediate 6-8 Hours
Pattern at a glance
Skill level
Intermediate
Time to make
6-8 Hours
Hook size
3.5 mm (E)
Yarn weight
DK / #3
Finished size
Approx. 17 cm tall / 6.7 in
Gauge
Approximately 6 stitches and 6 rounds per 2 cm (3.5 mm hook on DK weight); gauge not critical but helps consistency
Yarn used
Main color ~100-150 g; secondary colors ~30-60 g total

Materials Needed

Main Fabric
  • 01
    Yarn in the colors: dark grey, light grey; for ice cream: light brown, rosé, red, green
  • 02
    Yarn strength: DK / light worsted; weight #3
  • 03
    Embroidery thread: black or dark grey for nose & mouth; optional
  • 04
    Embroiderer’s thread recommended for whiskers
  • 05
    Safety eyes: 12 mm
  • 06
    Hook: 3.5 mm (E)
Tools Required
  • 01
    Crochet hook size 3.5 mm (E)
  • 02
    Scissors
  • 03
    Yarn needle for sewing
  • 04
    Stitch markers
  • 05
    Pins for alignment
  • 06
    Polyester stuffing
  • 07
    Embroidery needle
  • 08
    Safety eyes 12 mm

— Head/Body :

Round 1: 6 sc in magic ring (6)
Round 2: 2 sc in each stitch around (12)
Round 3: (1 sc, inc) x6 (18)
Round 4: (2 sc, inc) x6 (24)
Round 5: (3 sc, inc) x6 (30)
Round 6: (4 sc, inc) x6 (36)
Round 7: (5 sc, inc) x6 (42)
Round 8: (6 sc, inc) x6 (48)
Round 9: (7 sc, inc) x6 (54)
Round 10: (8 sc, inc) x6 (60)
Round 11: (9 sc, inc) x6 (66)
Round 12: (10 sc, inc) x6 (72)
Round 13: (11 sc, inc) x6 (78)
Round 14: (12 sc, inc) x6 (84)
Round 15: (13 sc, inc) x6 (90)
Round 16: (14 sc, inc) x6 (96)
Round 17: sc around (96)
Round 18: sc around (96)
Round 19: sc around (96)
Round 20: sc around (96)
Round 21: sc around (96)
Round 22: sc around (96)
Round 23: sc around (96)
Round 24: sc around (96)
Round 25: sc around (96)
Round 26: sc around (96)
Round 27: sc around (96)
Round 28: sc around (96)
Round 29: sc around (96)
Round 30: sc around (96)
Round 31: 14 sc, invdec (90)
Round 32: sc around (90)
Round 33: sc around (90)
Round 34: sc around (90)
Round 35: sc around (90)
Round 36: (13 sc, invdec) x6 (84)
Round 37: sc around (84)
Round 38: sc around (84)
Round 39: sc around (84)
Round 40: sc around (84)
Round 41: (12 sc, invdec) x6 (78)
Round 42: sc around (78)
Round 43: sc around (78)
Round 44: (11 sc, invdec) x6 (72)
Round 45: sc around (72)
Round 46: sc around (72)
Round 47: sc around (72)
Round 48: sc around (72)
Round 49: (10 sc, invdec) x6 (66)
Round 50: (9 sc, invdec) x6 (60)
Round 51: (8 sc, invdec) x6 (54)
Round 52: (7 sc, invdec) x6 (48)
Round 53: (6 sc, invdec) x6 (42)
Round 54: (5 sc, invdec) x6 (36)
Round 55: (4 sc, invdec) x6 (30)
Round 56: (3 sc, invdec) x6 (24)
Round 57: (2 sc, invdec) x6 (18)
Round 58: (1 sc, invdec) x6 (12)
Round 59: invdec around (6)

— Ears (2X) :

Round 1: 6 sc in magic ring (6)
Round 2: (1 sc, inc) x3 (9)
Round 3: sc around (9)
Round 4: (1 sc, inc) x3, 3 sc (12)
Round 5: (1 sc, inc) x6 (18)
Round 6: sc around (18)
Round 7: (1 sc, inc) x6, 6 sc (24)
Round 8: sc around (24)
Round 9: (2 sc, inc) x6, 6 sc (30)

— Smaller stripe :

Round 1: ch 26, beginning in second ch from hook 25 sc, ch1, turn;
Round 2: 25 sc, ch 1, turn;
Round 3: 25 sc, (inc) x3, 22 sc, (inc) x3, slst (60)

— Bigger stripe :

Round 1: ch 29, beginning in second ch from hook 28 sc, ch 1, turn;
Round 2: 29 sc, ch 1, turn;
Round 3: 27 sc, (inc) x3, 26 sc, (inc) x3, 1 sc, slst (67)

— Hands/Feet (X4) :

Round 1: 6 sc in magic ring (6)
Round 2: 2 sc in each stitch around (12)
Round 3: sc around (12)
Round 4: sc around (12)

— Tail :

Round 4: sc around (12)
Round 5: sc around (12)
Round 6: sc around (12)
Round 7: sc around (12)

— Ice Cream :

Round 7: sc around (12)
Round 8: sc around (12)
Round 9: sc around (12)
Round 10: sc around (12)
Round 11: sc around (12)
Round 12: sc around (12)
Round 13: sc around (12)
Round 14: sc around (12)
Round 15: sc around (12)
Round 16: sc around (12)
Round 17: sc around (12)
Round 18: sc around (12)

— Cherry :

Round 1: 6 sc in magic ring (6)
Round 2: 2 sc in each stitch around (12)
Round 3: sc around (12)
Round 4: sc around (12)
Round 5: (1 sc, invdec) x3, 3 sc (9) Stuff.

— Assembly :

Round 1: 6 sc in magic ring (6)
Round 2: 2 sc in each stitch around (12)
Round 3: (1 sc, inc) x6 (18)
Round 4: (2 sc, inc) x6 (24)
Round 5: (3 sc, inc) x6 (30)
Round 6: sc around (30)
Round 7: sc around (30)
Round 8: sc around (30)
Round 9: sc around (30)
Round 10: sc around (30)
Round 11: (3 sc, invdec) x6 (24)
Round 12: in FLO: [(hdc + sc)* x3, slst in next stitch, skip one stitch] repeat around *in same stitch;
Round 13: in BLO sc around (24)
Round 14: Sc around (24)
Round 15: Sc around (24)
Round 16: (3 sc, invdec) x5 (20)
Round 17: sc around (20)
Round 18: (2 sc, invdec) x5 (16)
Round 19: sc around (16)
Round 20: (1 sc, invdec) x5 (10)
Round 21: sc around (10)
Round 22: Invdec around (5)

— Part 10 :

Round 1: 6 sc in magic ring (6)
Round 2: 2 sc in each stitch around (12)
Round 3: sc around (12)
Round 4: sc around (12)

— Closing :

Round 4: invdec around (6)

Assembly Instructions

  1. Attach head to body by aligning the neck and sewing with a whip stitch, ensuring a smooth seam and stable connection.
  2. Position ears on top of the head between rounds 5 and 9 for balanced symmetry, then stitch in place firmly.
  3. Place arms on the sides of the body between rounds 12 and 14, angling slightly forward for a natural pose before sewing.
  4. Sew legs to the bottom of the body, spacing evenly to help the toy sit upright.
  5. Insert the ice cream cone into the paws, securing with a few stitches so it stays in place during handling.
  6. Embroider facial features between the eyes using dark grey or black embroidery thread and a fine backstitch for crisp lines.

Important Notes

  • Use stitch markers to keep track of rounds during color changes and shaping sections.
  • Stuff gradually, ensuring the head remains round and not flattened by excess stuffing near the neck.
  • Weave in ends as you go to prevent loose tails from peeking through the seams.
  • Align all parts before sewing; take time to test-fit ears and paws for the proper balance.

This charming Pusheen with Ice Cream invites you to slow down and savor the stitching, ending in a soft, huggable friend with a playful dessert prop that sparks conversation and smiles. It sits as a gentle reminder that handmade time is time well spent, ready to brighten a desk, shelf, or bedside table.

Good to know

You ask, we answer

The finished amigurumi measures approximately 17 cm tall when using the recommended DK yarn and hook size.

Yes. To resize, select a different weight yarn and proportionally adjust the hook size and round counts to preserve the same proportions.

This pattern is rated intermediate; basic knowledge of crochet stitches, color changes, and sewing small parts is recommended for best results.

Most crocheters finish in about 6-8 hours, depending on experience, pace, and how many color changes you attempt.

Ice cream cone prop held by crocheted paws
Join 100k+ crocheters

Get new free patterns, stitch tips and exclusive content in your inbox.