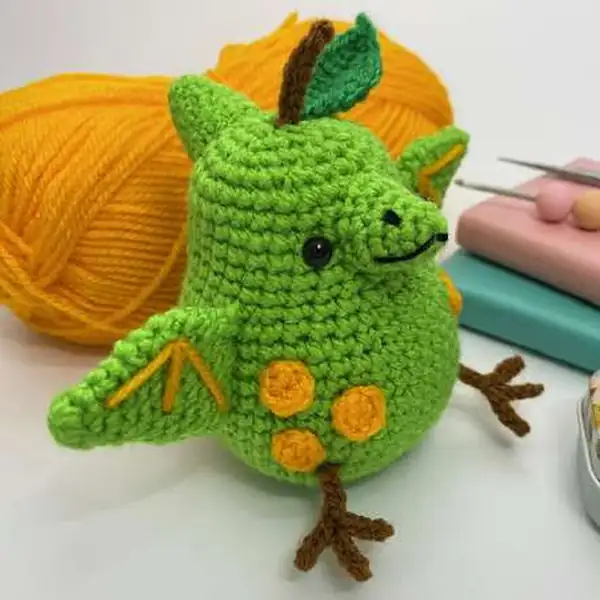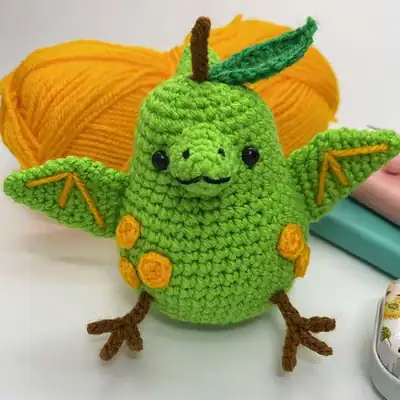
About This Pearodactyl Amigurumi Pattern
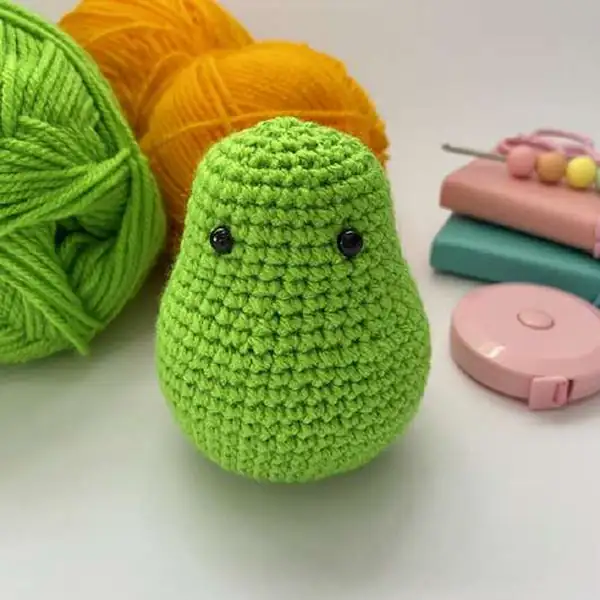
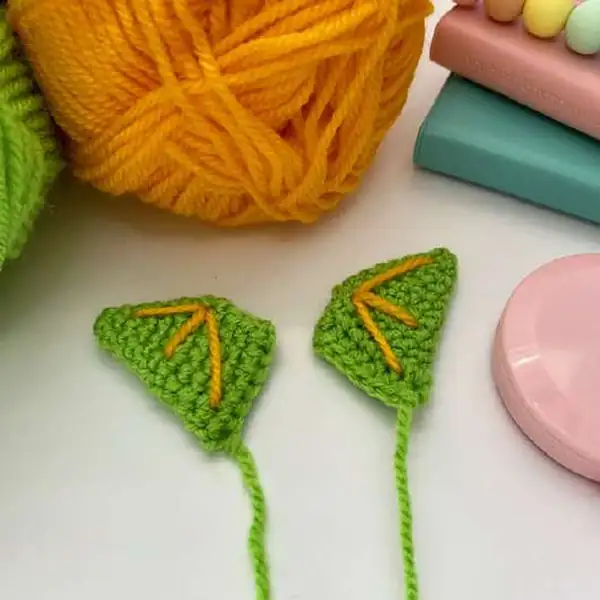
In this little amigurumi, a pear shaped body meets a dragon’s cheeky charm to create a toy you’ll want to cuddle and display. The main Grass Green body uses DK yarn to achieve a soft, matte finish, while Sunshine spots add playful sparkle along the back and belly to echo a sunlit orchard. The Gingerbread limbs and stem bring contrast and scale, so Pearodactyl reads as both fruit and creature at a glance. The pattern is designed for a finished height of approx. 11 cm, perfect for tiny hands and shelf sized decor. I use a magic ring to start the head, then round and round shaping to form a rounded snout, wide cheeks, and a gentle curve down to a plump torso. Three dimensional limbs are tucked into the body with a touch of invisible seam work, and I finish with two 6 mm safety eyes, a small embroidered mouth, and careful stuffing to keep the shape responsive but not too stiff. The overall technique stays within DK yarns and a 2.5 mm hook, with attention to BLO for the body surface to minimize gaps and keep everything snug.
This Pearodactyl Amigurumi Pattern is designed for intermediate crocheters who enjoy clean shaping and precise colorwork. You’ll begin with a magic ring to anchor the head, then work in rounds that balance curvature and size as you add the body. Increases and decreases create the pear like contour, while BLO and FLO techniques define surface texture and tuck the shaping into a compact silhouette. The color sequence—Grass Green for the main body, Sunshine for spots, and Gingerbread for limbs and stem—keeps the character readable while preserving the friendly toy like feel that makes this a staple in any amigurumi collection.
As you stitch, you’ll notice Pearodactyl’s limbs are joined toward the torso with careful seam work. The head, neck, and belly are built as a single unit through a consistent rhythm of rounds, so the transitions stay smooth when you sew pieces together. The eyes sit with safety hardware at the sides of the head, and the mouth is embroidered with black thread to give a tiny, friendly grin without adding bulk. Finishing includes a measured amount of stuffing to keep a springy pose, and a final touch of invisible seam work to seal joins. The pattern relies on common amigurumi techniques—slip stitches to close, tight invisible decreases, and careful tension—to keep Pearodactyl compact at roughly 11 cm tall while remaining sturdy enough for little play.
Careful tension, consistent stitch counts, and the occasional stitch marker help keep Pearodactyl's signature pear shape from collapsing as you work. If you’re inclined to improvise, you can tweak the main color or switch the accent spots for a seasonal look, all while preserving the essential proportions that give this amigurumi its character. The instructions include a straightforward key for MR, SC, INC, DEC, FLO, BLO, and CH so you can translate the design into your preferred crochet language. With patience and a few sneaky finishing touches, this free Pearodactyl Amigurumi Pattern becomes a dependable template you’ll return to for years of tiny green charm.
Color flexibility makes the Pearodactyl Amigurumi Pattern a repeatable project in your crochet repertoire. The palette used here—Grass Green as the main body, Sunshine for spots, and Gingerbread for limbs and stem—creates that bright, friendly look, but you can swap in any DK-weight greens, yellows, and browns to suit your yarn shelf or gift recipient. When you change brands or base fibers, you may see a small difference in height, so I always recommend a quick gauge swatch and a test piece to confirm you’ll land near the 11 cm target. If you opt for a heavier or lighter DK, adjust your hook to preserve the round head, airy belly, and sturdy limbs. Yardage will shift too: plan on roughly 60-90 g of main color and 20-40 g of accents as a starting point, then round up if you’re adding extra spots or making the limbs longer. This is a pattern that rewards thoughtful substitutions without losing Pearodactyl’s distinctive pear shape and playful charm.
Beyond yarn, you can experiment with safety eyes or switch to embroidered eyes for a softer look, and you can place the eyes slightly higher or lower to create different expressions. If you’re avoiding plastic components, you can anchor the eyes with stitches and skip the safety pieces, although I recommend the standard 6 mm security eyes for reliability in play. The same approach applies to stuffing: firm yet forgiving, using standard polyester fill behind the limbs, but you can adjust the amount to create a more squishy or more solid feel. I also like to personalize Pearodactyl with tiny felt cheeks or a stitched belly button for extra character. These tweaks help you tailor the amigurumi to gift recipients, seasonal themes, and display settings, while staying true to the overall shape and proportions that define the Pearodactyl pattern.