Crochetologist
Free Crochet Pattern
Beautiful Detailed Adorable

My Little Husky Amigurumi Pattern

Close-up of gray Husky amigurumi head in progress
4.7Rating
8-12 HoursTime
IntermediateSkill
Highlights

What makes it special

Made with Love

An adorable friend to cherish, handcrafted with love to bring comfort and joy for years to come.

Slow & Steady

This 10-12 hour journey is ideal for savoring each step, from colorwork transitions to precise placement of eyes and limbs, spread over several crochet sessions.

Intermediate Level

This pattern is suited to crocheters who enjoy color changes, working in the round, invisible decreases, and careful seaming to fuse multiple pieces into a convincing, cuddly Husky amigurumi. The construction emphasizes careful proportioning, steady tension, and thoughtful assembly rather than any advanced or mythical technique. While approachable for those who have completed beginner projects, it rewards patience and attention to detail with a finished figure that reads as a polished, play-ready character.

My Little Husky is a fluffy, cuddly amigurumi designed for makers who adore plush textures and cheerful character design. Crafted in plush chenille yarn, this project blends colorwork, shaping, and careful assembly into a tiny canine friend that brightens desks, shelves, and gift baskets alike. If you’re seeking a prop for a photo shoot or a steady, satisfying build, this Husky fits the bill with its friendly face and huggable body.

About This My Little Husky Amigurumi Pattern

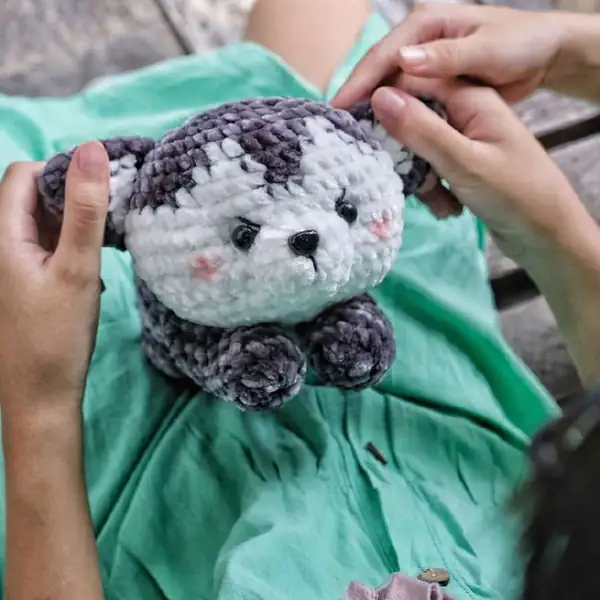
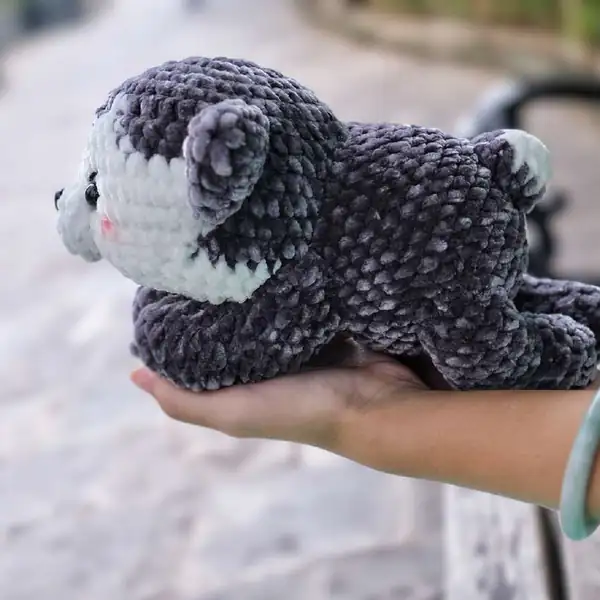
My Little Husky is a soft, cuddle-worthy amigurumi built from plush chenille yarn in Gray and White. The pattern comprises a head, body, two arms, two legs, two ears, a muzzle, and a tail, each crocheted in the round and joined with careful sewing to form a friendly canine figure. Color placement mimics a Husky’s markings, and Safety Eyes add character while keeping the plush appearance smooth and safe. The overall vibe emphasizes a sturdy silhouette and a tactile, huggable finish that adults and kids alike will reach for again and again.

White Husky amigurumi face with safety eyes

The process weaves texture, form, and expression together: you’ll start with a base shape in Gray and White, crochet the facial details, then assemble the limbs with precise placement so the head tilts and the body sits naturally. The technique mix includes the foundational rounds and color shifts with seamless finishing through careful stitching; separable components ensure a neat finish. While not a beginner project, it remains approachable for those who enjoy steady turning, consistent tension, and a little patience for a truly adorable result.

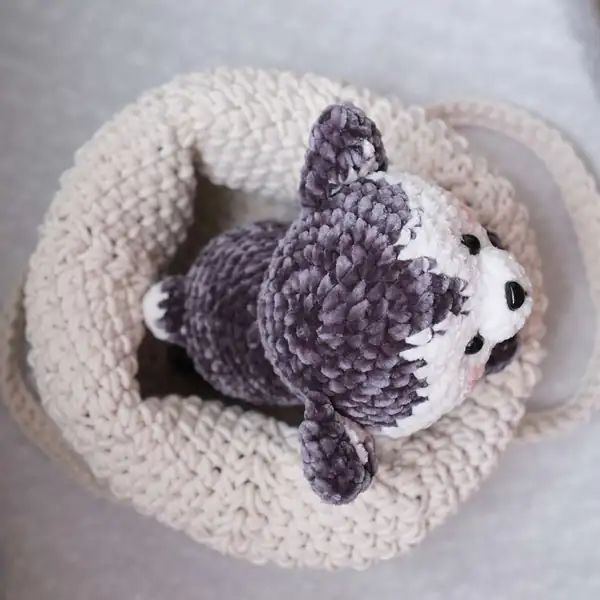
Once complete, the Husky becomes a soft, heirloom-like toy that kids can cradle and adults can display with pride, a reminder that handmade creatures carry warmth into every hug. Detailed assembly steps emphasize aligning limbs for a natural stance, placing the ears at the right angle, and shaping the muzzle so the expression stays gentle. The finishing phase includes weaving in ends, securing joints, and a final check for gaps along seams to ensure a tidy, durable result that endures handling and display.

Stitches & Skills You'll Use

Stitches you’ll use include MR - magic ring to start each piece cleanly with a tight center, and a consistent crochet technique for the rounds to maintain a dense, even fabric. Color changes are executed smoothly so the transition between Gray and White remains invisible, maintaining a seamless look. You’ll work in the round to avoid seams along the torso, then switch to vertical alignment for the ears and tail to keep them precise. Safety eyes require careful placement at the head, and a small amount of embroidery or felt details can be added for a gentle facial touch. The combination of these techniques yields a sturdy yet huggable Husky with a bright, friendly expression.

Invisible decreases are used to smooth the muzzle and facial area, while increases help build the round cheeks and snout. The arms and legs are stuffed and shaped before being sewn to the body to ensure balance and a natural sitting pose. Throughout, you’ll rely on consistent tension and careful stuffing to prevent gaps or lumps, creating a compact form that reads as a real toy rather than a flat figure. Each joint is anchored with a few securing stitches to ensure durability without stiffness, allowing the limbs to hold pose naturally.

Finally, you’ll weave in ends and attach the tail with a gentle curve so the whole figure feels balanced from every angle. Finishing touches include aligning facial features with measured accuracy and double-checking proportions before the final assembly. The technique set remains approachable yet precise, designed to deliver a polished, professional look you’ll be proud to display or gift. A thoughtful seam line can vanish under fur, while subtle shading from the yarn adds depth without relying on any special texture.

Why You'll Love This My Little Husky Amigurumi Pattern

I absolutely love this pattern because it rewards patience with a deeply satisfying finished piece. The husky’s face comes alive through careful colorwork and the use of chenille yarn, which yields an irresistibly plush texture. I enjoy the deliberate process of shaping the head and limbs, then sewing everything into a cohesive whole that feels sturdy and ready for cuddles.

Watching the small details—eye sockets, nose, and blush of cheeks—come together makes the pattern feel like a tiny sculpture, not just a toy. I hope fellow crocheters experience that same joy when they finish their own husky and see the spark of personality shine through in the eyes and stance.

Colour & Yarn Inspiration

Neutral grays with white accents create a faithful Husky look, while a pale blue-gray earth tone gives a cool, modern twist. For a friendlier vibe, keep the face lighter with white predominance and add rosy cheeks with a tiny bit of pink embroidery. You could also experiment with chocolate gray or deep charcoal for a more dramatic silhouette, while keeping white to highlight the muzzle and chest. Substituting the Chenille yarn for a plush blend can yield a different texture, such as a slightly stiffer feel that still remains soft to touch, perfect for display rather than heavy play. If you want a travel-friendly version, use a lighter weight yarn to shrink the overall dimensions without losing shape. Remember to recalculate gauge to ensure the final size remains close to the intended finish.

Varying the eyes or nose color can dramatically alter the expression; a black nose with white highlights gives a friendly look, while a brown nose with darker shading can create a more thoughtful character. Colorwork on the paws and tail tips adds extra depth and realism. Consider adding tiny pink noses or cheek blushes for a cute, endearing finish. For a seasonal twist, swap the scarf color for festive hues and add a tiny crochet gift tag to complete the theme.

Finished Husky amigurumi sitting upright

Switch Things Up

Customization ideas let you make this Husky truly yours. Start by softening the facial contrast with Ivory or Cream instead of White, or swap Gray for charcoal to alter the silhouette. A tiny crocheted collar in a bright hue adds personality, and a scarf or hat tailored to the season makes the piece suitable for display year-round. For a display piece, switch to a fluffier yarn and a slightly larger hook to create a bigger, cuddlier form; adjust the number of rounds to preserve the overall shape. For a softer, cuddle-ready version, choose a yarn with a longer pile and maintain consistent tension to keep stitches even.

Other customization routes include exploring facial expression: embroidery or stitched features on the muzzle can shift mood, and changing eye color or shape alters the gaze. You can crochet a tiny leash or tag, or add embroidered or felt features that give the Husky its own character while keeping the overall construction straightforward. If sharing on social platforms, consider a short caption that explains your color choices and the small challenges you enjoyed mastering, which helps others feel confident about attempting the pattern themselves.

Pose and proportion adjustments are possible by varying limb length slightly or repositioning the head at the join; a small tweak here or there can yield a different sitting or standing posture while maintaining a cuddly silhouette. When making multiple huskies, rotate eye color or switch to stitch-based facial features for a cohesive family. Packaging ideas include a tiny felt leash, a matching crocheted blanket, or a miniature throne for display, turning the set into a thoughtful gift collection. The key is to plan ahead, measure frequently, and adjust rounding and seam placement to preserve balance across versions.

As you refine your process, keep a simple record of your pattern notes—starting tail length, number of rounds per piece, and the exact placement of the facial features—to help you reproduce your favorite version in the future without guesswork.

Ways to Use & Gift It

Gifting a Husky amigurumi is ideal for kids who need a comforting buddy, or for a friend who appreciates handmade toys with a soft, tactile finish. The compact size fits into a plush collection or a desk display, becoming a thoughtful desk companion or bedtime friend. A handmade Husky also makes a unique baby gift for newborns, offering a tiny, snuggly friend that stays durable with careful stuffing and high-quality yarn. For teens and adults, this toy can be a desk buddy that sparks joy and creativity, a reminder that a little crafting effort can yield a bright, tangible reward.

Beyond gifts, the Husky serves as a charming home decor piece on shelves or a cozy cushion companion on a reading nook. Consider pairing it with a few crocheted paw prints or a miniature scarf to extend the gift set and create a cohesive hand-made gift collection. You can personalize the eyes with safety options or embroidery to reflect the recipient’s personality, turning a standard pattern into a one-of-a-kind treasure.

Common Mistakes & How to Fix Them

Losing your stitch count — place a marker at the start of each round. Working too loosely, which lets the stuffing show through the fabric. Forgetting to stuff firmly before closing a piece. Sewing parts on before pinning and checking the proportions.

Maker's Notes

During pattern testing, a 4 mm hook with chenille in Gray and White was used to achieve a plush, dense fabric that holds shape well. The project typically required about 9–11 hours across two sessions, with color work demanding careful tightening at color transitions to avoid visible gaps. Starting rounds and the first few stitches were marked to maintain alignment as the piece grew. A common stumbling point for beginners is stuffing balance; it helps to stuff limbs separately before the final assembly to achieve a solid, balanced toy. The strongest guidance is to keep tension consistent through every round and to place the facial features with care to ensure a natural, friendly expression. The final assembly session is where the Husky truly comes to life, and patience here yields a durable, endearing result.

I tried a substitution: Substituting chenille with a plush velvet yarn produced a softer hand and a slightly tighter overall stitch; the silhouette shortened by about 1.5 cm, but the overall shape remained intact with careful tension control. Using a lighter yarn weight required adjusting the hook size to around 3.5 mm to preserve density, yet color transitions stayed smooth with practiced technique. Embroidered features on the muzzle yielded a subtler facial look that can read as more gentle or reserved depending on the stitch density. Substitutions can be compatible with a few gauge checks and minor adjustments in the number of rounds to maintain proportional accuracy throughout the pattern.

My Little Husky Amigurumi Pattern

Free Crochet pattern for a cuddly Husky Amigurumi. Full instructions, materials, and tips included. Start crocheting this adorable toy today!

Intermediate 8-12 Hours
Pattern at a glance
Skill level
Intermediate
Time to make
8-12 Hours
Hook size
4.0 mm (G)
Yarn weight
Chenille / Plush
Finished size
Approx. 11 cm tall / 4.3 in
Gauge
Not critical; use tight, consistent stitches with chenille yarn to avoid gaps
Yarn used
Gray 120m + White 40m (as per pattern note); approx. 160m total main color

Materials Needed

Main Fabric
  • 01
    Chunky yarn in your chosen colours
Tools Required
  • 01
    4 mm crochet hook
  • 02
    Stitch markers
  • 03
    Yarn needle
  • 04
    Fibrefill stuffing
  • 05
    Scissors
  • 06
    Safety eyes (optional)

— Head :

Round 1: MR 8sc. (8)
Round 2: 8 inc. (16)
Round 3: (1 sc, inc) x 8 times. (24)
Round 4: 1 sc, inc, (2 sc, inc) x 7 times, 1 sc. (32)
Round 5: (3 sc, inc) x 8 times. (40)
Round 6: Gray 16 sc, White 2 sc, Gray 4 sc, White 2 sc, Gray 16 sc. (40)
Round 7: Gray 15 sc, White 4 sc, Gray 2 sc, White 4 sc, Gray 15 sc. (40)
Round 8: Gray 14 sc, White 5 sc, Gray 2 sc, White 5 sc, Gray 14 sc. (40)
Round 9: Gray 10 sc, White 6 inc, 8 sc, 6 inc, Gray 10 sc. (52)
Round 10: Gray 10 sc, White 32 sc, Gray 10 sc. (52)
Round 11: Gray 10 sc, White 32 sc, Gray 10 sc. (52)
Round 12: Gray 10 sc, White 6 dec, 8 sc, 6 dec, Gray 10 sc. (52)
Round 13: (8 sc, dec) x 4 times. (36)
Round 14: 36 sc. (36)
Round 15: (4 sc, dec) x 6 times. (30)
Round 16: (3 sc, dec) x 6 times. (24)
Round 17: 12 dec. (12)
Round 18: 6 dec. (6)

— Muzzle :

Round 1: MR 6 sc. (6)
Round 2: (1 sc, inc) x 3 times. (9)
Round 3: 6 sc, 3 inc, slst. (12)

— Body :

Round 1: MR 8 sc. (8)
Round 2: 8 inc. (16)
Round 3: (1 sc, inc) x 8 times. (24)
Round 4: (1 sc, inc, 1 sc) x 8 times. (32)
Round 5: (3 sc, inc) x 8 times. (40)
Round 6: 40 sc. (40)
Round 7: 40 sc. (40)
Round 8: 40 sc. (40)
Round 9: 40 sc. (40)
Round 10: 40 sc. (40)
Round 11: (3 sc, dec) x 8 times. (32)
Round 12: 32 sc. (32)
Round 13: 32 sc. (32)
Round 14: 32 sc. (32)
Round 15: (14 sc, dec) x 2 times. (30)
Round 16: 30 sc, slst. (30)

— Arms/Legs :

Round 1: MR 6 sc. (6)
Round 2: 6 inc. (12)
Round 3: 4 sc, inc, 5 sc, dec. (12)
Round 4: 4 sc, inc, 5 sc, dec. (12)
Round 5: 4 sc, inc, 5 sc, dec. (12)
Round 6: 4 sc, inc, 5 sc, dec. (12)
Round 7: 4 sc, inc, 5 sc, dec. (12)
Round 8: 4 sc, inc, 5 sc, dec. (12)
Round 9: 4 sc, inc, 5 sc, dec. (12)
Round 10: 4 sc, inc, 5 sc, dec. (12)
Round 11: 4 sc, inc, 5 sc, dec. (12)
Round 12: 4 sc, inc, 5 sc, dec. (12)
Round 13: 6 sc, slst. (6)

— Ears :

Round 1: MR 6 sc. (6)
Round 2: (1 sc, inc) x 3 times. (9)
Round 3: Gray (2 sc, inc) x 2 times, White sc, Gray sc, inc. (12)
Round 4: Gray 7 sc, White 3 sc, Gray 2 sc. (12)
Round 5: Gray 3 sc, inc, 3 sc, White inc, 3 sc, Gray inc. (15)
Round 6: 7 sc, slst. (7)

— Tail :

Round 1: MR 6 sc. (6)
Round 2: (1 sc, inc) x 3 times. (9)
Round 3: (2 sc, inc) x 3 times. (12)
Round 4: 12 sc. (12)
Round 5: 12 sc. (12)

Assembly Instructions

  1. Sew the muzzle to the head between the eyes, then attach the safety nose (you can also embroider the nose with yarn).
  2. Create eye sockets for the little dog and position safety eyes between rounds 10 and 11, the distance between the two eyes is 7 stitches.
  3. Sew the ears to the head between rounds 4 & 8, with the distance between the ears at 8 stitches; do not stuff the ears.
  4. Sew the body to the head by placing the two pieces on a flat surface and sewing one stitch on the body to one stitch on the head, ensuring alignment.
  5. Attach the legs at round 6 of the body, with the distance between the two legs about 10 stitches; then sew the arms at rounds 12-15 and attach the tail to the body.

Important Notes

  • Work in a continuous spiral unless otherwise stated. Do not join rounds.
  • Use a stitch marker to mark the beginning of round and check tension to keep it even.
  • Stuff gradually and firmly, but avoid overstuffing to prevent distortion of contours.
  • Weave in ends as you go to avoid a tedious finishing session at the end.
  • Keep facial features aligned; small adjustments can dramatically affect character.

This Husky Amigurumi is a soft, huggable handmade treasure designed to spark joy and creativity. You’ll love to cuddle it, display it proudly, and gift it with confidence to friends and family. May your crocheting sessions be relaxing and rewarding as you bring this affectionate pup to life. Enjoy the process of colorwork and assembly, and celebrate your progress with a finished toy that captures the playful spirit of a real Husky. Share photos of your unique version and inspire others to try this charming project. Happy crocheting! May your Husky bring warmth to any room and become a beloved companion for years to come. Your patience, practice, and creativity are what make this little dog truly special.

Good to know

You ask, we answer

The finished amigurumi measures approximately 11 cm tall when using the recommended chenille yarn and a 4 mm hook.

Yes, you can use different yarn weights, but this will affect the final size and texture. Use an appropriate hook size to maintain density and avoid gaps.

This pattern is labeled Intermediate, so basic knowledge of stitches and color placement is helpful, along with comfort working in the round and basic sewing.

Absolutely, this makes a charming, handmade gift that can be personalized with color choices and small facial details. It’s perfect for birthdays or special occasions.

Most crocheters finish in about 8–12 hours, depending on experience and how many sessions you dedicate to stuffing, assembly, and finishing touches.

Yes—eyes can be added with embroidery or safety options, and the mouth can be stitched or embroidered with yarn. Small adjustments can dramatically change the character.

Husky amigurumi tail being attached
Join 100k+ crocheters

Get new free patterns, stitch tips and exclusive content in your inbox.