— Part 1 :
Round 1: 4SC into a magic loop {4};
Round 2: 3SC into each ST around {12};
Round 3: SC around {12};
Round 4: SC around {12};
Round 5: SC around {12};
Round 6: SC around {12};
Round 7: SC around {12};
Round 8: SC around {12};
Round 9: SC around {12};
Round 10: SC around {12};
Round 11: SC11 (around the leg not including the stitch we SL ST into) SC1 into the chain we made, SC11;
Round 12: SC around {24};
Round 13: SC around {24};
Round 14: SC around {24};
Round 15: SC around {24};
Round 16: SC around {24};
Round 17: SC around {24};
Round 18: SC around {24};
Round 19: SC around {24};
Round 20: SC around {24};
Round 21: SC around {24};
Round 22: SC around {24};
Round 23: SC around {24};
Round 24: SC around {24};
Round 25: SC around {24};
Round 26: (SC to stitch before marker SC3TOG) repeat 4 times, SC to end.
— Part 2 :
Round 1: 4SC into a magic loop {4};
Round 2: 3SC into each ST around {12};
Round 3: SC around {12};
Round 4: SC around {12};
Round 5: SC around {12};
Round 6: SC around {12};
Round 7: SC around {12};
Round 8: SC around {12};
Round 9: SC around {12};
Round 10: SC around {12};
Round 11: SC around {12};
Round 12: SC around {12};
Round 13: SC around {12};
Round 14: SC around {12};
Round 15: SC around {12};
— Part 3 :
Round 1: 8SC into a magic loop {8};
Round 2: (SC1, 3SC into the next ST) 4 times {16)
Round 3: SC2, 3SC into the next ST, (SC3, 3SC into the next ST) 3 times, SC1 {24)
Round 4: SC3, 3SC into the next ST, (SC5, 3SC into the next ST) 3 times, SC2 {32)
Round 5: SC4, 3SC into the next ST, (SC7, 3SC into the next ST) 3 times, SC3 {40)
Round 6: SC around {40};
Round 7: SC around {40};
Round 8: SC to first marker in orange, including the stitch with the marker in, in pink SC8, in orange SC to end. {40};
Round 9: SC to first marker in orange, including the stitch with the marker in, SC3, in pink SC4, in orange SC to end. {40};
Round 10: SC to stitch before marker in orange, in pink SC10, in orange SC to end. {40};
Round 11: SC to stitch before marker in orange, in pink SC10, in orange SC to end. {40};
Round 12: SC to stitch before marker in orange, in pink SC10, in orange SC to end. {40};
Round 13: SC to stitch before marker in orange, in pink SC10, in orange SC to end. {40};
Round 14: SC to 2 stitches before marker in orange, in pink SC12, in orange SC to end. {40};
Round 15: SC to 2 stitches before marker in orange, in pink SC12, in orange SC to end. {40};
Round 16: SC to 2 stitches before marker in orange, in pink SC12, in orange SC to end. {40};
Round 17: (SC to stitch before marker SC3TOG) 4 times, SC to end {32};
Round 18: (SC to stitch before marker SC3TOG) 4 times, SC to end {24};
Round 19: (SC to stitch before marker SC3TOG) 4 times, SC to end {16};
Round 20: (SC to stitch before marker SC3TOG) 4 times, SC to end {8} -Remove markers;
— Part 4 :
Round 1: 8SC into a magic loop {8};
Round 2: (SC1, 3SC into the next ST) 4 times {16)
Round 3: SC2, 3SC into the next ST, (SC3, 3SC into the next ST) 3 times, SC1 {24)
Round 4: SC3, 3SC into the next ST, (SC5, 3SC into the next ST) 3 times, SC2 {32)
Round 5: SC around {32};
Round 6: SC around {32};
Round 7: SC around {32};
Round 8: SC around {32};
Round 9: SC around {32};
Round 10: SC around {32};
Round 11: SC around {32};
Round 12: SC around {32};
Round 13: SC around {32};
Round 14: SC around {32};
Round 15: (SC to stitch before marker SC3TOG) 4 times, SC to end {24};
Round 16: (SC to stitch before marker SC3TOG) 4 times, SC to end {16};
Round 17: (SC to stitch before marker SC3TOG) 4 times, SC to end {8} -Remove markers;
— Part 5 :
Round 1: 8SC into a magic loop {8};
Round 2: (SC1, 3SC into the next ST) 4 times {16)
Round 3: SC2, 3SC into the next ST, (SC3, 3SC into the next ST) 3 times, SC1 {24)
Round 4: SC around {24};
Round 5: SC around {24};
Round 6: SC around {24};
Round 7: SC around {24};
Round 8: SC around {24};
Round 9: SC around {24};
Round 10: SC around {24};
Round 11: SC around {24};
Round 12: SC around {24};
Round 13: SC around {24};
Round 14: SC around {24};
Round 15: SC around {24};
Round 16: SC around {24};
Round 17: SC around {24};
Round 18: SC around {24};
Round 19: (SC to stitch before marker SC3TOG) 4 times, SC to end {16};
Round 20: (SC to stitch before marker SC3TOG) 4 times, SC to end {8} -Remove markers;
— Part 6 :
Round 1: 8SC into a magic loop {8};
Round 2: (SC1, 3SC into the next ST) 4 times {16)
Round 3: SC around {16};
Round 4: SC around {16};
Round 5: SC around {16};
Round 6: SC around {16};
Round 7: SC around {16};
Round 8: (SC1, SC3TOG) 4 times {8} Join and FO.
— Part 7 :
Round 1: CH2, 5SC into the 2nd CH from hook {5};
Round 2: 2SC into every ST around {10};
Round 3: SC around {10};
Round 4: SC around {10};
Round 5: SC around {10};
Round 6: SC around {10};
Round 7: SC around {10};
Round 8: SC around {10};
Round 9: SC around {10};
Round 10: SC around {10};
Round 11: SC around {10};
Round 12: SC around {10};
Round 13: SC around {10};
Round 14: SC around {10};
Round 15: SC around {10};
Round 16: SC around {10};
Round 17: SC around {10};
Round 18: SC around {10};
Round 19: SC around {10};
Round 20: SC around {10};
Round 21: SC around {10};
Round 22: SC around {10};
Round 23: SC around {10};
Round 24: SC around {10};
Round 25: SC around {10};
Round 26: SC around {10};
Round 27: SC around {10};
Round 28: SC9 (around the leg not including the stitch we SL ST into) SC into one side of each of the CH3;
Round 29: SC around {24};
Round 30: SC around {24};
Round 31: SC around {24};
Round 32: SC around {24};
Round 33: SC around {24};
Round 34: SC around {24};
Round 35: SC around {24};
Round 36: SC around {24};
Round 37: SC around {24};
Round 38: SC around {24};
Round 39: SC around {24};
Round 40: SC around {24};
Round 41: SC around {24};
Round 42: SC around {24};
Round 43: SC around {24};
Round 44: (SC to stitch before marker SC3TOG) repeat 4 times, SC to end.
— Part 8 :
Round 1: 8SC into a magic loop {8};
Round 2: (SC1, 3SC into the next ST) 4 times {16)
Round 3: SC2, 3SC into the next ST, (SC3, 3SC into the next ST) 3 times, SC1 {24)
Round 4: SC3, 3SC into the next ST, (SC5, 3SC into the next ST) 3 times, SC2 {32)
Round 5: SC4, 3SC into the next ST, (SC6, 3SC into the next ST) 3 times, SC2 {40)
Round 6: SC around {40};
Round 7: SC around {40};
Round 8: SC around {40};
Round 9: SC around {40};
Round 10: SC around {40};
Round 11: SC around {40};
Round 12: SC around {40};
Round 13: SC around {40};
Round 14: (SC to stitch before marker SC3TOG) 4 times, SC to end {32};
Round 15: (SC to stitch before marker SC3TOG) 4 times, SC to end {24};
Round 16: (SC to stitch before marker SC3TOG) 4 times, SC to end {16};
Round 17: (SC to stitch before marker SC3TOG) 4 times, SC to end {8} -Remove markers;
— Part 9 :
Round 1: CH2, 6SC into the 2nd CH from hook {6};
Round 2: (SC1, 2SC into the next ST) 3 times {9};
Round 3: SC around {9};
Round 4: SC around {9};
Round 5: SC around {9};
Round 6: SC around {9};
Round 7: SC around {9};
Round 8: SC around {9};
Round 9: SC around {9};
Round 10: SC around {9};
Round 11: SC around {9};
Round 12: SC around {9};
Round 13: SC around {9};
Round 14: SC around {9};
Round 15: SC around {9};
Round 16: SC around {9};
Round 17: SC around {9};
Round 18: SC around {9};
Round 19: SC around {9};
Round 20: SC around {9};
Round 21: SC around {9};
Round 22: SC around {9};
Round 23: SC around {9};
Round 24: SC around {9};
Round 25: SC around {9};
Round 26: SC around {9};
Round 27: SC around {9};
Round 28: SC around {9};
Round 29: SC around {9};
— Part 10 :
Round 1: 8SC into a magic loop {8};
Round 2: (SC1, 3SC into the next ST) 4 times {16)
Round 3: SC2, 3SC into the next ST, (SC3, 3SC into the next ST) 3 times, SC1 {24)
Round 4: SC3, 3SC into the next ST, (SC5, 3SC into the next ST) 3 times, SC2 {32)
Round 5: SC4, 3SC into the next ST, (SC7, 3SC into the next ST) 3 times, SC3 {40)
Round 6: SC around {40};
Round 7: SC around {40};
Round 8: SC around {40};
Round 9: SC around {40};
Round 10: SC around {40};
Round 11: SC around {40};
Round 12: SC around {40};
Round 13: SC around {40};
Round 14: SC around {40};
Round 15: SC around {40};
Round 16: SC around {40};
Round 17: SC around {40};
Round 18: SC around {40};
Round 19: (SC to stitch before marker SC3TOG) 4 times, SC to end {32};
Round 20: (SC to stitch before marker SC3TOG) 4 times, SC to end {24};
Round 21: (SC to stitch before marker SC3TOG) 4 times, SC to end {16};
Round 22: (SC to stitch before marker SC3TOG) 4 times, SC to end {8} -Remove markers;
— Part 11 :
Round 1: CH2, 6SC into the 2nd CH from hook {6};
Round 2: (SC1, 2SC into the next ST) 3 times {9};
Round 3: SC around {9};
Round 4: SC around {9};
Round 5: SC around {9};
Round 6: SC around {9};
Round 7: SC around {9};
Round 8: SC around {9};
Round 9: SC around {9};
— Part 12 :
Round 1: 8SC into a magic loop {8};
Round 2: (SC1, 3SC into the next ST) 4 times {16)
Round 3: SC2, 3SC into the next ST, (SC3, 3SC into the next ST) 3 times, SC1 {24)
Round 4: SC3, 3SC into the next ST, (SC5, 3SC into the next ST) 3 times, SC2 {32)
Round 5: SC4, 3SC into the next ST, (SC7, 3SC into the next ST) 3 times, SC3 {40)
Round 6: SC5, 3SC into the next ST, (SC9, 3SC into the next ST) 3 times, SC3 {48};
Round 7: SC around {48};
Round 8: SC around {48};
Round 9: SC around {48};
Round 10: SC around {48};
Round 11: SC around {48};
Round 12: SC around {48};
Round 13: SC around {48};
Round 14: SC around {48};
Round 15: SC around {48};
Round 16: SC around {48};
Round 17: SC around {48};
Round 18: SC around {48};
Round 19: SC around {48};
Round 20: SC around {48};
Round 21: (SC to stitch before marker SC3TOG) 4 times, SC to end {40};
Round 22: (SC to stitch before marker SC3TOG) 4 times, SC to end {32};
Round 23: (SC to stitch before marker SC3TOG) 4 times, SC to end {24};
Round 24: (SC to stitch before marker SC3TOG) 4 times, SC to end {16};
Round 25: (SC to stitch before marker SC3TOG) 4 times, SC to end {8} -Remove markers;
— Part 13 :
Round 1: CH8, SC in 2nd chain from hook, SC5, 3SC into last chain.
Round 2: Working down opposite side of foundation chain, SC5, 2SC in the last ST (the first ST of the previous round) {16};
Round 3: 2SC into the 1st ST, SC5, 2SC into the next 3STS, SC5, 2SC into the last 2STS {22};
Round 4: SC around {22};
Round 5: SC around {22};
— Part 14 :
Round 1: CH2, 5SC into the 2nd CH from hook {5};
Round 2: 2SC into all STS {10};
Round 3: SC around {10};
Round 4: SC around {10};
Round 5: SC around {10};
Round 6: SC around {10};
— Part 15 :
Round 1: CH8, SC in 2nd chain from hook, SC5, 3SC into last chain, working down opposite side of foundation chain, SC5, 2SC in the last ST (the first ST of the previous round) {16};
Round 2: 2SC into the 1st ST, SC5, 2SC into the next 3STS, SC5, 2SC into the last 2STS {22};
Round 3: SC around {22};
Round 4: SC around {22};
Round 5: SC around {22};
Round 6: SC2TOG, SC5, (SC2TOG) 3 times, SC5, (SC2TOG) twice {16};
Round 7: SC around {16};
Round 8: SC around {16};
Round 9: SC2TOG, SC2, (SC2TOG) 3 times, SC2, (SC2TOG) twice {10};
Round 10: SC around {10};
Round 11: SC around {10};
Round 12: SC around {10};
Round 13: SC around {10};
Round 14: SC around {10};
Round 15: SC around {10};
Round 16: SC around {10};
— Part 16 :
Round 1: 8SC into a magic loop {8};
Round 2: (SC1, 3SC into the next ST) 4 times {16)
Round 3: SC2, 3SC into the next ST, (SC3, 3SC into the next ST) 3 times, SC1 {24)
Round 4: SC3, 3SC into the next ST, (SC5, 3SC into the next ST) 3 times, SC2 {32)
Round 5: SC around {32};
Round 6: SC around {32};
Round 7: SC around {32};
Round 8: SC around {32};
Round 9: SC around {32};
Round 10: SC around {32};
Round 11: SC around {32};
Round 12: SC around {32};
Round 13: SC around {32};
Round 14: SC around {32};
Round 15: SC around {32};
Round 16: SC around {32};
Round 17: (SC to stitch before marker SC3TOG) 4 times, SC to end {24} -Remove markers;
Round 18: (SC to stitch before marker SC3TOG) 4 times, SC to end {16};
Round 19: (SC to stitch before marker SC3TOG) 4 times, SC to end {8} -Remove markers;
— Part 17 :
Round 1: 8SC into a magic loop {8};
Round 2: (SC1, 3SC into the next ST) 4 times {16)
Round 3: SC2, 3SC into the next ST, (SC3, 3SC into the next ST) 3 times, SC1 {24)
Round 4: SC3, 3SC into the next ST, (SC5, 3SC into the next ST) 3 times, SC2 {32)
Round 5: SC4, 3SC into the next ST, (SC6, 3SC into the next ST) 3 times, SC2 {40)
Round 6: SC around {40};
Round 7: SC around {40};
Round 8: SC around {40};
Round 9: SC around {40};
Round 10: SC around {40};
Round 11: SC around {40};
Round 12: SC around {40};
Round 13: SC around {40};
Round 14: SC around {40};
Round 15: SC around {40};
Round 16: (SC to stitch before marker SC3TOG) 4 times, SC to end {32};
Round 17: (SC to stitch before marker SC3TOG) 4 times, SC to end {24};
Round 18: (SC to stitch before marker SC3TOG) 4 times, SC to end {16};
Round 19: (SC to stitch before marker SC3TOG) 4 times, SC to end {8} -Remove markers;
— Part 18 :
Round 1: CH6, SC in 2nd chain from hook, SC across, 3SC into last chain, working down opposite side of foundation chain, SC3, 2SC in the last ST (the first ST of the previous round) {12};
Round 2: 2SC into the 1st ST, SC3, 2SC into the next 3STS, SC3, 2SC into the last 2STS {18};
Round 3: SC around {18};
Round 4: SC around {18};
Round 5: SC around {18};
— Part 19 :
Round 1: CH10, SC in 2nd chain from hook, SC across, 3SC into last chain, working down opposite side of foundation chain, SC7, 2SC in the last ST (the first ST of the previous round) {20};
Round 2: 2SC into the 1st ST, SC7, 2SC into the next 3STS, SC7, 2SC into the last 2STS {26};
Round 3: SC around {26};
Round 4: SC around {26};
— Part 20 :
Round 1: CH6, SC in 2nd chain from hook, SC across, 3SC into last chain, working down opposite side of foundation chain, SC3, 2SC in the last ST (the first ST of the previous round) {12};
Round 2: 2SC into the 1st ST, SC3, 2SC into the next 3STS, SC3, 2SC into the last 2STS {18};
Round 3: SC around {18};
Round 4: SC around {18};
Round 5: SC around {18};
Round 6: SC around {18};
Round 7: SC around {18};
Round 8: SC around {18};
Round 9: SC around {18};
Round 10: SC around {18};
Round 11: SC around {18};
Round 12: SC around {18};
— Part 21 :
Round 1: CH4, SC into 2nd CH from hook and all other chains, CH1, T {3};
Round 2: SC across, CH1, T {3};
Round 3: SC across, CH4, T;
Round 4: SC into the 2nd CH from hook and all other chains / stitches across, CH1, T {6};
Round 5: SC across, CH1, T {6};
Round 7: SC across, CH4, T;
Round 8: SC into the 2nd CH from hook and all other chains / stitches across, CH1, T {6};
Round 9: SC across {6} Join and FO.
— Part 22 :
Round 1: CH6, SC in 2nd chain from hook, SC across, 3SC into last chain, working in the bottom of the foundation chain, SC3, 2SC in the last ST (the first ST of the previous round) {12};
Round 2: In BLO SC around {12};
Round 3: SC3, (SC2TOG) 3 times, SC3 {9};
Round 4: (SC1, SC2TOG) 3 times {6};
Round 5: SC around {6};
Round 6: SC around {6};
— Part 23 :
Round 1: 8SC into a magic loop {8};
Round 2: (SC1, 3SC into the next ST) 4 times {16)
Round 3: SC2, 3SC into the next ST, (SC3, 3SC into the next ST) 3 times, SC1 {24)
Round 4: SC3, 3SC into the next ST, (SC5, 3SC into the next ST) 3 times, SC2 {32)
Round 5: SC around {32};
Round 6: SC around {32};
Round 7: SC around {32};
Round 8: SC around {32};
Round 9: SC around {32};
Round 10: SC around {32};
Round 11: SC around {32};
Round 12: SC around {32};
Round 13: SC around {32};
Round 14: SC around {32};
Round 15: SC around {32};
Round 16: SC around {32};
Round 17: (SC to stitch before marker SC3TOG) 4 times, SC to end {24};
Round 18: (SC to stitch before marker SC3TOG) 4 times, SC to end {16};
Round 19: (SC to stitch before marker SC3TOG) 4 times, SC to end {8} -Remove markers;
— Part 24 :
Round 1: 8SC into a magic loop {8};
Round 2: (SC1, 3SC into the next ST) 4 times {16)
Round 3: SC2, 3SC into the next ST, (SC3, 3SC into the next ST) 3 times, SC1 {24)
Round 4: SC3, 3SC into the next ST, (SC5, 3SC into the next ST) 3 times, SC2 {32)
Round 5: SC4, 3SC into the next ST, (SC6, 3SC into the next ST) 3 times, SC2 {40)
Round 6: SC around {40};
Round 7: SC around {40};
Round 8: SC around {40};
Round 9: SC around {40};
Round 10: SC around {40};
Round 11: SC around {40};
Round 12: SC around {40};
Round 13: SC around {40};
Round 14: SC around {40};
Round 15: SC around {40};
Round 16: (SC to stitch before marker SC3TOG) 4 times, SC to end {32};
Round 17: (SC to stitch before marker SC3TOG) 4 times, SC to end {24};
Round 18: (SC to stitch before marker SC3TOG) 4 times, SC to end {16};
Round 19: (SC to stitch before marker SC3TOG) 4 times, SC to end {8} -Remove markers;
— Part 25 :
Round 1: CH6, SC in 2nd chain from hook, SC across, 3SC into last chain, working down opposite side of foundation chain, SC3, 2SC in the last ST (the first ST of the previous round) {12};
Round 2: 2SC into the 1st ST, SC3, 2SC into the next 3STS, SC3, 2SC into the last 2STS {18};
Round 3: SC around {18};
Round 4: SC around {18};
Round 5: SC around {18};
— Part 26 :
Round 1: 4SC into a magic loop {4};
Round 2: 3SC into every ST {12};
Round 3: SC around {12};
Round 4: SC around {12};
Round 5: SC around {12};
Round 6: SC around {12};
— Part 27 :
Round 1: CH10, 3SC into the 2nd CH from hook and all other chains along. Join and FO.
— Part 28 :
Round 1: 8SC into a magic loop {8};
Round 2: (SC1, 3SC into the next ST) 4 times {16)
Round 3: SC2, 3SC into the next ST, (SC3, 3SC into the next ST) 3 times, SC1 {24)
Round 4: SC3, 3SC into the next ST, (SC5, 3SC into the next ST) 3 times, SC2 {32) Change to black yarn.
Round 5: SC4, 3SC into the next ST, (SC7, 3SC into the next ST) 3 times, SC3 {40)
Round 6: SC around {40};
Round 7: SC around {40};
Round 8: SC around {40};
Round 9: SC around {40};
Round 10: SC around {40};
Round 11: SC around {40};
Round 12: SC around {40};
Round 13: SC around {40};
Round 14: SC around {40};
Round 15: SC around {40};
Round 16: SC around {40};
Round 17: SC around {40};
Round 18: SC around {40};
Round 19: (SC to stitch before marker SC3TOG) 4 times, SC to end {32};
Round 20: (SC to stitch before marker SC3TOG) 4 times, SC to end {24};
Round 21: (SC to stitch before marker SC3TOG) 4 times, SC to end {16};
Round 22: (SC to stitch before marker SC3TOG) 4 times, SC to end {8} -Remove markers;
— Part 29 :
Round 1: CH2, 6SC into the 2nd CH from hook {6};
Round 2: SC around {6};
Round 3: SC around {6};
Round 4: SC around {6};
Round 5: SC around {6};
Round 6: SC around {6};
Round 7: SC around {6};
Round 8: SC around {6};
Round 9: SC around {6};
Round 10: SC around {6};
Round 11: SC around {6};
Round 12: SC around {6};
Round 13: SC around {6};
Round 14: SC around {6};
Round 15: SC around {6};
Round 16: SC around {6};
Round 17: SC around {6};
Round 18: SC around {6};
Round 19: SC around {6};
Round 20: SC around {6};
Round 21: SC around {6};
Round 22: SC around {6};
Round 23: SC around {6};
Round 24: SC around {6};
— Part 30 :
Round 1: 4SC into a magic loop {4};
Round 2: 3SC into each ST around {12};
Round 3: SC around {12};
Round 4: SC around {12};
Round 5: SC around {12};
Round 6: SC around {12};
Round 7: SC around {12};
Round 8: SC around {12};
Round 9: SC around {12};
Round 10: SC around {12};
Round 11: SC11 (around the leg not including the stitch we SL ST into) SC1 into the chain we made, SC11;
Round 12: SC around {24};
Round 13: SC around {24};
Round 14: SC to marker, do the one stitch the marker is holding in teal, change back to blue yarn and SC to;
Round 15: SC to stitch before marker, change to teal yarn and SC3, change back to blue yarn and SC to;
Round 16: SC around {24};
Round 17: SC around {24};
Round 18: SC around {24};
Round 19: SC around {24};
Round 20: SC around {24};
Round 21: SC around {24};
Round 22: SC around {24};
Round 23: SC around {24};
Round 24: SC around {24};
Round 25: SC around {24};
Round 26: SC around {24};
Round 27: (SC to stitch before marker SC3TOG) repeat 4 times, SC to end.
— Part 31 :
Round 1: 4SC into a magic loop {4};
Round 2: 3SC into each ST around {12};
Round 3: SC around {12};
Round 4: SC around {12};
Round 5: SC around {12};
Round 6: SC around {12};
Round 7: SC around {12};
Round 8: SC around {12};
Round 9: SC around {12};
Round 10: SC around {12};
Round 11: SC around {12};
Round 12: SC around {12};
Round 13: SC around {12};
Round 14: SC around {12};
Round 15: SC around {12};
— Part 32 :
Round 1: 8SC into a magic loop {8};
Round 2: (SC1, 3SC into the next ST) 4 times {16)
Round 3: SC2, 3SC into the next ST, (SC3, 3SC into the next ST) 3 times, SC1 {24)
Round 4: SC3, 3SC into the next ST, (SC5, 3SC into the next ST) 3 times, SC2 {32)
Round 5: SC4, 3SC into the next ST, (SC7, 3SC into the next ST) 3 times, SC3 {40)
Round 6: SC around {40};
Round 7: SC around {40};
Round 8: SC to first stitch marker in brown, including the stitch with the marker in, SC the next 8 stitches in pink, SC to end with brown yarn. {40};
Round 9: SC to stitch before marker in brown, SC10 in pink, SC to end with brown. {40};
Round 10: SC to stitch before marker in brown, SC10 in pink, SC to end with brown. {40};
Round 11: SC to 2 stitch before marker in brown, SC12 in pink, SC to end with brown. {40};
Round 12: SC to 3 stitch before marker in brown, SC14 in pink, SC to end with brown. {40};
Round 13: SC around {40};
Round 14: SC around {40};
Round 15: SC around {40};
Round 16: SC around {40};
Round 17: (SC to stitch before marker SC3TOG) 4 times, SC to end {32};
Round 18: (SC to stitch before marker SC3TOG) 4 times, SC to end {24};
Round 19: (SC to stitch before marker SC3TOG) 4 times, SC to end {16};
Round 20: (SC to stitch before marker SC3TOG) 4 times, SC to end {8} -Remove markers;
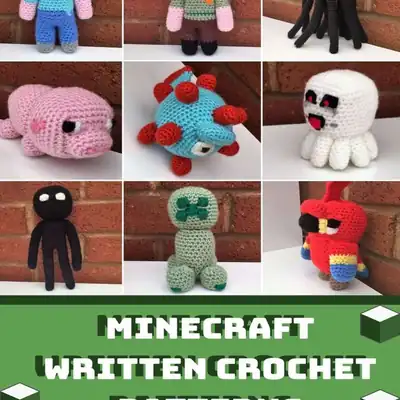
This Minecraft amigurumi pack was created to bring a shelf of tiny characters into your home and give fans a handmade set to collect. The designs balance blocky, game-accurate silhouettes with soft toy friendly shaping so children and players alike will recognise and adore each figure. Whether you are gifting a full set or making a single Creeper or Alex, the finished pieces are sturdy, charming and endlessly poseable with simple sewing.