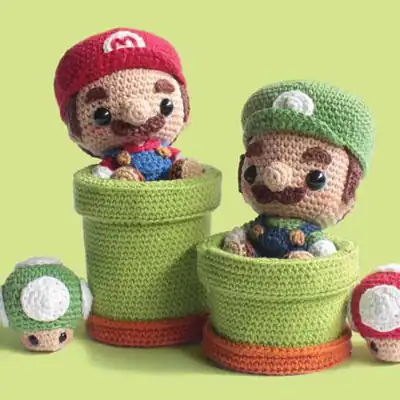
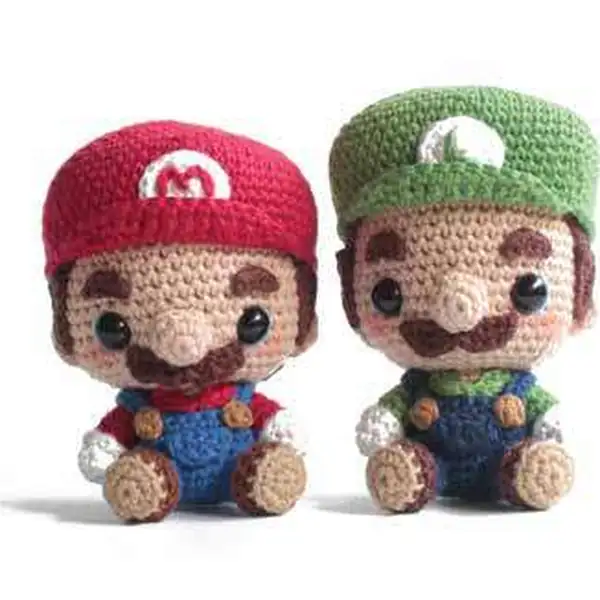
Make a cheerful Mario amigurumi with our free crochet pattern—step-by-step rounds, materials, and finishing tips. Download now and start stitching!
— Head :
Round 1: 6sc in magic ring [6];
Round 2: inc x6 [12];
Round 3: (inc, sc) x6 [18];
Round 4: (inc, 2sc) x6 [24];
Round 5: (inc, 3sc) x6 [30];
Round 6: (inc, 4sc) x6 [36];
Round 7: (inc, 5sc) x6 [42];
Round 8: (inc, 6sc) x6 [48];
Round 9: sc around [48];
Round 10: sc around [48];
Round 11: sc around [48];
Round 12: sc around [48];
Round 13: sc around [48];
Round 14: sc around [48];
Round 15: sc around [48];
Round 16: sc around [48];
Round 17: sc around [48];
Round 18: (dec, 6sc) x6 [42];
Round 19: (dec, 5sc) x6 [36];
Round 20: (dec, 4sc) x6 [30];
Round 21: (dec, 3sc) x6 [24];
Round 22: (dec, 2sc) x6 [18];
— Collar :
Round 1: (in red) 6sc in magic ring [6];
Round 2: inc x6 [12];
Round 3: (inc, sc) x6 [18];
Round 4: (inc, 2sc) x6 [24];
Round 5: sc around [24];
Round 6: sc around [24];
Round 7: sc around [24];
Round 8: sc around [24];
Round 9: sc around [24];
Round 10: (dec, 2sc) x2, dec, sc, (change to beige) sc, (change to red) (dec, 2sc) x3 [18];
Round 11: 8sc, (change to beige) 2sc, (change to red) 8sc [18];
— Legs X2 :
Round 1: (in tan) 6sc in magic ring [6];
Round 2: inc x6 [12];
Round 3: (change to brown) BLO, sc around [12];
Round 4: FLO, sc around [12];
Round 5: (crochet into the back loops of R3) (change to blue) 5sc, sk 1 st, 5sc, sk 1 st [10];
Round 6: sc around [10];
Round 7: sc around [10];
Round 8: (dec, 3sc) x2 [8];
— Arms X2 :
Round 1: 6sc in magic ring [6];
Round 2: inc x6 [12];
Round 3: (inc, sc) x6 [18];
Round 4: (inc, 2sc) x6 [24];
Round 5: (inc, 11sc) x2 [26];
Round 6: sc around [26];
Round 7: sc around [26];
Round 8: sc around [26];
Round 9: 8sc, ch 1 and turn [8];
Round 10: sc, sk 1 st, 4sc, sk 1 st, sc [6];
— Hair Base :
Round 1: (in white) 4sc in magic ring [4];
Round 2: inc x4 [8];
Round 3: sc around [8];
Round 4: FLO, sc around [8];
Round 5: (crochet into the back loops of R3) (change to red) sc around [8];
Round 6: sc around [8];
Round 7: sc around [8];
Round 8: sc around [8];
Round 9: sc around [8];
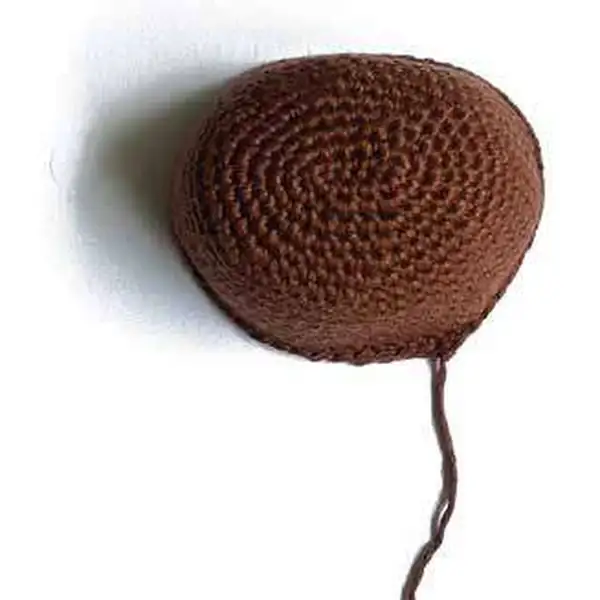
— Nose :
Round 1: 6sc in magic ring [6];
Round 2: inc x6 [12];
Round 3: (inc, sc) x6 [18];
Round 4: (inc, 2sc) x6 [24];
Round 5: (inc, 3sc) x6 [30];
Round 6: (inc, 4sc) x6 [36];
Round 7: (inc, 5sc) x6 [42];
Round 8: (inc, 6sc) x6 [48];
Round 9: sc around [48];
Round 10: sc around [48];
Round 11: sc around [48];
Round 12: sc around [48];
Round 13: sc around [48];
Round 14: sc around [48];
Round 15: sc around [48];
Round 16: sc around [48];
Round 17: sc around [48];
— Eyebrows X2 :
Round 1: 5sc in magic ring [5];
Round 2: inc x5 [10];
Round 3: sc around [10];
— Moustache :
Round 1: 6sc in magic ring [6];
Round 2: inc x6 [12];
Round 3: (inc, sc) x6 [18];
Round 4: (2sc, inc) x6 [24];
Round 5: (inc, 3sc) x6 [30];
Round 6: (4sc, inc) x6 [36];
Round 7: (inc, 5sc) x6 [42];
Round 8: (6sc, inc) x6 [48];
Round 9: (inc, 7sc) x6 [54];
Round 10: (8sc, inc) x6 [60];
Round 11: (inc, 9sc) x6 [66];
Round 12: sc around [66];
Round 13: sc around [66];
Round 14: sc around [66];
Round 15: sc around [66];
Round 16: (dec, 9sc) x6 [60];
Round 17: sc around [60];
Round 18: (8sc, dec) x6 [54];
Round 19: FLO, slst, sc, hdc, dc, htc, tc inc, 6tc, tc inc, htc, dc, hdc, sc, slst [20];
— like so :
Round 1: R1: (in white) 5sc in magic ring [5];
Round 2: inc x5 [10];
Round 3: (inc, sc) x5 [15];
Round 4: of the uniform, and about 4sts in between. 6. This step is optional, I inserted a wire through the upper part of the body for the arms. (Not recommended if you make this amigu- rumi for kids) 7. Sew the arms to the sides of the upper body. 8. Attach the pocket to the centre of the uniform. 9. Attach both straps from the front flap, to the shoulders then to the back flap. 10. Attach the buttons on the left and right side of the front flap, in front of the straps.
Round 5: of the uniform, and about 4sts in between. 6. This step is optional, I inserted a wire through the upper part of the body for the arms. (Not recommended if you make this amigu- rumi for kids) 7. Sew the arms to the sides of the upper body. 8. Attach the pocket to the centre of the uniform. 9. Attach both straps from the front flap, to the shoulders then to the back flap. 10. Attach the buttons on the left and right side of the front flap, in front of the straps.
Round 6: of the uniform, and about 4sts in between. 6. This step is optional, I inserted a wire through the upper part of the body for the arms. (Not recommended if you make this amigu- rumi for kids) 7. Sew the arms to the sides of the upper body. 8. Attach the pocket to the centre of the uniform. 9. Attach both straps from the front flap, to the shoulders then to the back flap. 10. Attach the buttons on the left and right side of the front flap, in front of the straps.
Round 7: of the uniform, and about 4sts in between. 6. This step is optional, I inserted a wire through the upper part of the body for the arms. (Not recommended if you make this amigu- rumi for kids) 7. Sew the arms to the sides of the upper body. 8. Attach the pocket to the centre of the uniform. 9. Attach both straps from the front flap, to the shoulders then to the back flap. 10. Attach the buttons on the left and right side of the front flap, in front of the straps.
Round 11: Sew the ears to the sides of the face, approximately 5sts away from the eyes, and in the same level of the eyes. 12. Place the moustache slightly under the eyes. Don’t attach it yet. (more on the next page)
— Body :
Round 1: Change red to green (body, collar, arms). 2) Change brown to dark brown (legs). 3) Change blue to navy blue (uniform, straps, pocket) 4) For the head, cap, hair base and moustache, use different pat- tern that are provided after this. 5) For the assembly, follow exactly Mario’s assembly. luigi PATTERN moustache (dark brown) Ch 10, (starting from 2nd ch from hook) slst, sc, hdc inc, hdc, slst, hdc, hdc inc, sc, slst [11];
— Head :
Round 1: 6sc in magic ring [6];
Round 2: inc x6 [12];
Round 3: (inc, sc) x6 [18];
Round 4: (inc, 2sc) x6 [24];
Round 5: (inc, 3sc) x6 [30];
Round 6: (inc, 4sc) x6 [36];
Round 7: (inc, 5sc) x6 [42];
Round 8: (inc, 13sc) x3 [45];
Round 9: sc around [45];
Round 10: sc around [45];
Round 11: sc around [45];
Round 12: sc around [45];
Round 13: sc around [45];
Round 14: sc around [45];
Round 15: sc around [45];
Round 16: sc around [45];
Round 17: sc around [45];
Round 18: sc around [45];
Round 19: sc around [45];
Round 20: (dec, 13sc) x3 [42];
Round 21: (dec, 5sc) x6 [36];
Round 22: (dec, 4sc) x6 [30];
Round 23: (dec, 3sc) x6 [24];
Round 24: (dec, 2sc) x6 [18];
— Cap :
Round 1: Ch 7, (starting from 2nd ch from hook) 6sc. Turn and make 6sc again on the loops of other side of the chains. Now you’re working in rounds. [12];
Round 2: (inc, sc) x6 [18];
Round 3: (inc, 2sc) x6 [24];
Round 4: (inc, 3sc) x6 [30];
Round 5: (inc, 4sc) x6 [36];
Round 6: (inc, 5sc) x6 [42];
Round 7: (inc, 6sc) x6 [48];
Round 8: sc around [48];
Round 9: sc around [48];
Round 10: sc around [48];
Round 11: sc around [48];
Round 12: (inc, 15sc) x3 [51];
Round 13: sc around [51];
Round 14: sc around [51];
Round 15: sc around [51];
Round 16: sc around [51];
— Ears X2 :
Round 1: 6sc in magic ring [6];
Round 2: inc x6 [12];
Round 3: (inc, sc) x6 [18];
Round 4: (2sc, inc) x6 [24];
Round 5: (inc, 3sc) x6 [30];
Round 6: (4sc, inc) x6 [36];
Round 7: (inc, 5sc) x6 [42];
Round 8: (6sc, inc) x6 [48];
Round 9: (inc, 7sc) x6 [54];
Round 10: (8sc, inc) x6 [60];
Round 11: (inc, 19sc) x3 [63];
Round 12: sc around [63];
Round 13: sc around [63];
Round 14: sc around [63];
Round 15: sc around [63];
Round 16: (dec, 19sc) x3 [60];
Round 17: (18sc, dec) x3 [57];
Round 18: dec, 8sc, dec, 7sc, dec, 8sc, dec, 7sc, dec, 8sc, dec, 7sc [51];
Round 19: FLO, slst, sc, hdc, dc, htc, tc inc, 5tc, tc inc, htc, dc, hdc, sc, slst [19];
— Pockets :
Round 1: R1: (in white) 5sc in magic ring [5];
Round 2: inc x5 [10];
Round 3: (inc, sc) x5 [15];
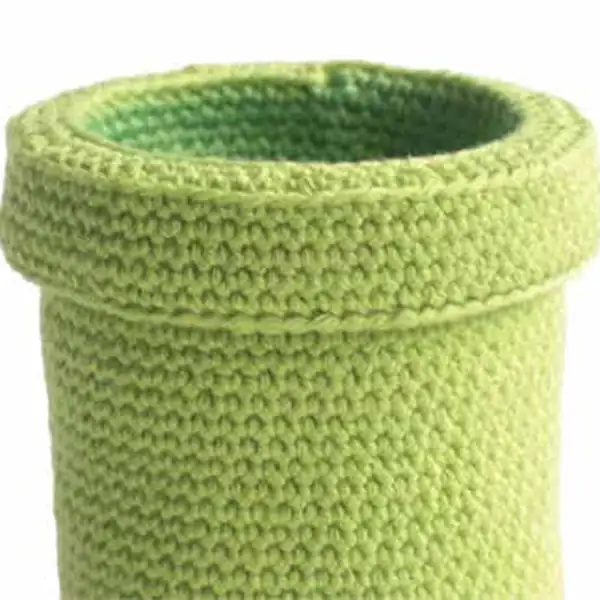
— Pipes :
Round 1: (in terracotta) 6sc in magic ring [6];
Round 2: inc x6 [12];
Round 3: (inc, sc) x6 [18];
Round 4: (2sc, inc) x6 [24];
Round 5: (inc, 3sc) x6 [30];
Round 6: (4sc, inc) x6 [36];
Round 7: (inc, 5sc) x6 [42];
Round 8: (6sc, inc) x6 [48];
Round 9: (inc, 7sc) x6 [54];
Round 10: (8sc, inc) x6 [60];
Round 11: (inc, 9sc) x6 [66];
Round 12: BLO, sc around [66];
Round 13: sc around [66];
Round 14: FLO, sc around [66];
Round 15: (crochet into the back loops of R13) (change to light green) (dec, 9sc) x6 [60];
Round 16: sc around [60];
Round 17: sc around [60];
Round 18: sc around [60];
Round 19: sc around [60];
Round 20: sc around [60];
Round 21: sc around [60];
Round 22: sc around [60];
Round 23: sc around [60];
Round 24: sc around [60];
Round 25: FLO, (inc, 9sc) x6 [66];
Round 26: (10sc, inc) x6 [72];
Round 27: BLO, sc around [72];
Round 28: sc around [72];
Round 29: sc around [72];
Round 30: sc around [72];
Round 31: sc around [72];
Round 32: BLO, (dec, 10sc) x6 [66];
Round 33: (9sc, dec) x6 [60];
Round 34: (change to green) BLO, (dec, 18sc) x3 [57];
Round 35: sc around [57];
Round 36: sc around [57];
Round 37: sc around [57];
Round 38: sc around [57];
Round 39: sc around [57];
Round 40: sc around [57];
Round 41: sc around [57];
Round 42: sc around [57];
Round 43: sc around [57];
Round 44: FLO, (17sc, dec) x3 [54];
Round 45: (dec, 7sc) x6 [48];
Round 46: (6sc, dec) x6 [42];
Round 47: (dec, 5sc) x6 [36];
— Additional steps :
Round 1: Your pipe is looking like this. 2) Insert the darker green coloured piece inside. 3) Push it and shape it inside the inner pipe. Make it neat. 4) Don’t forget the outer part, shape the edges and make it neat. 5) You’re done making pipe 1. 6) Make pipe 2. Follow pipe 1’s pattern, but double the height: From R16, instead of sc around for 9 rounds, you sc around for 18 rounds.
— Closing :
Round 48: (4sc, dec) x6 [30];
Round 49: (dec, 3sc) x6 [24];
Round 50: (2sc, dec) x6 [18];
Round 51: (dec, sc) x6 [12];
Round 52: dec x6 [6];
— Dots :
Round 1: 6sc in magic ring [6];
Round 2: inc x6 [12];
Round 3: (inc, sc) x6 [18];
Round 4: (2sc, inc) x6 [24];
Round 5: (inc, 7sc) x3 [27];
Round 6: (inc, 8sc) x3 [30];
Round 7: (4sc, inc) x6 [36];
Round 8: sc around [36];
Round 9: sc around [36];
Round 10: sc around [36];
Round 11: (inc, 5sc) x6 [42];
Round 12: (dec, 5sc) x6 [36];
Round 13: (4sc, dec) x6 [30];
Round 14: (dec, 3sc) x6 [24];
— Assembly :
Round 1: 6sc in magic ring [6];
Round 2: inc x6 [12];
Round 3: (inc, sc) x6 [18];
Round 4: (inc, 5sc) x3 [21];
Round 5: sc around [21];
Round 6: sc around [21];
Round 7: sc around [21];
Round 8: sc around [21];
— Part 20 :
Round 1: 4sc in magic ring [4];
Round 2: inc x4 [8];
Round 3: (inc, sc) x4 [12];
Round 4: (inc, 2sc) x4 [16];
This cheerful Mario pattern is a celebration of classic gaming meet handmade craft. It blends well-loved colors with accessible stitches to create a durable, cuddle-worthy character. You’ll finish with a sense of accomplishment and a friend you can display proudly.
Whether you gift it to a fellow Mario fan or keep it as a desk companion, this amigurumi invites mindful, enjoyable crafting moments that you’ll remember long after the yarn is cut. Happy crocheting and may your stitches stay precise!
Enjoy the process from start to finish and let the little hat, overalls, and mustache bring a smile to your day. Enjoy the playfulness as you complete each round and tie off the last stitch with care.