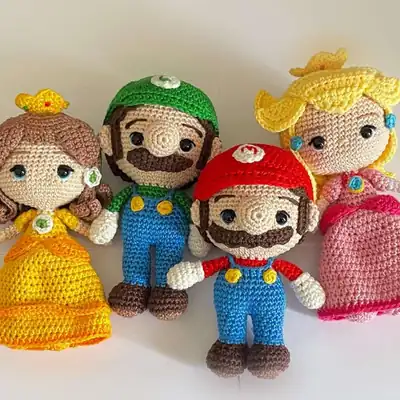
Download this free crochet pattern to make Mario, Luigi and princess amigurumi with full round-by-round instructions, materials list and assembly tips. Start today and craft your miniature heroes.
— Magic ring :
Round 1: Loop the yarn around your fingers forming an “X” (I use 2).
Round 2: Insert the hook and pull the thread bellow the thread to create a loop.
Round 3: Chain st;
— Closing it up :
Round 1: Fasten off and leave long yarn to close the part that we’re crocheting.
Round 2: Using a needle, bring it under the back chain of the stitch only, repeat until you close it.
— Let’s begin! ( :
Round 1: Magic ring (6)
Round 2: 2sc in each st (12)
Round 3: 1sc in the next 1st, 1inc x 6 (18)
Round 4: 1sc in the next 2st, 1inc x 6 (24)
Round 5: 1sc in each st (24)
Round 6: 1sc in each st (24)
Round 7: 1sc in the next 5st, 1dec in the next 5st, 1sc in;
Round 8: 1sc in the next 1st, 1dec x 6 (12)
Round 9: 1sc in each st (12)
Round 10: Working behind the ch. 1sc in each st (12)
Round 11: 1sc in each st (12)
Round 12: 1sc in each st (12)
Round 13: 1sc in each st (12)
Round 14: 1sc in each st (12)
— Part 4 :
Round 1: 1sc in the next 9st (1 leg), 1sc in the next 12st of the other;
Round 2: 1sc, 1inc x 8 (36)
Round 3: 1sc in each st (36)
Round 4: 1sc in each st (36)
Round 5: 1sc in each st (36)
Round 6: 1sc in each st (36)
Round 7: 1sc in the next 4st, 1dec x 6 (30)
Round 8: 1sc in each st (30)
Round 9: Working at the back ch. 1sc in the next 3st, 1dec x 6 (24)
Round 10: 1sc in each st (24)
Round 11: 1sc in the next 1st, 1dec x 6 (16)
— Part 5 :
Round 1: 1sc in each st (16)
Round 2: 1sc in the next 1st,1inc x 8 (24)
Round 3: 1sc in the next 2st, 1inc x 8 (32)
Round 4: 1sc in the next 3st, 1inc x 8 (40)
Round 5: 1sc in the next 5st, 1sc and 1inc x 7, 1sc in the next;
Round 6: 1sc in the next 55st, 1inc in next 1st (57)
Round 7: 1sc in each st (57)
Round 8: 1sc in each st (57)
Round 9: 1sc in each st (57)
Round 10: 1sc in each st (57)
Round 11: 1sc in each st (57)
Round 12: 1sc in the next 17st, 1dec x 3 (54)
Round 13: 1sc in each st (54)
Round 14: 1sc in each st (54)
Round 15: 1sc in each st (54)
Round 16: 1sc in each st (54)
Round 17: 1sc in each st (54)
Round 18: 1sc in each st (54)
Round 19: 1sc in each st (54)
Round 20: 1sc in each st (54)
Round 21: 1sc in the next 7st, 1dec x 6 (48)
Round 22: 1sc in the next 6st, 1dec x 6 (42)
Round 23: 1sc in the next 5st, 1dec x 6 (36)
Round 24: 1sc in the next 4st, 1dec x 6 (30)
Round 25: 1sc in the next 3st, 1dec x 6 (24)
Round 26: 1sc in the next 2st, 1dec x 6 (18)
Round 27: 1sc in the next 1st, 1dec x 6 (12)
Round 28: 1dec in the next 6st (6)
— Part 6 :
Round 1: Magic ring (6)
Round 2: 2sc in each st (12)
Round 3: 1sc in each st (12)
Round 4: 1sc in each st (12)
Round 5: 1sc in each st (12)
Round 6: 1sc in the next 1st, 1dec x 6 (8)
Round 7: Working on the front ch. 1sc in each st (8)
Round 8: Working at the back ch from Round 7. 1sc in each st (8)
Round 9: 1sc in each st (8)
Round 10: 1sc in each st (8)
Round 11: 1sc in each st (8)
Round 12: 1sc in each st (8)
Round 13: 1sc in each st (8)
— Ears (Make 2) :
Round 1: Magic ring (6)
Round 2: 2sc in each st (12)
Round 3: 1sc in each st (12)
— Moustache :
Round 1: 15ch;
Round 2: 1sc in each st (15)
Round 3: 1sc in the next 1st, 2dc in the next 1st, 1sc in the next;
— Nose :
Round 1: Magic ring (6)
Round 2: 2sc in each st (12)
Round 3: 1sc in the next 1st, 1inc x 6 (18)
Round 4: 1sc in each st (18)
Round 5: 1sc in each st (18)
Round 6: 1sc in the next 1st, 1dec x 6 (12)
— Part 10 :
Round 1: Magic Ring (4), 1sl st.
— Part 11 :
Round 1: Magic ring (7)
Round 2: 1inc in each st (14)
Round 3: 1sc in the next 1st, 1inc x 7 (21)
Round 4: 1sc in the next 2st, 1inc x 7 (28)
Round 5: 1sc in the next 3st, 1inc x 7 (35)
Round 6: 1sc in the next 4st, 1inc x 7 (42)
Round 7: 1sc in the next 5st, 1inc x 7 (49)
Round 8: 1sc in the next 6st, 1inc x 7 (56)
Round 9: 1sc in the next 27st, 1inc x 2 (58)
Round 10: 1sc in each st (58)
Round 11: 1sc in each st (58)
Round 12: 1sc in each st (58)
Round 13: 1sc in each st (58)
Round 14: 1sc in each st (58)
Round 15: 1sc in each st (58)
Round 16: - 1sc in the next 1st, 8ch, turn and start at the 2ch from the hook, 1hdc in the next 7st and finish with 1sl st (sideburn).
Round 17: 1dec, 1sc in the next 33st, 1dec (35)
Round 18: 1dec, 1sc in the next 31st, 1dec (33)
Round 19: 1sc in the next 1st, 2dc in the next 1st, 1sc in the next;
— Part 12 :
Round 1: Magic ring (7)
Round 2: 1inc in each st (14)
Round 3: 1sc in the next 1st, 1inc x 7 (21)
Round 4: 1sc in the next 2st, 1inc x 7 (28)
Round 5: 1sc in the next 3st, 1inc x 7 (35)
Round 6: 1sc in the next 4st, 1inc x 7 (42)
Round 7: 1sc in the next 5st, 1inc x 7 (49)
Round 8: 1sc in the next 6st, 1inc x 7 (56)
Round 9: 1sc in the next 7st, 1inc x 7 (63)
Round 10: 1sc in each st (63)
Round 11: 1sc in each st (63)
Round 12: 1sc in each st (63)
Round 13: 1sc in each st (63)
Round 14: 1sc in each st (63)
Round 15: 1sc in each st (63)
Round 16: 1sc in each st (63)
Round 17: 1sc in each st (63)
Round 18: 1sc in each st (63)
Round 19: 1sc in each st (63)
Round 20: Working in the front ch. 1sc in the next 18st (18)
Round 21: 1sc in each st (18)
Round 22: 1dec, 1sc in the next 14st, 1dec (16)
Round 23: 1sc in each st (16)
Round 24: 1dec, 1sc in the next 12st, 1dec (14)
— Part 13 :
Round 1: Magic Ring (6), 1sl st and 1ch.
Round 2: Start in the same st. 1inc in each st (12), finish with a sl st and leave long tail to sew to the cap.
— Assemble :
Round 1: Arms: Attach arms at Round 10 of the body, make sure they are even apart. Fasten off and hide the end. 9;
Round 2: Overall: Start at the back, make 1sc in the next 7st in the front ch of Round 9 of the Body, 6ch and go to the front of the Body where you’ll make 1sc in the next 7st, 6ch and end at the back of the body (use the;
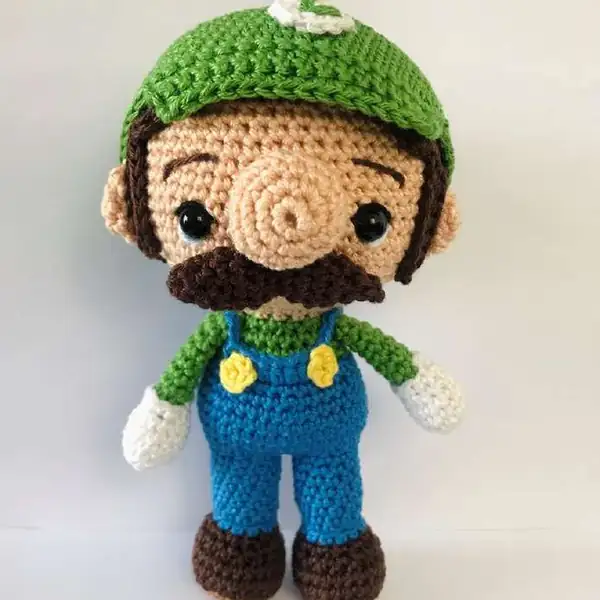
Round 4: Moustache: First, always use pins to see how it’ll look. Then, you’ll sew the moustache just below the eyes. Only sew the top of the moustache (see the photo, purple line). Fasten off and hide the end.
Round 5: Nose: Place the nose at the center between the eyes above the moustache. Sew it to the face, fasten off and hide the ends.
Round 6: Ears: First you’ll need to use pins to place the hair, so you can know where the ears go. They must be behind the sideburns, for me it was about 4st apart from the moustache. Before placing them, fold them;
— Let’s begin! ( :
Round 1: Magic ring (6)
Round 2: 2sc in each st (12)
Round 3: 1sc in the next 1st, 1inc x 6 (18)
Round 4: 1sc in the next 2st, 1inc x 6 (24)
Round 5: 1sc in each st (24)
Round 6: 1sc in each st (24)
Round 7: 1sc in the next 5st, 1dec in the next 5st, 1sc in the next;
Round 8: 1sc in the next 1st, 1dec x 6 (12)
Round 9: 1sc in each st (12)
Round 10: Working behind the ch. 1sc in each st (12)
Round 11: 1sc in each st (12)
Round 12: 1sc in each st (12)
Round 13: 1sc in each st (12)
Round 14: 1sc in each st (12)
Round 15: 1sc in each st (12)
Round 16: 1sc in each st (12)
Round 17: 1sc in each st (12)
— Part 16 :
Round 1: 1sc in the next 11st (1 leg), 1sc in the next 12st of the;
Round 2: 1sc, 1inc x 8 (36)
Round 3: 1sc in each st (36)
Round 4: 1sc in each st (36)
Round 5: 1sc in each st (36)
Round 6: 1sc in each st (36)
Round 7: 1sc in the next 4st, 1dec x 6 (30)
Round 8: 1sc in each st (30)
Round 9: Working at the back ch. 1sc in the next 3st, 1dec x 6;
Round 10: 1sc in each st (24)
Round 11: 1sc in each st (24)
Round 12: 1sc in the next 1st, 1dec x 6 (16)
— Part 17 :
Round 1: 1sc in each st (16)
Round 2: 1sc in the next 1st,1inc x 8 (24)
Round 3: 1sc in the next 2st, 1inc x 8 (32)
Round 4: 1sc in the next 3st, 1inc x 8 (40)
Round 5: 1sc in the next 5st, 1sc and 1inc x 7, 1sc in the next 5st, 1sc;
Round 6: 1sc in the next 55st, 1inc in next 1st (57)
Round 7: 1sc in each st (57)
Round 8: 1sc in each st (57)
Round 9: 1sc in each st (57)
Round 10: 1sc in each st (57)
Round 11: 1sc in each st (57)
Round 12: 1sc in the next 17st, 1dec x 3 (54)
Round 13: 1sc in each st (54)
Round 14: 1sc in each st (54)
Round 15: 1sc in each st (54)
Round 16: 1sc in each st (54)
Round 17: 1sc in each st (54)
Round 18: 1sc in each st (54)
Round 19: 1sc in each st (54)
Round 20: 1sc in each st (54)
Round 21: 1sc in the next 7st, 1dec x 6 (48)
Round 22: 1sc in the next 6st, 1dec x 6 (42)
Round 23: 1sc in the next 5st, 1dec x 6 (36)
Round 24: 1sc in the next 4st, 1dec x 6 (30)
Round 25: 1sc in the next 3st, 1dec x 6 (24)
Round 26: 1sc in the next 2st, 1dec x 6 (18)
Round 27: 1sc in the next 1st, 1dec x 6 (12)
Round 28: 1dec in the next 6st (6)
— Part 18 :
Round 1: Magic ring (6)
Round 2: 2sc in each st (12)
Round 3: 1sc in each st (12)
Round 4: 1sc in each st (12)
Round 5: 1sc in each st (12)
Round 6: 1sc in the next 1st, 1dec x 6 (8)
Round 7: Working on the front ch. 1sc in each st (8)
Round 8: Working at the back ch from Round 7. 1sc in each st (8)
Round 9: 1sc in each st (8)
Round 10: 1sc in each st (8)
Round 11: 1sc in each st (8)
Round 12: 1sc in each st (8)
Round 13: 1sc in each st (8)
Round 14: 1sc in each st (8)
Round 15: 1sc in each st (8)
— Ears (Make 2) :
Round 1: Magic ring (6)
Round 2: 2sc in each st (12)
Round 3: 1sc in each st (12)
— Moustache :
Round 1: Magic ring (4)
Round 2: 1sc in the next 1st, 1inc x 2 (6)
Round 3: 1sc in the next 2st, 1inc x 2 (8)
Round 4: 1sc in the next 3st, 1inc x 2 (10)
Round 5: 1sc in each st (10)
Round 6: 1sc in the next 3st, 1dec x 2 (8)
Round 7: 1sc in the next 2st, 1dec x 2 (6)
Round 8: 1sc in the next 2st, 1inc x 2 (8)
Round 9: 1sc in the next 3st, 1inc x 2 (10)
Round 10: 1sc in each st (10)
Round 11: 1sc in the next 3st, 1dec x 2 (8)
Round 12: 1sc in the next 2st, 1dec x 2 (6)
Round 13: 1sc in the next 1st, 1dec x 2 (4)
— Nose :
Round 1: Magic ring (6)
Round 2: 2sc in each st (12)
Round 3: 1sc in the next 1st, 1inc x 6 (18)
Round 4: 1sc in each st (18)
Round 5: 1sc in each st (18)
Round 6: 1sc in the next 1st, 1dec x 6 (12)
— Part 22 :
Round 1: Magic Ring (4), 1sl st.
— Part 23 :
Round 1: Magic ring (7)
Round 2: 1inc in each st (14)
Round 3: 1sc in the next 1st, 1inc x 7 (21)
Round 4: 1sc in the next 2st, 1inc x 7 (28)
Round 5: 1sc in the next 3st, 1inc x 7 (35)
Round 6: 1sc in the next 4st, 1inc x 7 (42)
Round 7: 1sc in the next 5st, 1inc x 7 (49)
Round 8: 1sc in the next 6st, 1inc x 7 (56)
Round 9: 1sc in the next 27st, 1inc x 2 (58)
Round 10: 1sc in each st (58)
Round 11: 1sc in each st (58)
Round 12: 1sc in each st (58)
Round 13: 1sc in each st (58)
Round 14: 1sc in each st (58)
Round 15: 1sc in each st (58)
Round 16: - 1sc in the next 1st, 8ch, turn and start at the 2ch from the hook, 1hdc in the next 7st and finish with 1sl st (sideburn).
Round 17: 1dec, 1sc in the next 33st, 1dec (35)
Round 18: 1dec, 1sc in the next 31st, 1dec (33)
Round 19: 1sc in the next 1st, 2dc in the next 1st, 1sc in the next;
— Part 24 :
Round 1: Magic ring (7)
Round 2: 1inc in each st (14)
Round 3: 1sc in the next 1st, 1inc x 7 (21)
Round 4: 1sc in the next 2st, 1inc x 7 (28)
Round 5: 1sc in the next 3st, 1inc x 7 (35)
Round 6: 1sc in the next 4st, 1inc x 7 (42)
Round 7: 1sc in the next 5st, 1inc x 7 (49)
Round 8: 1sc in the next 6st, 1inc x 7 (56)
Round 9: 1sc in the next 7st, 1inc x 7 (63)
Round 10: 1sc in each st (63)
Round 11: 1sc in each st (63)
Round 12: 1sc in each st (63)
Round 13: 1sc in each st (63)
Round 14: 1sc in each st (63)
Round 15: 1sc in each st (63)
Round 16: 1sc in each st (63)
Round 17: 1sc in each st (63)
Round 18: 1sc in each st (63)
Round 19: 1sc in each st (63)
Round 20: Working in the front ch. 1sc in the next 18st (18)
Round 21: 1sc in each st (18)
Round 22: 1dec, 1sc in the next 14st, 1dec (16)
Round 23: 1sc in each st (16)
Round 24: 1dec, 1sc in the next 12st, 1dec (14)
— Part 25 :
Round 1: Magic Ring (6), 1sl st and 1ch.
Round 2: Start in the same st. 1inc in each st (12), finish with a sl st and leave long tail to sew to the cap.
— Assemble :
Round 1: Arms: Attach arms at Round 11 of the body, make sure they are even apart. Fasten off and hide the end.
Round 2: Overall: Start at the back, make 1sc in the next 7st in the front ch of Round 9 of the Body, 6ch and go to the front of the Body where you’ll make 1hdc in the next 7st, 6ch and end at the back of the body (use the;
Round 5: Ears: First you’ll need to use pins to place the hair, so you can know where the ears go. They must be behind the sideburns, for me it was about 4st apart from the moustache. Before placing them, fold them;
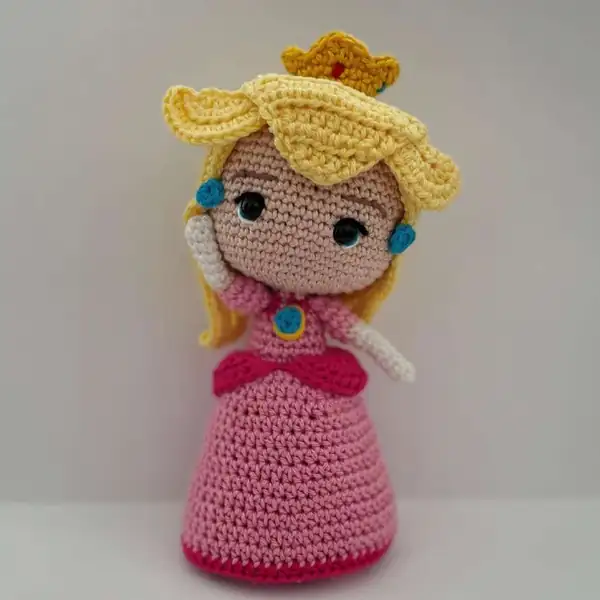
— Start with the pink color yarn :
Round 1: Magic ring (6)
Round 2: 2sc in each st (12)
Round 3: 1sc, 1inc x 6 (18)
Round 4: 1sc in each st (18)
Round 5: 1sc in each st (18)
Round 6: 1sc in the next 3st, 1dec in the next 3st, 1sc and 1dec x 3 (12)
Round 7: 1sc and 1dec x 4 (8)
Round 8: 1sc in each st (8)
Round 9: 1sc in each st (8)
Round 10: 1sc in each st (8)
Round 11: 1sc in each st (8)
Round 12: 1sc in each st (8)
Round 13: 1sc in each st (8)
Round 14: 1sc in each st (8)
Round 15: 1sc in each st (8)
Round 16: 1sc in each st (8)
Round 17: 1sc in each st (8)
Round 18: 1sc in each st (8)
— Part 28 :
Round 1: part is how my legs result. You’ll connect the legs with 1sc (16)
— Part 29 :
Round 1: 1sc in the next 4st (1 leg), 1sc in the next 8st of the other;
Round 2: 1sc, 1inc x 8 (24)
Round 3: 1sc in each st (24)
Round 4: 1sc in each st (24)
Round 5: 1sc in each st (24)
Round 6: Working at the back of the ch. 1sc in each st (24)
Round 7: 1sc in the next 6st, 1dec x 3 (21)
Round 8: 1sc in the next 5st, 1dec x 3 (18)
Round 9: 1sc in each st (18)
Round 10: 1sc in the next 4st, 1dec x 3 (15)
Round 11: 1sc in the next 3st, 1dec x 3 (12)
Round 12: 1sc in the next 1st, 1dec x 3 (8)
— Part 30 :
Round 1: 1hdc in the next 3st, 1inc x 6 (30)
Round 2: 1hdc in the next 4st, 1inc x 6 (36)
Round 3: 1hdc in each st (36)
Round 4: 1hdc in the next 5st, 1inc x 6 (42)
Round 5: 1hdc in each st (42)
Round 6: 1hdc in each st (42)
Round 7: 1hdc in the next 6st, 1inc x 6 (48)
Round 8: 1hdc in each st (48)
Round 9: 1hdc in each st (48)
Round 10: 1hdc in the next 7st, 1inc x 6 (54)
Round 11: 1hdc in each st (54)
Round 12: 1hdc in each st (54)
Round 13: 1hdc in each st (54)
Round 14: 1hdc in each st (54)
— Let’s go back to the head! ( :
Round 1: 1sc in each st (8)
Round 2: 2sc in each st (16)
Round 3: 1sc in the next 1st,1inc x 8 (24)
Round 4: 1sc in the next 2st, 1inc x 8 (32)
Round 5: 1sc in the next 3st, 1inc x 8 (40)
Round 6: 1sc in the next 5st, 1sc and 1inc x 7, 1sc in the next 5st, 1sc and;
Round 7: 1sc in the next 55st, 1inc in next 1st (57)
Round 8: 1sc in each st (57)
Round 9: 1sc in each st (57)
Round 10: 1sc in each st (57)
Round 11: 1sc in each st (57)
Round 12: 1sc in each st (57)
Round 13: 1sc in the next 17st, 1dec x 3 (54)
Round 14: 1sc in each st (54)
Round 15: 1sc in each st (54)
Round 16: 1sc in each st (54)
Round 17: 1sc in each st (54)
Round 18: 1sc in each st (54)
Round 19: 1sc in each st (54)
Round 20: 1sc in each st (54)
Round 21: 1sc in each st (54)
Round 22: 1sc in the next 7st, 1dec x 6 (48)
Round 23: 1sc in the next 6st, 1dec x 6 (42)
Round 24: 1sc in the next 5st, 1dec x 6 (36)
Round 25: 1sc in the next 4st, 1dec x 6 (30)
Round 26: 1sc in the next 3st, 1dec x 6 (24)
Round 27: 1sc in the next 2st, 1dec x 6 (18)
Round 28: 1sc in the next 1st, 1dec x 6 (12)
Round 29: 1dec in the next 6st (6)
— Part 32 :
Round 1: Magic ring (6)
Round 2: 1sc in each st (6)
Round 3: 1sc in each st (6)
Round 4: 1sc in each st (6)
Round 5: 1sc in each st (6)
Round 6: 1sc in each st (6)
Round 7: 1sc in each st (6)
Round 8: 1sc in each st (6)
Round 9: 1inc in each st (12)
Round 10: 1sc in each st (12)
Round 11: 1sc in each st (12)
Round 12: 1sc in the next 1st, 1dec x 4 (8)
— Part 33 :
Round 1: 1hdc in each st (4)
Round 2: 1inc in each st (8)
Round 3: 1inc in each st (16)
Round 4: 1hdc in each st (16)
— Part 34 :
Round 1: Magic ring (4)
— Hair :
Round 1: Magic ring hdc (7)
Round 2: 2hdc in each st (14)
Round 3: 1hdc in the next 1st, 2hdc in the next 1st x 7 (21)
Round 4: 1hdc in the next 2st, 2hdc in the next 1st x 7 (28)
Round 5: 1hdc in the next 3st, 2hdc in the next 1st x 7 (35)
— Part 36 :
Round 1: 1hdc in each st (4)
Round 2: 1inc in each st (8)
Round 3: 1inc in each st (16)
— Part 37 :
Round 1: 1hdc in each st (16)
Round 2: 1dec, 1hdc in the next 12st, 1dec (14)
Round 3: 1dec, 1hdc in the next 10st, 1dec (12)
Round 4: 1dec, 1hdc in the next 8st, 1dec (10)
Round 5: 1dec, 1hdc in the next 6st, 1dec (8)
Round 6: 1dec, 1hdc in the next 4st, 1dec (6)
Round 7: 1dec, 1hdc in the next 2st, 1dec (4)
Round 8: 1dec in the next 2st (2)
— Crown :
Round 1: 1sc in each (16)
Round 2: 1sc in each (16)
Round 3: 1sc and 1hdc in the next 1 st, 2dc in the next 1 st, 1hdc and 1sc in the next 1 st, 1sl st in the next st.
— Assemble :
Round 2: Arms: Attach arms at Round 11 of the body, make sure they are even apart. Fasten off and hide the end.
Round 5: Hair: Using pins put on the hair and make sure it’s like you want it. I sew discreetly the middle part to the head, so it doesn’t fall (not too many stitches). Fasten off and hide the end.
Round 6: Earrings and crown: Earrings: Attach the earrings to the hair at the eye level, fasten off and hide the ends. Crown: Sew the crown to the top of the head, fasten off and hide the ends.
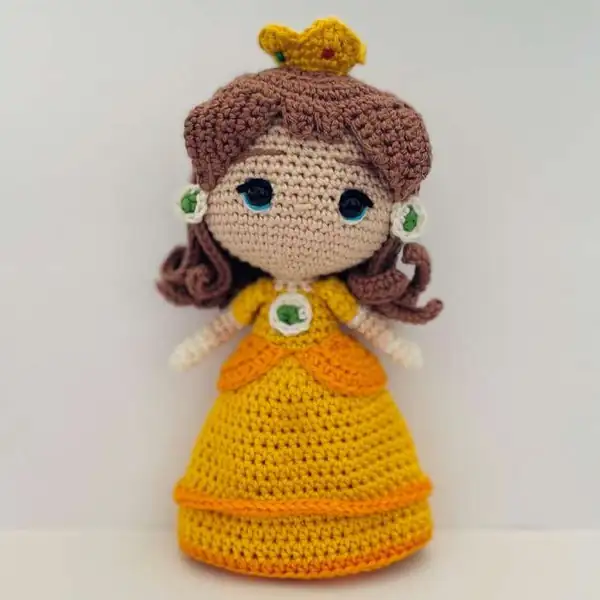
— Start with the orange color yarn :
Round 1: Magic ring (6)
Round 2: 2sc in each st (12)
Round 3: 1sc, 1inc x 6 (18)
Round 4: 1sc in each st (18)
Round 5: 1sc in each st (18)
Round 6: 1sc in the next 3st, 1dec in the next 3st, 1sc and 1dec x 3;
Round 7: 1sc and 1dec x 4 (8)
Round 8: 1sc in each st (8)
Round 9: 1sc in each st (8)
Round 10: 1sc in each st (8)
Round 11: 1sc in each st (8)
Round 12: 1sc in each st (8)
Round 13: 1sc in each st (8)
Round 14: 1sc in each st (8)
Round 15: 1sc in each st (8)
Round 16: 1sc in each st (8)
Round 17: 1sc in each st (8)
Round 18: 1sc in each st (8)
— Part 41 :
Round 1: part is how my legs result. You’ll connect the legs with 1sc (16) (use;
— Part 42 :
Round 1: 1sc in the next 4st (1 leg), 1sc in the next 8st of the other leg,;
Round 2: 1sc, 1inc x 8 (24)
Round 3: 1sc in each st (24)
Round 4: 1sc in each st (24)
Round 5: 1sc in each st (24)
Round 6: Working at the back of the ch. 1sc in each st (24)
Round 7: 1sc in the next 6st, 1dec x 3 (21)
Round 8: 1sc in the next 5st, 1dec x 3 (18)
Round 9: 1sc in each st (18)
Round 10: 1sc in the next 4st, 1dec x 3 (15)
Round 11: 1sc in the next 3st, 1dec x 3 (12)
Round 12: 1sc in the next 1st, 1dec x 3 (8)
— Part 43 :
Round 1: 1hdc in the next 3st, 1inc x 6 (30)
Round 2: 1hdc in the next 4st, 1inc x 6 (36)
Round 3: 1hdc in each st (36)
Round 4: 1hdc in the next 5st, 1inc x 6 (42)
Round 5: 1hdc in each st (42)
Round 6: 1hdc in each st (42)
Round 7: 1hdc in the next 6st, 1inc x 6 (48)
Round 8: 1hdc in each st (48)
Round 9: 1hdc in each st (48)
Round 10: 1hdc in the next 7st, 1inc x 6 (54)
Round 11: Work at the back ch. 1hdc in each st (54)
Round 12: 1hdc in each st (54)
Round 13: 1hdc in each st (54)
Round 14: 1hdc in each st (54)
— Part 44 :
Round 1: 1hdc in the next 8st, 1inc x 6 (60)
— Let’s go back to the head! ( :
Round 1: 1sc in each st (8)
Round 2: 2sc in each st (16)
Round 3: 1sc in the next 1st,1inc x 8 (24)
Round 4: 1sc in the next 2st, 1inc x 8 (32)
Round 5: 1sc in the next 3st, 1inc x 8 (40)
Round 6: 1sc in the next 5st, 1sc and 1inc x 7, 1sc in the next 5st,;
Round 7: 1sc in the next 55st, 1inc in next 1st (57)
Round 8: 1sc in each st (57)
Round 9: 1sc in each st (57)
Round 10: 1sc in each st (57)
Round 11: 1sc in each st (57)
Round 12: 1sc in each st (57)
Round 13: 1sc in the next 17st, 1dec x 3 (54)
Round 14: 1sc in each st (54)
Round 15: 1sc in each st (54)
Round 16: 1sc in each st (54)
Round 17: 1sc in each st (54)
Round 18: 1sc in each st (54)
Round 19: 1sc in each st (54)
Round 20: 1sc in each st (54)
Round 21: 1sc in each st (54)
Round 22: 1sc in the next 7st, 1dec x 6 (48)
Round 23: 1sc in the next 6st, 1dec x 6 (42)
Round 24: 1sc in the next 5st, 1dec x 6 (36)
Round 25: 1sc in the next 4st, 1dec x 6 (30)
Round 26: 1sc in the next 3st, 1dec x 6 (24)
Round 27: 1sc in the next 2st, 1dec x 6 (18)
Round 28: 1sc in the next 1st, 1dec x 6 (12)
Round 29: 1dec in the next 6st (6)
— Part 46 :
Round 1: Magic ring (6)
Round 2: 1sc in each st (6)
Round 3: 1sc in each st (6)
Round 4: 1sc in each st (6)
Round 5: 1sc in each st (6)
Round 6: 1sc in each st (6)
Round 7: 1sc in each st (6)
Round 8: 1sc in each st (6)
Round 9: 1inc in each st (12)
Round 10: 1sc in each st (12)
Round 11: 1sc in each st (12)
Round 12: 1sc in the next 1st, 1dec x 4 (8)
— Part 47 :
Round 1: 1hdc in each st (4)
Round 2: 1inc in each st (8)
Round 3: 1inc in each st (16)
Round 4: 1hdc in each st (16)
— Part 48 :
Round 1: Magic ring (4)
Round 2: 1sc in the next 1st, 1inc x 2 (6)
— Hair :
Round 1: Magic ring hdc (7)
Round 2: 2hdc in each st (14)
Round 3: 1hdc in the next 1st, 2hdc in the next 1st x 7 (21)
Round 4: 1hdc in the next 2st, 2hdc in the next 1st x 7 (28)
Round 5: 1hdc in the next 3st, 2hdc in the next 1st x 7 (35)
— Part 50 :
Round 1: 1sc in each st (10)
Round 2: 1sc in the next 8st, 1dec (9)
Round 3: 1dec, 1sc in the next 7sc (8)
Round 4: 1sc in the next 6st, 1dec (7)
Round 5: 1dec, 1sc in the next 5st (6)
Round 6: 1sc in the next 4st, 1dec (5)
Round 7: 1dec, 1sc in the next 3st (4)
Round 8: Make 4ch, turn and start at the 2nd ch from your hook, 1sc in the next 1 st, 1hdc in the next 2st.
Round 9: Make 4ch, turn and start at the 2nd ch from your hook, 1sc in the next 1 st, 1hdc in the next 2st.
Round 10: Make 5ch, turn and start at the 2nd ch from your hook, 1inc, 1sc in the next 3st (5)
Round 11: 1sc in the next 4st, 1inc (6)
Round 12: 1inc, 1sc in the next 5st (7)
Round 13: 1sc in the next 6st, 1inc (8)
Round 14: 1inc, 1sc in the next 7st (9)
Round 15: 1sc in the next 8st, 1inc (10)
Round 16: 1inc, 1sc in the next 9st (11)
Round 17: You’ll make 1ch and turn, make 1sc in each st (see photo for guidance). For me it was 20sc.
Round 18: 1sc in each st (20)
Round 19: 1dec, 1sc in the next 16st, 1dec (18)
Round 20: 1dec, 1sc in the next 14st, 1dec (16)
— Crown :
Round 1: 1sc in each (16)
Round 2: 1sc in each (16)
Round 3: 1sc and 1hdc in the next 1 st, 2dc in the next 1 st, 1hdc and 1sc in the next 1 st, 1sl st in the next st.
Round 6: Earrings and crown: Earrings: Attach the earrings to the hair at the eye level, fasten off and hide the ends.
These little Mario Bros characters were designed to be pocket-sized amigurumi companions to make and share. The combination of tiny overalls, expressive moustaches and removable caps creates playful personality in each doll. Detailed assembly notes and step photos in the PDF guide you through pinning and sewing for professional-looking results. Happy making and enjoy gifting your handmade heroes!