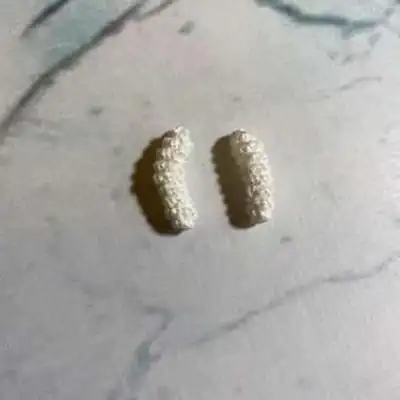
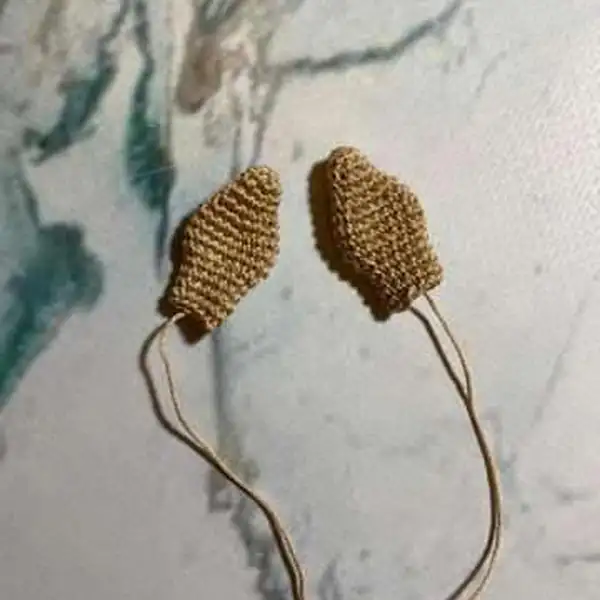
From the moment the tiny ears pop from the head, you can sense a lived-in story in Bunny's House Amigurumi. The pattern guides you through a precise sequence of rounds, a magic ring foundation, and discreet color transitions that create the house’s frame and the bunny’s features without bulk. The lace-weight yarn behaves like a whisper on the hook, encouraging delicate folds and a crisp silhouette at a finished height of approximately 7–8 cm. You’ll stitch with a 1.0 mm hook, switch between BLO and FLO to emphasize shaping, and use the invisible decrease technique to keep the seams seamless. The house-inspired base is built with clever increases and decreases that form a compact pedestal, while the bunny’s head, ears, and tiny paws emerge with careful placement. The finishing touches—glue eyes or safety eyes, neat ends tucked inside, and a small amount of pink pastel for toning—bring this character fully to life. It’s a small sculpture you can display on a shelf, gift to a friend, or tuck into a dollhouse corner for storytelling.
— Part 1 :
Round 1: 6sc in MR;
Round 2: 6inc (12)
Round 3: (1sc, inc) *6 (18)
Round 4: (2sc, inc) *6 (24)
Round 5: (3sc, inc) *6 (30)
Round 6: 30sc (3 rounds) (30)
Round 7: 30sc (3 rounds) (30)
Round 8: 30sc (3 rounds) (30)
Round 9: (1sc, dec) *6, 12sc (24)
Round 10: 24sc (5 rounds) (24)
Round 11: 24sc (5 rounds) (24)
Round 12: 24sc (5 rounds) (24)
Round 13: 24sc (5 rounds) (24)
Round 14: 24sc (5 rounds) (24)
Round 15: (2sc, dec) *6 (18)
Round 16: 18sc (18)
Round 17: 18inc (36)
Round 18: (5sc, inc) *6 (42)
Round 19: 42sc (5 rounds) (42)
Round 20: 42sc (5 rounds) (42)
Round 21: 42sc (5 rounds) (42)
Round 22: 42sc (5 rounds) (42)
Round 23: 42sc (5 rounds) (42)
Round 24: (5sc, dec) *6 (36)
Round 25: (4sc, dec) *6 (30)
Round 26: 30sc (4 rounds) (30)
Round 27: 30sc (4 rounds) (30)
Round 28: 30sc (4 rounds) (30)
Round 29: 30sc (4 rounds) (30)
Round 30: (3sc, dec) *6 (24)
Round 31: (2sc, dec) *6 (18)
Round 32: (1sc, dec) *6 (12)
Round 33: 6dec;
— Part 2 :
Round 1: Chain 6. Start in the second;
Round 3: 8sc, (4-dc Bobble st, sc) *3,;
Round 4: 4sc, 6dec, 2sc (12)
Round 5: (2sc, dec) *3 (9)
Round 6: (1sc, dec) *3 (6)
Round 7: 6sc (4 rounds) (6)
Round 8: 6sc (4 rounds) (6)
Round 9: 6sc (4 rounds) (6)
Round 10: 6sc (4 rounds) (6)
— Part 3 :
Round 1: 6sc in MR;
Round 2: (1sc, inc) *3 (9)
Round 3: 9sc (9)
Round 4: (2sc, inc) *3 (12)
Round 5: 12sc (12)
Round 6: (1sc, inc) *6 (18)
Round 7: 18sc (4 rounds) (18)
Round 8: 18sc (4 rounds) (18)
Round 9: 18sc (4 rounds) (18)
Round 10: 18sc (4 rounds) (18)
Round 11: (1sc, dec) *6 (12)
Round 12: 12sc (5 rounds) (12)
Round 13: 12sc (5 rounds) (12)
Round 14: 12sc (5 rounds) (12)
Round 15: 12sc (5 rounds) (12)
Round 16: 12sc (5 rounds) (12)
Round 17: 6dec (6)
Round 18: 6sc. Do not stuff.
— Part 4 :
Round 1: 6sc in MR;
Round 2: 6sc (2 rounds) (6)
Round 3: 6sc (2 rounds) (6)
Round 4: inc, 5sc (7)
Round 5: 7sc (4 rounds) (7)
Round 6: 7sc (4 rounds) (7)
Round 7: 7sc (4 rounds) (7)
Round 8: 7sc (4 rounds) (7)
Round 9: 3sc, dec, 2sc (6)
— Part 5 :
Round 1: 6sc in MR;
Round 2: 6inc (12)
Round 3: 12sc (12)
Round 4: 6dec;
— Part 6 :
Round 1: 6sc in MR;
Round 2: (1sc, inc) *3 (9)
Round 3: 9sc (9)
Round 4: (2sc, inc) *3 (12)
Round 5: 12sc (12)
Round 6: (1sc, inc) *6 (18)
Round 7: 18sc (3 rounds) (18)
Round 8: 18sc (3 rounds) (18)
Round 9: 18sc (3 rounds) (18)
Round 10: (1sc, dec) *6 (12)
Round 11: 12sc (4 rounds) (12)
Round 12: 12sc (4 rounds) (12)
Round 13: 12sc (4 rounds) (12)
Round 14: 12sc (4 rounds) (12)
Round 15: 6dec (6)
— Part 7 :
Round 1: 6sc in MR;
Round 2: 6inc (12)
Round 3: (1sc, inc) *6 (18)
Round 4: (2sc, inc) *6 (24)
Round 5: (3sc, inc) *6 (30)
Round 6: 30sc (3 rounds) (30)
Round 7: 30sc (3 rounds) (30)
Round 8: 30sc (3 rounds) (30)
Round 9: (1sc, dec) *6, 12sc (24)
Round 10: 24sc (5 rounds) (24)
Round 11: 24sc (5 rounds) (24)
Round 12: 24sc (5 rounds) (24)
Round 13: 24sc (5 rounds) (24)
Round 14: 24sc (5 rounds) (24)
Round 15: (2sc, dec) *6 (18)
Round 16: (1sc, dec) *6 (12)
Round 17: 6dec;
— Part 8 :
Round 1: 6sc in MR;
Round 2: 6inc (12)
Round 3: (1sc, inc) *6 (18)
Round 4: (2sc, inc) *6 (24)
Round 5: (3sc, inc) *6 (30)
Round 6: (4sc, inc) *6 (36)
Round 7: (5sc, inc) *6 (42)
Round 8: 42sc (3 rounds) (42)
Round 9: 42sc (3 rounds) (42)
Round 10: 42sc (3 rounds) (42)
Round 11: (5sc, dec) *6 (36)
Round 12: (4sc, dec) *6 (30)
Round 13: 30sc (4 rounds) (30)
Round 14: 30sc (4 rounds) (30)
Round 15: 30sc (4 rounds) (30)
Round 16: 30sc (4 rounds) (30)
Round 17: (3sc, dec) *6 (24)
Round 18: (2sc, dec) *6 (18)
Round 19: (1sc, dec) *6 (12)
Round 20: 6dec;
— Part 9 :
Round 1: 6sc in MR;
Round 2: 6sc (2 rounds) (6)
Round 3: 6sc (2 rounds) (6)
Round 4: inc, 5sc (7)
Round 5: 7sc (4 rounds) (7)
Round 6: 7sc (4 rounds) (7)
Round 7: 7sc (4 rounds) (7)
Round 8: 7sc (4 rounds) (7)
Round 9: 3sc, dec, 2sc (6)
— Part 10 :
Round 1: Chain 6. Start in the second;
Round 3: 8sc, (4-dc Bobble st , sc) *3,;
Round 4: 4sc, 6dec, 2sc (12)
Round 5: (2sc, dec) *3 (9)
Round 6: (1sc, dec) *3 (6)
Round 7: 6sc (3 rounds) (6)
Round 8: 6sc (3 rounds) (6)
Round 9: 6sc (3 rounds) (6)
— Part 11 :
Round 1: 6sc in MR;
Round 2: 6inc (12)
Round 3: 12sc (12)
Round 4: 6dec;
— Part 12 :
Round 1: 6sc in MR;
Round 2: 6sc (6)
Round 3: (1sc, inc) *3 (9)
Round 4: 9sc (9)
Round 5: (2sc, inc) *3 (12)
Round 6: 12sc (2 rounds) (12)
Round 7: 12sc (2 rounds) (12)
Round 8: 6dec (6)
— Part 13 :
Round 1: 8sc in MR;
Round 3: 2sc, 2dec, 2sc (6)
Round 4: 6sc;
Round 5: 6sc;
Round 6: 6sc;
Round 7: 6sc;
— Part 14 :
Round 1: 6sc in MR;
Round 2: 6sc (5 rounds) (6)
Round 3: 6sc (5 rounds) (6)
Round 4: 6sc (5 rounds) (6)
Round 5: 6sc (5 rounds) (6)
Round 6: 6sc (5 rounds) (6)
— Part 15 :
Round 1: 6sc in MR;
Round 2: 6inc (12)
Round 3: (1sc, inc) *6 (18)
Round 4: 18sc (4 rounds) (18)
Round 5: 18sc (4 rounds) (18)
Round 6: 18sc (4 rounds) (18)
Round 7: 18sc (4 rounds) (18)
Round 8: (1sc, dec) *6 (12)
Round 9: 12sc;
Round 10: 12sc;
Round 11: 12sc;
Round 12: 12inc (24)
Round 13: 24sc (3 rounds) (24)
Round 14: 24sc (3 rounds) (24)
Round 15: 24sc (3 rounds) (24)
Round 16: (2sc, dec) *6 (18)
Round 17: 18sc;
Round 18: 18sc;
Round 19: 18sc;
Round 20: (1sc, dec) *6 (12)
Round 21: 6dec;
— Part 16 :
Round 1: 6sc in MR;
Round 2: (1sc, inc) *3 (9)
Round 3: 9sc (9)
Round 4: (1sc, dec) *3 (6)
— Part 17 :
Round 1: Chain 13. From the second;
Round 2: ch1, 12sc, turn;
Round 3: ch1, 12sc, turn;
Round 4: ch1, 12sc, turn;
Round 5: ch1, 12sc, turn;
Round 6: ch1, 12sc, turn;
Round 7: ch1, 12sc, turn;
Round 8: ch1, 12sc, turn;
Round 9: ch1, 12sc, turn;
Round 10: ch1, 12sc, turn;
Round 11: ch1, 12sc, turn;
Round 12: ch1, 12sc, turn;
Round 13: ch1, 12sc, turn;
Round 14: ch1, 12sc, turn;
Round 15: ch1, 12sc, turn;
Round 16: ch1, 12sc, turn;
Round 17: ch1, 12sc, turn;
Round 18: ch1, 12sc, turn;
Round 19: ch1, 12sc, turn;
Round 20: ch1, 12sc, turn;
Round 21: ch1, 12sc, turn;
Round 22: ch1, 12sc, turn;
Round 23: ch1, 12sc, turn;
Round 24: ch1, 12sc, turn;
Round 25: ch1, 12sc, turn;
Round 26: ch1, 12sc, turn;
Round 27: ch1, 12sc, turn;
Round 28: ch1, 12sc, turn;
Round 29: ch1, 12sc, turn;
Round 30: ch1, 12sc, turn;
Round 31: ch1, 12sc, turn;
Round 32: ch1, 12sc, turn;
Round 33: ch1, 12sc, turn;
Round 34: ch1, 12sc, turn;
Round 35: ch1, 12sc, turn;
Round 36: ch1, 12sc, turn;
Round 37: ch1, dec, 8sc, dec, turn (10)
Round 38: ch1, 10sc, turn (10)
Round 39: ch1, dec, 6sc, dec, turn (8)
Round 40: ch1, 8sc, turn (8)
Round 41: ch1, dec, 4sc, dec, turn (6)
Round 42: ch1, 6sc;
— Part 18 :
Round 1: 6sc in MR;
Round 2: 6inc (12)
Round 3: (1sc, inc) *6 (18)
Round 4: (2sc, inc) *6 (24)
Round 5: (3sc, inc) *6 (30)
Round 6: (4sc, inc) *6 (36)
Round 7: (5sc, inc) *6 (42)
Round 8: (6sc, inc) *6 (48)
Round 9: 48sc (3 rounds) (48)
Round 10: 48sc (3 rounds) (48)
Round 11: 48sc (3 rounds) (48)
Round 12: (7sc, inc) *6 (54)
Round 13: 54sc (7 rounds) (54)
Round 14: 54sc (7 rounds) (54)
Round 15: 54sc (7 rounds) (54)
Round 16: 54sc (7 rounds) (54)
Round 17: 54sc (7 rounds) (54)
Round 18: 54sc (7 rounds) (54)
Round 19: 54sc (7 rounds) (54)
— Part 19 :
Round 1: 5sc in MR, turn;
Round 2: ch1, 2sc, 3sc inc, 2sc, turn;
Round 3: ch1, sc, inc, sc, 3sc inc, sc,;
Round 4: ch1, 2sc, inc, 2sc, 3sc inc,;
Round 5: ch1, 3sc, inc, 3sc, 3sc inc,;
Round 6: ch1, 4sc, inc, 4sc, 3sc inc,;
— Part 20 :
Round 1: 6sc in MR;
Round 2: 6inc (12)
Round 3: (1sc, inc) *6 (18)
Round 4: (2sc, inc) *6 (24)
Round 5: (3sc, inc) *6 (30)
Round 6: (4sc, inc) *6 (36)
Round 7: (5sc, inc) *6 (42)
Round 8: (6sc, inc) *6 (48)
Round 9: (7sc, inc) *6 (54)
Round 10: (8sc, inc) *6 (60)
— Part 21 :
Round 1: 6sc in MR;
Round 2: 6inc (12)
Round 3: (1sc, inc) *6 (18)
Round 4: (2sc, inc) *6 (24)
Round 5: (3sc, inc) *6 (30)
Round 6: (4sc, inc) *6 (36)
Round 7: (5sc, inc) *6 (42)
Round 8: 42sc (6 rounds) (42)
Round 9: 42sc (6 rounds) (42)
Round 10: 42sc (6 rounds) (42)
Round 11: 42sc (6 rounds) (42)
Round 12: 42sc (6 rounds) (42)
Round 13: 42sc (6 rounds) (42)
Round 14: (5sc, dec) *6 (36)
Round 15: (4sc, dec) *6 (30)
Round 16: (3sc, dec) *6 (24)
Round 17: (2sc, dec) *6 (18)
Round 18: (1sc, dec) *6 (12)
Round 19: 6dec;
— Part 22 :
Round 1: 5sc in MR, turn;
Round 2: ch1, 2sc, 3sc inc, 2sc, turn;
Round 3: ch1, sc, inc, sc, 3sc inc, sc,;
Round 4: ch1, 2sc, inc, 2sc, 3sc inc,;
Round 5: ch1, 3sc, inc, 3sc, 3sc inc,;
Round 6: ch1, 4sc, inc, 4sc, 3sc inc,;
— Part 23 :
Round 1: 6sc in MR;
Round 2: 6inc (12)
Round 3: (1sc, inc) *6 (18)
Round 4: (2sc, inc) *6 (24)
Round 5: (3sc, inc) *6 (30)
Round 6: (4sc, inc) *6 (36)
Round 7: (5sc, inc) *6 (42)
Round 8: (6sc, inc) *6 (48)
— Part 24 :
Round 1: 6sc in MR;
Round 2: 6inc (12)
Round 3: (1sc, inc) *6 (18)
Round 4: 18sc (18)
Round 5: (2sc, inc) *6 (24)
Round 6: 24sc (24)
Round 7: (3sc, inc) *6 (30)
Round 8: (4sc, inc) *6 (36)
Round 9: 36sc (36)
Round 10: (5sc, inc) *6 (42)
Round 11: 42sc (42)
Round 12: (6sc, inc) *6 (48)
Round 13: 48sc (2 rounds) (48)
Round 14: 48sc (2 rounds) (48)
Round 15: (7sc, inc) *6 (54)
Round 16: 54sc (54)
Round 17: (8sc, inc) *6 (60)
Round 18: 60sc (60)
Round 19: (9sc, inc) *6 (66)
Round 20: (10sc, inc) *6 (72)
Round 21: 72sc (72)
Round 22: (11sc, inc) *6 (78)
Round 23: (12sc, inc) *6 (84)
Round 24: 84sc (2 rounds) (84)
Round 25: 84sc (2 rounds) (84)
Round 26: 10sc, skip 10sc, 64sc (74)
Round 27: 8sc, dec, skip distance for;
Round 28: 7sc, dec, skip distance for;
Round 29: 6sc, dec, skip distance for;
Round 30: 5sc, dec, skip distance for;
Round 31: 6sc, skip distance for;
Round 32: 6sc, skip distance for;
Round 33: 6sc, skip distance for;
Round 34: 6sc, skip distance for;
Round 35: 6sc, skip distance for;
Round 36: 6sc, skip distance for;
Round 37: 6sc, skip distance for;
Round 38: 6sc, skip distance for;
Round 39: 5sc, inc, skip distance for;
Round 40: 6sc, inc, skip distance for;
Round 41: 7sc, inc, skip distance for;
Round 42: 8sc, inc, skip distance for;
Round 43: 10sc, skip distance for the;
Round 44: 10sc, ch10, 64sc (84)
Round 45: 10sc, 10sc on the chain,;
Round 46: 84sc (5 rounds) (84)
Round 47: 84sc (5 rounds) (84)
Round 48: 84sc (5 rounds) (84)
Round 49: 84sc (5 rounds) (84)
Round 50: 84sc (5 rounds) (84)
Round 51: (12sc, dec) *6 (78)
Round 52: (11sc, dec) *6 (72)
Round 53: (10sc, dec) *6 (66)
Round 54: (9sc, dec) *6 (60)
Round 55: (8sc, dec) *6 (54)
Round 56: (7sc, dec) *6 (48)
Round 57: (6sc, dec) *6 (42)
Round 58: (5sc, dec) *6 (36)
Round 59: (4sc, dec) *6 (30)
Round 60: (3sc, dec) *6 (24)
Round 61: (2sc, dec) *6 (18)
Round 62: BLO (1sc, dec) *6 (12)
Round 63: BLO 6dec;
— Part 25 :
Round 1: 6sc in MR;
Round 2: 6inc (12)
Round 3: (1sc, inc) *6 (18)
Round 4: (2sc, inc) *6 (24)
Round 5: Change color to Green. (3sc, inc) *6 (30). Leave a long tail for;
— Part 26 :
Round 1: 6sc in MR;
Round 2: 6sc (11 rounds) (6)
Round 3: 6sc (11 rounds) (6)
Round 4: 6sc (11 rounds) (6)
Round 5: 6sc (11 rounds) (6)
Round 6: 6sc (11 rounds) (6)
Round 7: 6sc (11 rounds) (6)
Round 8: 6sc (11 rounds) (6)
Round 9: 6sc (11 rounds) (6)
Round 10: 6sc (11 rounds) (6)
Round 11: 6sc (11 rounds) (6)
— Part 27 :
Round 1: 6sc in MR;
Round 2: 6sc (29 rounds) (6)
Round 3: 6sc (29 rounds) (6)
Round 4: 6sc (29 rounds) (6)
Round 5: 6sc (29 rounds) (6)
Round 6: 6sc (29 rounds) (6)
Round 7: 6sc (29 rounds) (6)
Round 8: 6sc (29 rounds) (6)
Round 9: 6sc (29 rounds) (6)
Round 10: 6sc (29 rounds) (6)
Round 11: 6sc (29 rounds) (6)
Round 12: 6sc (29 rounds) (6)
Round 13: 6sc (29 rounds) (6)
Round 14: 6sc (29 rounds) (6)
Round 15: 6sc (29 rounds) (6)
Round 16: 6sc (29 rounds) (6)
Round 17: 6sc (29 rounds) (6)
Round 18: 6sc (29 rounds) (6)
Round 19: 6sc (29 rounds) (6)
Round 20: 6sc (29 rounds) (6)
Round 21: 6sc (29 rounds) (6)
Round 22: 6sc (29 rounds) (6)
Round 23: 6sc (29 rounds) (6)
Round 24: 6sc (29 rounds) (6)
Round 25: 6sc (29 rounds) (6)
Round 26: 6sc (29 rounds) (6)
Round 27: 6sc (29 rounds) (6)
Round 28: 6sc (29 rounds) (6)
Round 29: 6sc (29 rounds) (6)
Round 30: 6sc (29 rounds) (6)
— Part 28 :
Round 1: 6sc in MR;
Round 2: 6inc (12)
Round 3: (1sc, inc) *6 (18)
Round 4: (2sc, inc) *6 (24)
Round 5: (3sc, inc) *6 (30)
Round 6: (4sc, inc) *6 (36)
Round 7: (5sc, inc) *6 (42)
Round 8: (6sc, inc) *6 (48)
Round 9: (7sc, inc) *6 (54)
Round 10: (8sc, inc) *6 (60)
Round 11: (9sc, inc) *6 (66)
Round 12: (10sc, inc) *6 (72)
Round 13: (11sc, inc) *6 (78)
Round 14: (12sc, inc) *6 (84)
Round 15: (13sc, inc) *6 (90)
Round 16: (14sc, inc) *6 (96)
Round 17: (15sc, inc) *6 (102)
Round 18: (16sc, inc) *6 (108)
Round 19: (17sc, inc) *6 (114)
Round 20: (18sc, inc) *6 (120)
Round 21: (19sc, inc) *6 (126)
Round 22: (20sc, inc) *6 (132)
Round 23: (21sc, inc) *6 (138)
Round 24: (22sc, inc) *6 (144)
Round 25: (23sc, inc) *6 (150)
Round 26: (24sc, inc) *6 (156)
Round 27: (25sc, inc) *6 (162)
Round 28: (26sc, inc) *6 (168)
Round 29: (27sc, inc) *6 (174)
Round 30: (28sc, inc) *6 (180)
Round 31: (29sc, inc) *6 (186)
Round 32: (30sc, inc) *6 (192)
Round 33: (31sc, inc) *6 (198)
Round 34: (32sc, inc) *6 (204)
Round 35: (33sc, inc) *6 (210)
Round 36: (34sc, inc) *6 (216)
Round 37: (35sc, inc) *6 (222)
Round 38: (1sc, 3dc in the one stitch)
— Part 29 :
Round 1: Chain 11. Start from the;
Round 2: ch1, 10sc, turn;
Round 3: ch1, 10sc, turn;
Round 4: ch1, 10sc, turn;
Round 5: ch1, 10sc, turn;
— Part 30 :
Round 1: 5sc in MR;
Round 3: (4-tr cluster, ch1, sc) *5;
— Part 31 :
Round 1: Chain 7, from the second;
— Part 32 :
Round 1: 6sc in MR;
Round 2: 6inc (12)
Round 3: (1sc, inc) *6 (18)
Round 4: (2sc, inc) *6 (24)
Round 5: (3sc, inc) *6 (30)
Round 6: (4sc, inc) *6 (36)
Round 7: (5sc, inc) *6 (42)
Round 8: 42sc (2 rounds) (42)
Round 9: 42sc (2 rounds) (42)
Round 10: (6sc, inc) *6 (48)
Round 11: 48sc (6 rounds) (48)
Round 12: 48sc (6 rounds) (48)
Round 13: 48sc (6 rounds) (48)
Round 14: 48sc (6 rounds) (48)
Round 15: 48sc (6 rounds) (48)
Round 16: 48sc (6 rounds) (48)
Round 17: 12sc, ch22 (skip 12;
Round 18: 68sl st;
— Part 33 :
Round 1: 6sc in MR;
Round 2: 6sc (6)
Round 3: (1sc, inc) *3 (9)
Round 4: 9sc (9)
Round 5: (2sc, inc) *3 (12)
Round 6: 12sc (12)
Round 7: (3sc, inc) *3 (15)
Round 8: 15sc (3 rounds) (15)
Round 9: 15sc (3 rounds) (15)
Round 10: 15sc (3 rounds) (15)
Round 11: (3sc, dec) *3 (12)
Round 12: 6dec;
Thank you for exploring Bunny's House Amigurumi Pattern with me; I hope this tiny project becomes a welcome companion in your craft room and a favorite finish on your shelf. The 7–8 cm tall bunny with its little house sits somewhere between a sculpture and a toy, inviting you to pause, observe the shaping, and appreciate the skill in each stitch. May your colors stay true, your tension stay even, and your final piece travel well in photos or gifts. If you share your version, please tag your photos so fellow crocheters can celebrate your handiwork and be inspired to begin their own Bunny's House.