About This Little frog Amigurumi Pattern
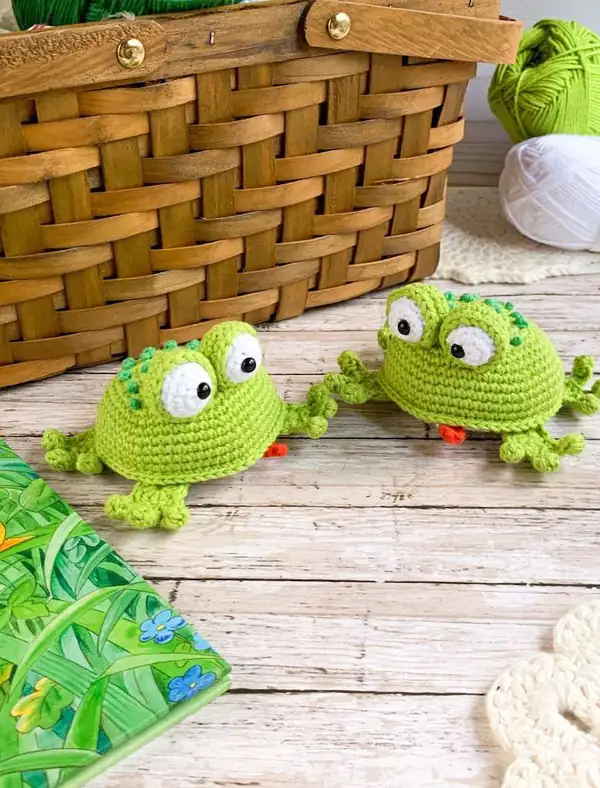
This little frog amigurumi is a friendly, squeezable toy that fits perfectly in small hands. It blends simple crochet stitches with a round, bouncy belly and bright lime limbs to create a character that feels alive as soon as you finish the last seam. The pattern guides you from a tight magic ring into a fully assembled plush using DK weight cotton, with Lime Green (629) as the main color, Paper White (601) for the belly, Spearmint Green (626) for accents, and Pillar Red (615) for tiny details. You’ll practice color changes that are clean and compact, learn how to keep your stitches tight so stuffing stays neatly hidden, and master finishing techniques that give the frog a polished, toy-quality look. Each piece is designed to be sturdy enough for daily hugs, yet soft enough for gentle play. It’s a beginner-friendly but deeply satisfying project: five to seven hours of focused crochet that results in a durable, giftable little creature you’ll be proud to share. The round belly centers the body and adds a pleasing dimension, while the small feet complete the character’s charm. The finished frog measures about 7–9 cm tall, making it perfect for small hands to hold and for gifting to a new crochet friend. This is the sort of project you’ll want to crochet again and again in different color stories, building confidence in color changes and careful finishing along the way.
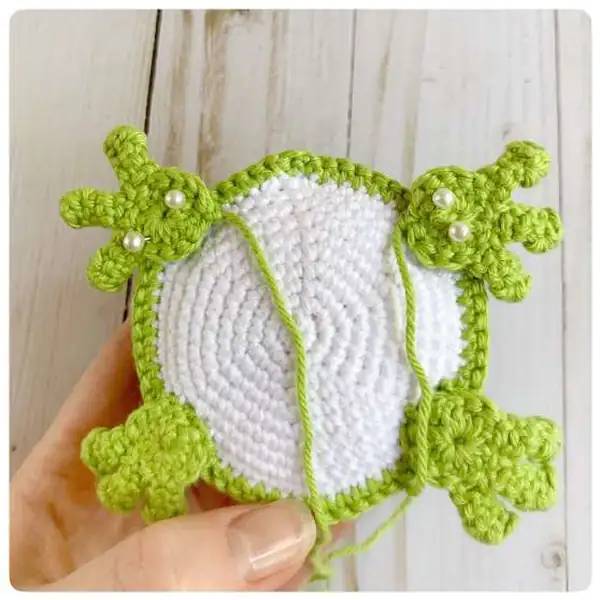
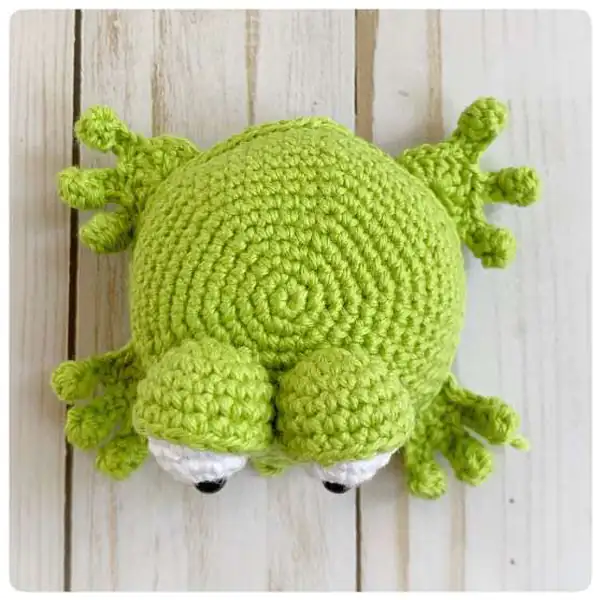
This frog amigurumi is designed to be cuddly and playful, with a white belly and bright green limbs. The pattern emphasizes tight stitching and clean joins to keep stuffing from showing. You’ll crochet in continuous spirals for a smooth surface, then assemble the pieces with careful placement of eyes and paws. The frog’s round body sits on a compact torso that expands into a slightly larger belly, creating a friendly, huggable silhouette. The limbs are worked separately and attached to the body with small, even stitches, so there are no bulky seams to distract from the shape. The white belly reads cleanly against the lime body, and the tiny red accents are used sparingly to suggest a smile or a little tongue peeking out. The color changes are deliberate but not dramatic, and the DK weight ensures a dense textile that holds its shape without becoming stiff. The pattern uses a Magic Ring to begin the head and body sections, followed by multiple rounds of single crochet, increases, and decreases that preserve a round, uniform texture. For a touch of durability, the body is finished with a tight last round and careful weaving of ends. If you prefer a completely seamless look, you can use an invisible decrease technique at the closing stage. When you reach assembly, place the eyes evenly apart and level with the mouth line for a balanced expression. The limbs attach with simple slip stitches and a few secure passes so they stay in place through play. The overall result is a compact, 7–9 cm tall frog that’s huggable, durable, and adored by kids and collectors alike. The pattern’s logic is gentle and repetitive, which helps beginners: keep tension steady, count reliably, and trust the rhythm of rounds. Throughout, you’ll encounter the technique of invisible decrease in places where shaping meets seam, which helps maintain a smooth surface without bulk.
This frog’s round body, expressive eyes, and tiny feet make it a delightful first amigurumi project for those expanding their crochet skills. It’s crafted primarily in DK weight cotton with a bright lime body and crisp white belly, so you can practice clean color changes without losing your rhythm. The construction emphasizes quick wins—each piece is small, and the body grows in predictable rounds that encourage consistent tension. You’ll practice working in the round, using continuous spirals to avoid visible seam lines, and you’ll learn to secure the paws and eyes with even, careful stitches for a polished finish. The assembly steps are straightforward: align the belly seam with the center of the body, position the limbs for a balanced silhouette, then attach the eyes and belly patch with patience. By the end, you’ll have a sturdy little friend whose proportions feel correct and whose surface is smooth courtesy of even, tight stitches. It’s a light, approachable project that yields a high-joy result—the frog’s friendly face and compact size make it ideal for kids, display shelves, or gifting. If you want a slightly different look without changing the stitch counts, try swapping the Spearmint Green accents for a slightly darker shade or adding a tiny white highlight near the eyes to give extra pop to the expression. The finished size remains within the 7–9 cm target when you use the same yarn weight and hook.